
Yapla has two kinds of access: your team's access to the administration interface, where you manage your organization, and the access your members, donors and participants have to their own space. This article covers both and points you to the detailed article for each topic.
In this article
- Log in to the administration interface
- Secure access with two-factor authentication
- Give your colleagues access
- Authenticate your organization to receive payments
- Your members' access
Log in to the administration interface
- Open the login page.
- Enter the email address associated with your user account, then your password.
- Click Connect.
Forgot your password
On the login page, click Forgot your password?. You will receive an email to create a new password. The full procedure is in Reset a Yapla user’s password.
Didn't receive the email? Check your spam folder, then add the sender to your contacts so future messages reach your inbox.
Invitation from an administrator
If an administrator of your organization added you as a user of the account, you will receive an email inviting you to log in and create your password.
Log in with Google or Microsoft
If your email address is hosted by Google (Gmail or a business account) or Microsoft (for example Outlook or most business accounts on Exchange), you can log in through that provider.
- On the login page, click your email provider.
- Accept the provider's terms. You only need to accept them once.
Your address is then linked to the provider, and from then on you log in with a single click.
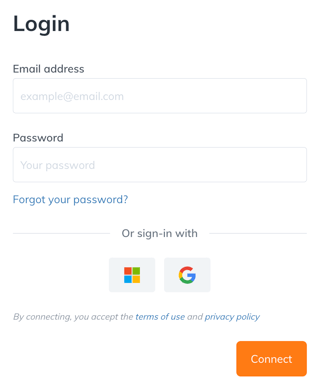
This option is not available for an address hosted by a provider other than Google or Microsoft: log in with your email address and password instead.
Secure access with two-factor authentication
Funds move through your account, so two-factor authentication (2FA) adds an extra layer of protection. After your password, Yapla asks for a one-time code, which protects your account even if your credentials are stolen.
- Turn on 2FA for your user: click your initials or photo in the top right-hand corner, then Account security. All the steps, including backup codes, are in Activate two-factor authentication (2FA) on my account.
- Make 2FA mandatory for the whole team: turn on the option under Settings > Users and licenses > Two-factor authentication.
An authenticator app, such as Google Authenticator, generates your codes instantly, with no risk of emails being delayed or filtered. Learn how it works in What is an authenticator app?
Give your colleagues access
Your colleagues do not need to create a new account: add them as users of your organization's account under Settings > Users and licenses. President, treasurer, volunteers, communications: everyone logs in with their own email address. See Configure User and Administrator Accounts in Yapla.
The role assigned to each user determines their permissions. Three native roles exist by default: Administrator, which gives access to the whole account, then Manager and User, which give access to fewer features. You can view each role's detailed permissions under Settings > Users and licenses > Roles.
With the Premium plan, create custom roles to restrict a user's access to certain features, for example donation campaigns only. See Create and Customize a User Role.
Authenticate your organization to receive payments
To receive online payments (credit card, recurring donations, etc.) and the funds collected, your organization verifies its identity and banking information under Settings > Authentication. All the steps are in Guide | Authenticate your Yapla Wallet.
Your members' access
Your members, donors and participants do not access the administration interface: they log in to their member area, where they update their profile and password, renew their membership and view their transactions.
- From your website: the Login and Member Area modules display a login form on your website. See Allow members and non-members to log in to your website and Add the Member Area module to your website.
- Without a password: the login link sends the person an email that logs them straight into their space, ideal for members who log in once a year. See The login link: an alternative to passwords.
- When you launch your platform: let your members know they can log in with the communication provided for this purpose. See Send members their login details for the new platform.