
Available with the Essentials plan and higher.
Articles form the basis of your website content. Before you can publish them on the different pages of your site, create them in the Articles section.
All of your site content, such as presentation texts, news, service descriptions or the About page, is structured as categorized articles. This approach centralizes your content, lets you reuse it on several pages and makes it easy to find.
Create a category
Before creating articles, create article categories. They are used to organize your articles and to filter them in certain modules of your web pages.
Create them under Website > Settings > Categories. Learn more about categories in the article Article categories and keywords.
Create an article
Go to Website > Articles, then click Add an article.
In the General information section, fill in the following fields:
- Title: title of the article (required).
- Category: select the category you created previously (required).
- Keywords: if needed, assign keywords to the article to filter its display on your website.
- Introduction: text displayed in the preview of your article.
- Article: full content of the article. The editor's Source button lets you add HTML code to customize the design of the article.
- Thumbnail: image that accompanies your article. It is also used as a thumbnail in the list of article previews. When uploading it, crop it to the 16:9, 4:3 or 1:1 format.
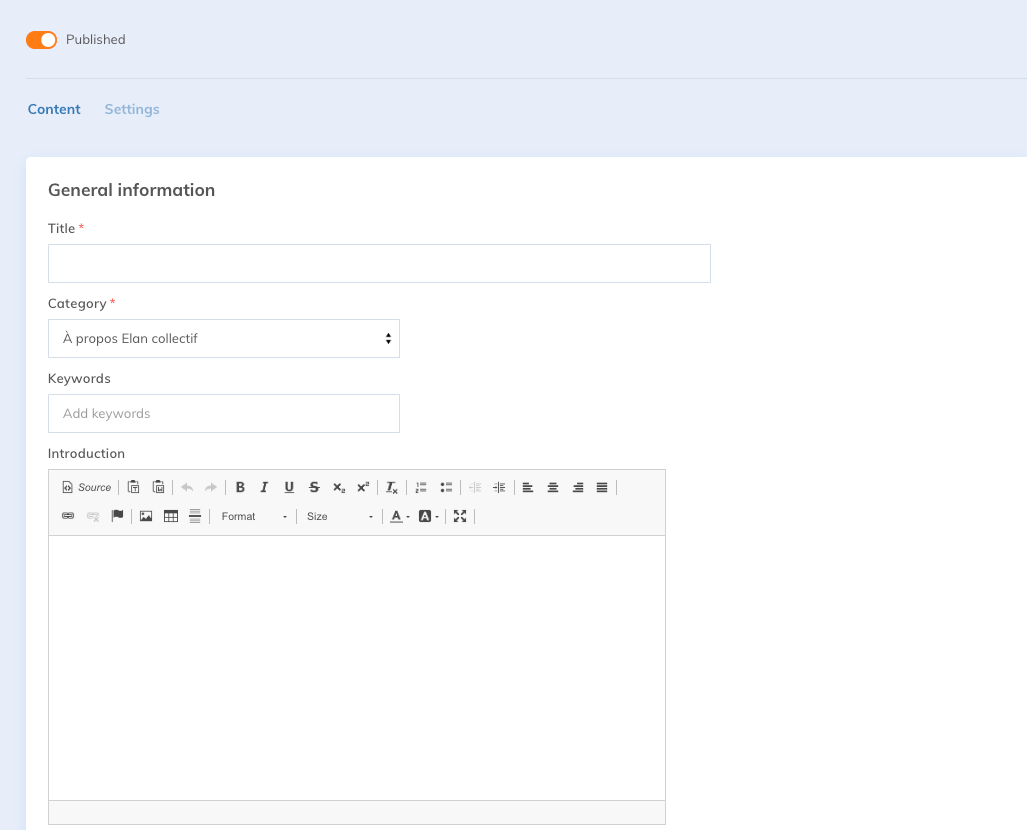
For more details on the editor, see the article Using the text editor.
Click Save.
Edit the additional settings
Once the article is saved, two new elements appear: the Search engine optimization (SEO) section, at the bottom of the Content tab, and the Settings tab.
Settings tab
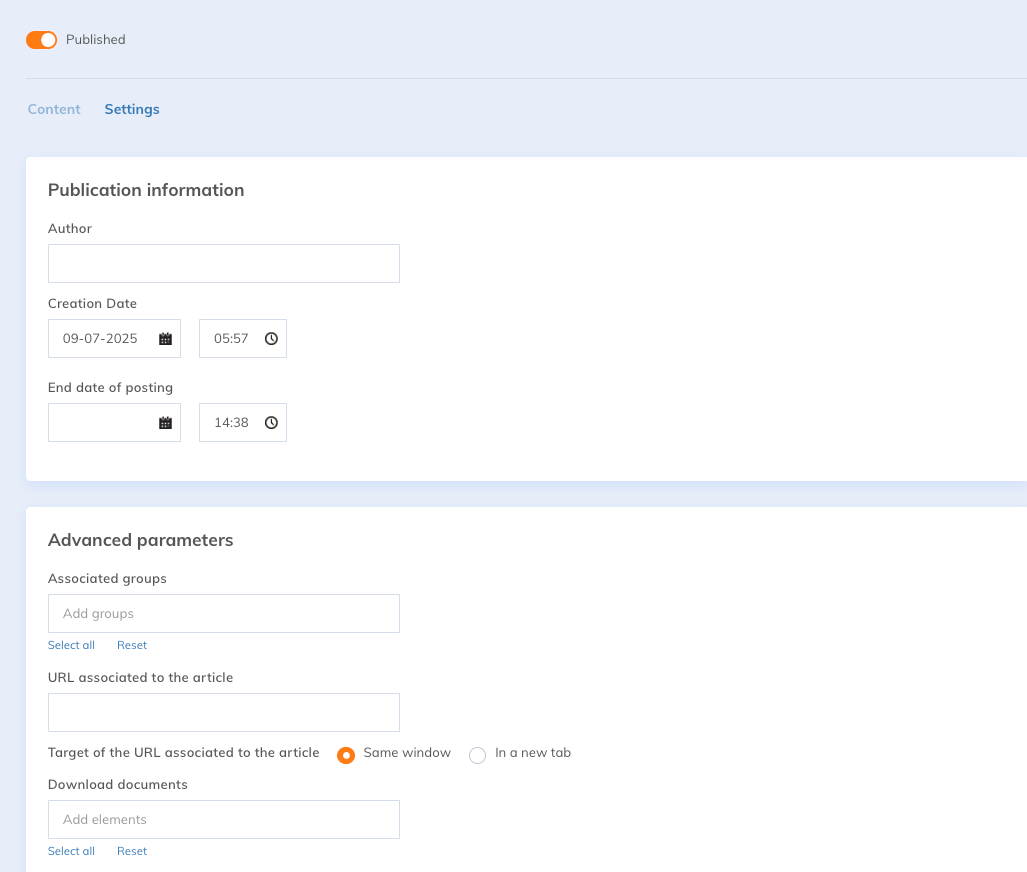
In the Settings tab, you can fill in:
- Author: name of the author of the article.
- Creation Date and End date of posting: useful to unpublish an article in lists displayed in chronological order. See the article Add an end of display date to an article.
- Associated groups: available with the Plus plan and higher, this setting determines which groups can access your article. Learn more in the article Create Custom Groups.
- URL associated to the article: if you prefer to redirect to an external page, leave the article content empty and insert a link to the existing external page instead. The Target of the URL associated to the article setting determines whether this link opens in the Same window or In a new tab.
- Download documents: with the Premium plan and higher, add documents from your media library so visitors can download them directly from your article. Learn more in the article Create a media library.
SEO optimization
Optimize the search engine ranking of your article by filling in the fields of the Search engine optimization (SEO) section, at the bottom of the Content tab:
- Article title tag: title displayed in web browsers and search results (60 characters maximum).
- Slug: identifies the article in the page URL.
- Description: summary of the article content (165 characters maximum).
- Image shared on social networks: image displayed when the article is shared.
- Canonical URL: URL of the page under which a search engine should index this page.
- Keywords
- Do not index this article: checkbox to exclude the article from search engines.
Changing the slug of an article that is already published may cause search engines to flag it as duplicated content. Choose a simple, understandable slug when you create the article.
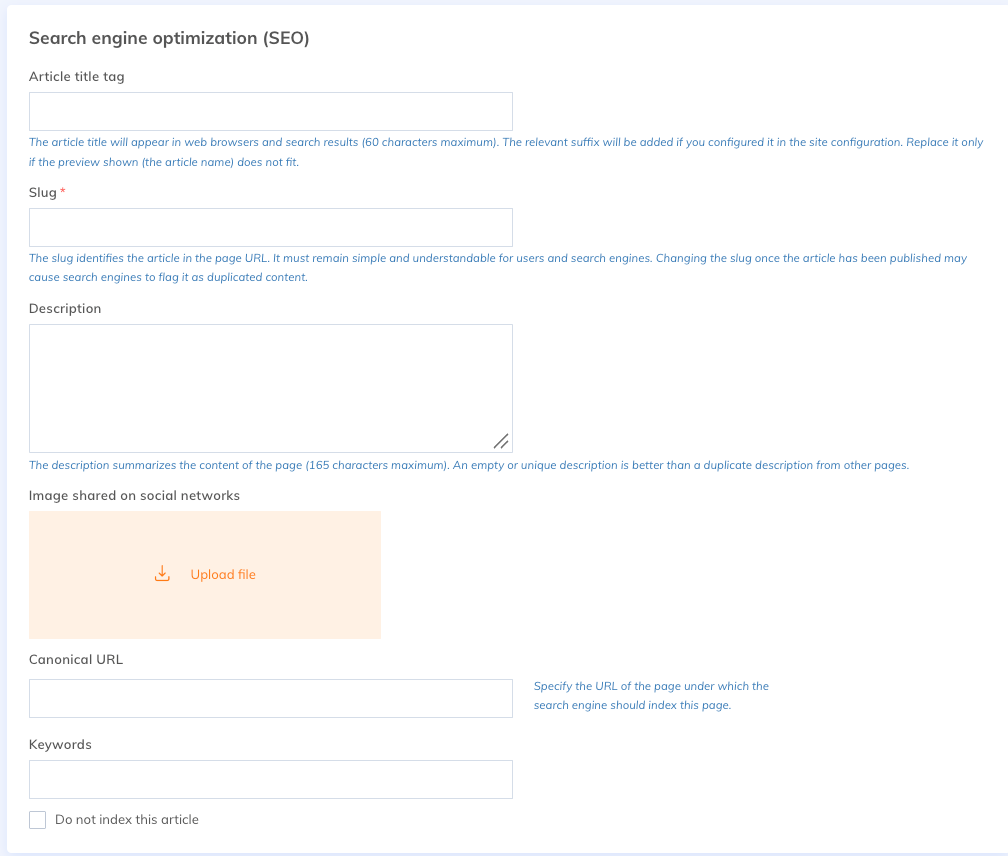
To learn more about optimizing your articles for search engines, see the article Search Engine Optimization (SEO).
Your article is now created. Don't forget to save.
Publish the article on your website
For an article to appear on your site, the Published toggle, under the title of the article, must be enabled. Then add it to a page of your website using one of the following modules:
To discover all the available modules, see the article List of modules in the Website feature.