A landing page is a web page hosted by Yapla Newsletters. It lets you collect sign-ups for your newsletters or promote an event without changing your website: you just share its address. Sign-ups are added to the contact list you choose.
Available with the Yapla Newsletters Premium plan.
In this article:
- Create a landing page
- Set up the page
- Edit the page content
- Set up the form
- Publish and share the page
- Manage your landing pages
Create a landing page
You can start from a blank page or from a template:
- Blank page: go to Audience Building > Landing Pages, then click the (+) at the top right.
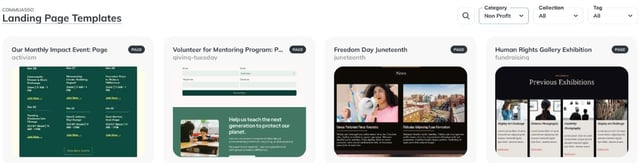
- From a template: go to Audience Building > Landing Page Templates. Filter the templates with the Category (for example Non Profit or Fundraising), Collection and Tag menus, or with the magnifying glass, then click the template you want.
In the Create Landing Page window, name the page, choose the list sign-ups will be added to, then click Confirm. The setup page opens, with a preview on the right.
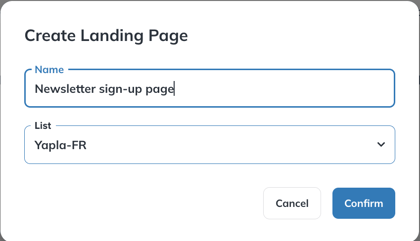
Choose the list carefully: the page's sign-ups are linked to the list selected when it's created.
Set up the page
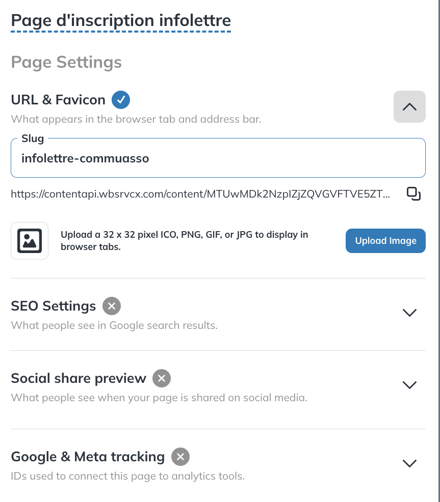
In the Page Settings section, open each option with the arrow on the right:
- URL & Favicon: the Slug is added to the end of the page address, for example newsletter-signup. The icon to the right of the address copies it. Click Upload Image to add the favicon, the 32 x 32 pixel icon (ICO, PNG, GIF or JPG) shown in the browser tab.
- SEO Settings: the title and description shown in Google search results.
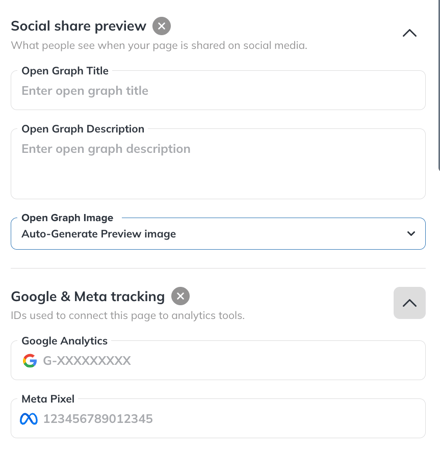
- Social share preview: the title, description and image (Open Graph) shown when the page is shared on social media. By default, the preview image is generated automatically.
- Google & Meta tracking: your Google Analytics (for example G-XXXXXXXXX) and Meta Pixel IDs, to track visits in these tools.
Edit the page content
The page is created with sample content. Replace it with your own content:
- Click Edit Page, above the preview.
- Edit the text and images, and add blocks from the Content tab on the right if needed. To collect sign-ups, make sure the page contains a Form block.
- Click Save, then Close to return to the setup page.
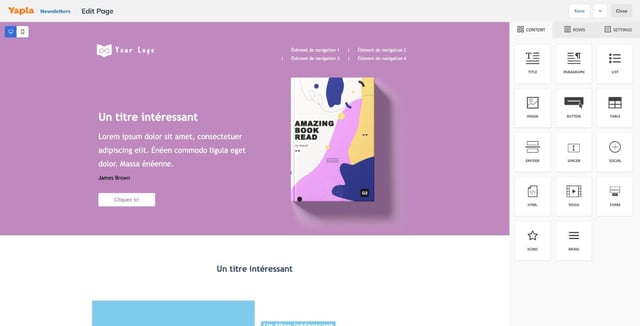
The computer and phone icons above the preview show the page in its desktop or mobile version. Full Preview shows it full screen.
Set up the form
The Form Settings section works like the one for popups and sign-up forms: Audience (the list for sign-ups), Double opt-in (Double opt-in, recommended, or Single opt-in), Redirections and Recaptcha. For details on these options, see Create a newsletter sign-up popup.
Publish and share the page
- Click Publish at the top right. The page status changes to Published.
- Copy the page address with the icon to the right of the URL, in the URL & Favicon section.
- Share this address in your emails and on social media, or add it to a button on your website.
After each change, click Publish again to update the page.
Manage your landing pages
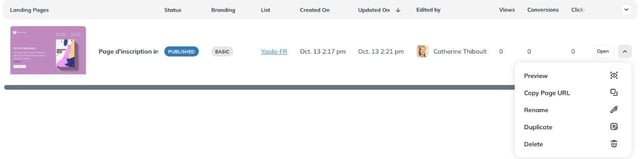
The Audience Building > Landing Pages page lists your pages with their status, list and statistics (views and conversions). Click Open to edit a page, or the arrow to its right to Preview, Copy Page URL, Rename, Duplicate or Delete it.