Creating an event is a great way to engage your community. Yapla allows you to easily create an event, then promote it on your social media and your website. And to save you time, it’s full of tools to help you automate your event management.
In this article:
- Create your event
- Set your prices
- Create a registration form
- Create a web page for your event
- Configure communications
- Promote the event
- Event configurations
- FAQ
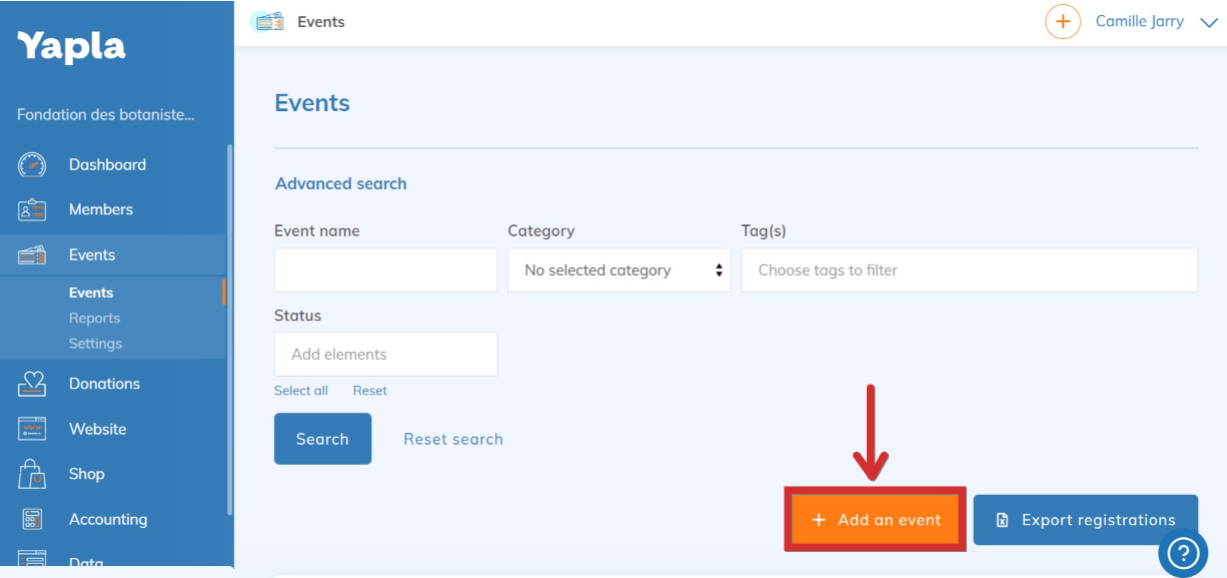
Create your event
Go to Events > Events and click on Add an event at the bottom right of the screen.
1. Enter the information related to your event:
- Name of the event.
- Start date and time: you can also add an end date for the event.
- Image.
- Description for social media: this short text can be shared by your participants on their social networks to attract a wider audience. If you leave this field empty, the event title will appear with the share link.
- Description: this text will appear on the page of your event.
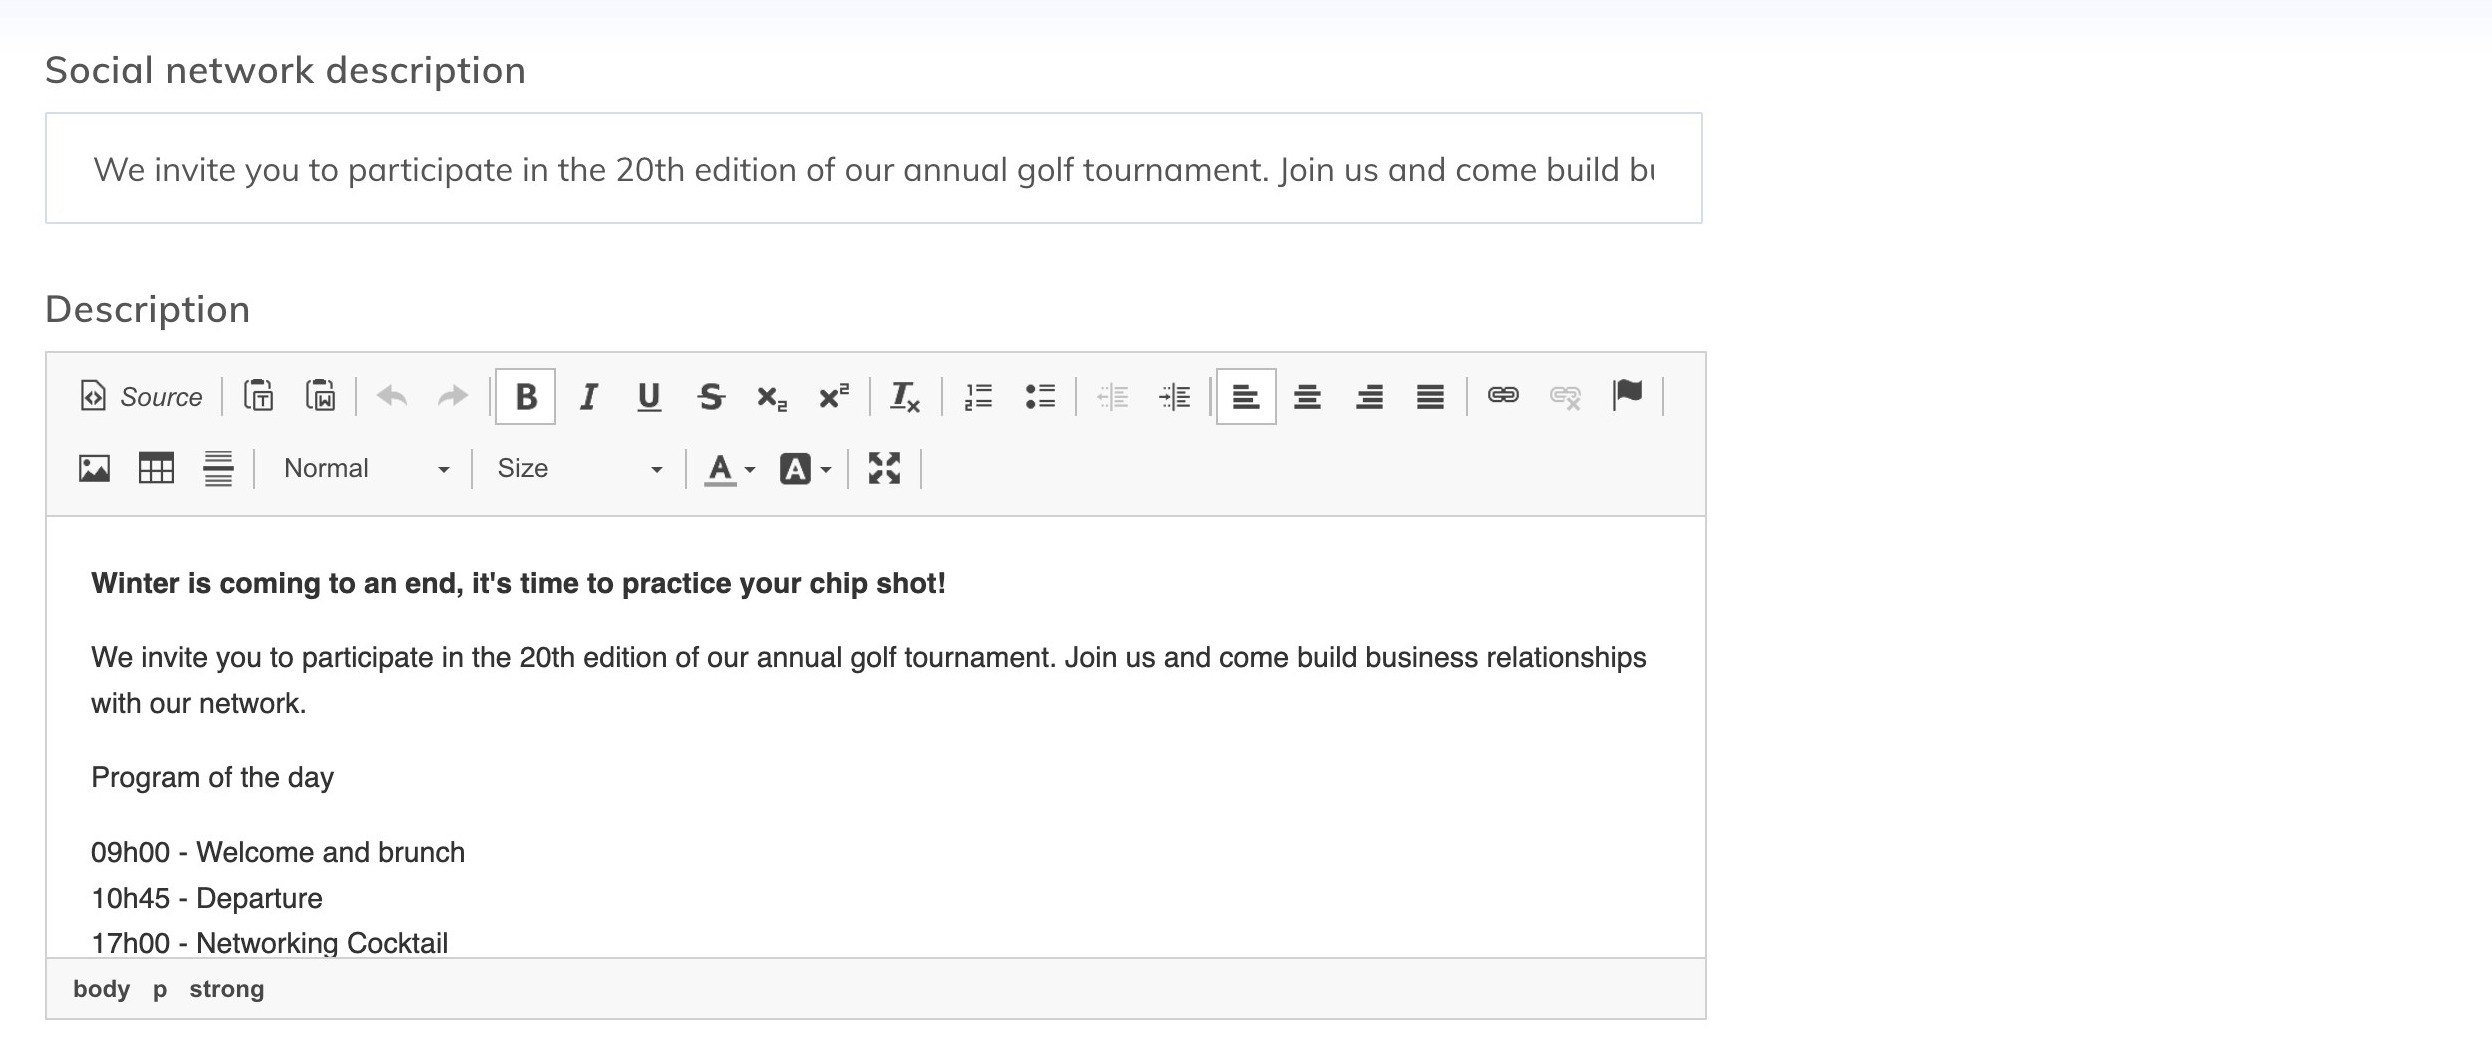
Once these fields are completed, click Next.
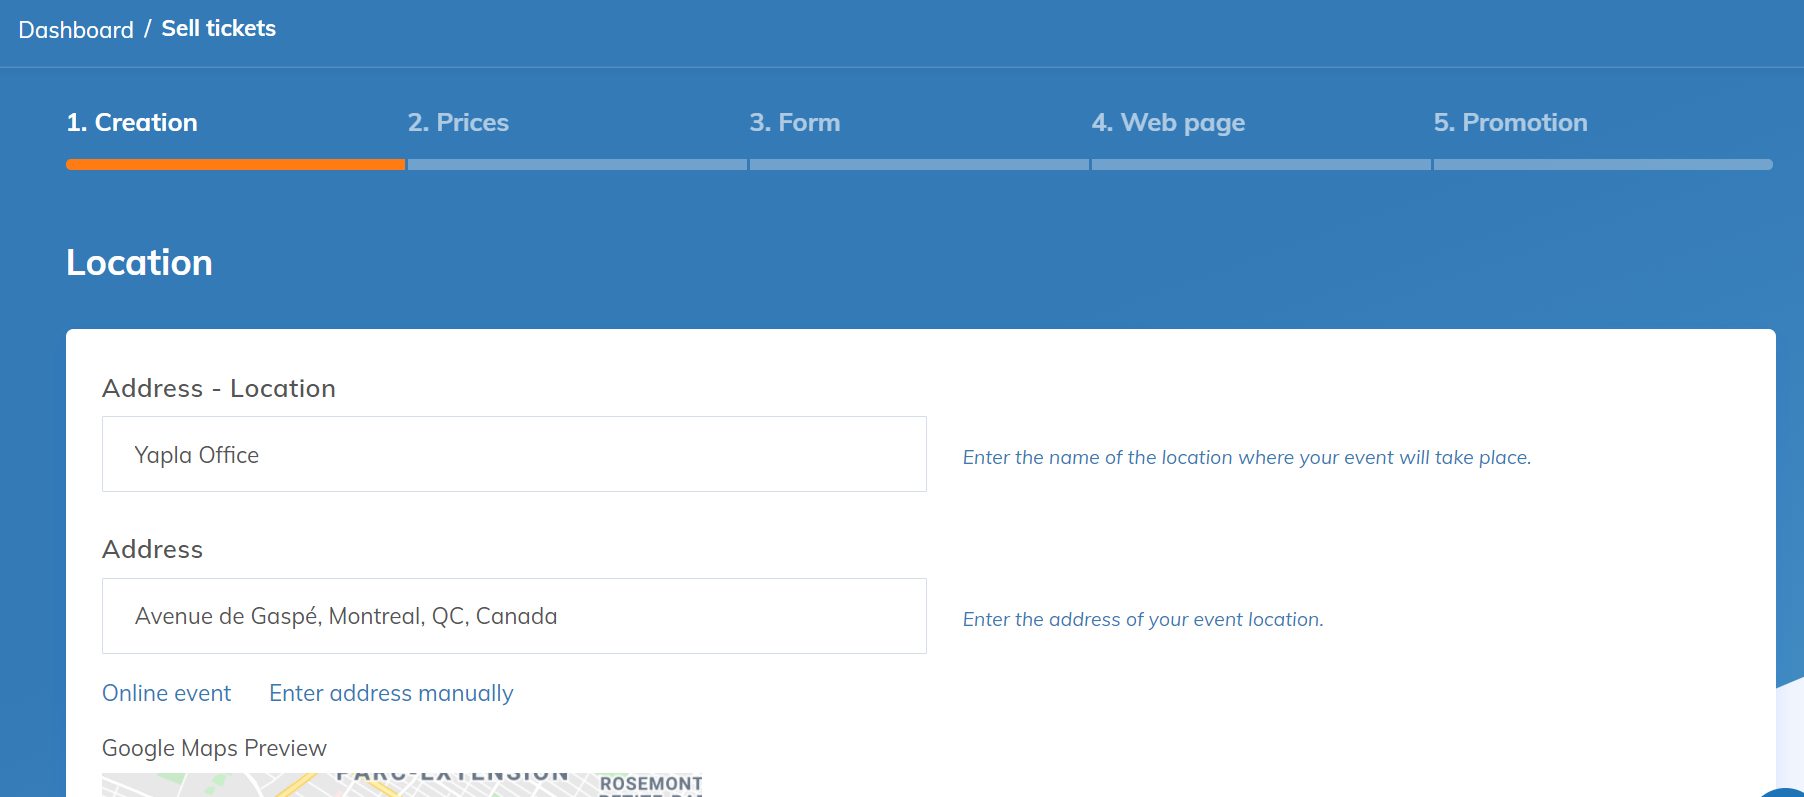
2. Fill in the fields related to the location and the address of the event.
- Name of the event location – you will then need to provide the exact address in the next field.
- Event address – if it’s an online event, click on Online event under the Address field.
- For a physical location, enter the full address. If it is listed on Google, you can choose to generate it automatically using Google Maps.
3. Define the event organizer.
To allow participants to contact you, display the organizer’s information on the event’s dedicated page. And if you are organizing your event with an external partner, you can also specify it at this stage. They will then be copied into certain automatic communications.
Enter the name of the organizer. By default, it’s your administrator’s name, but you can enter a different name. You can also add the organizer’s phone number and email address.
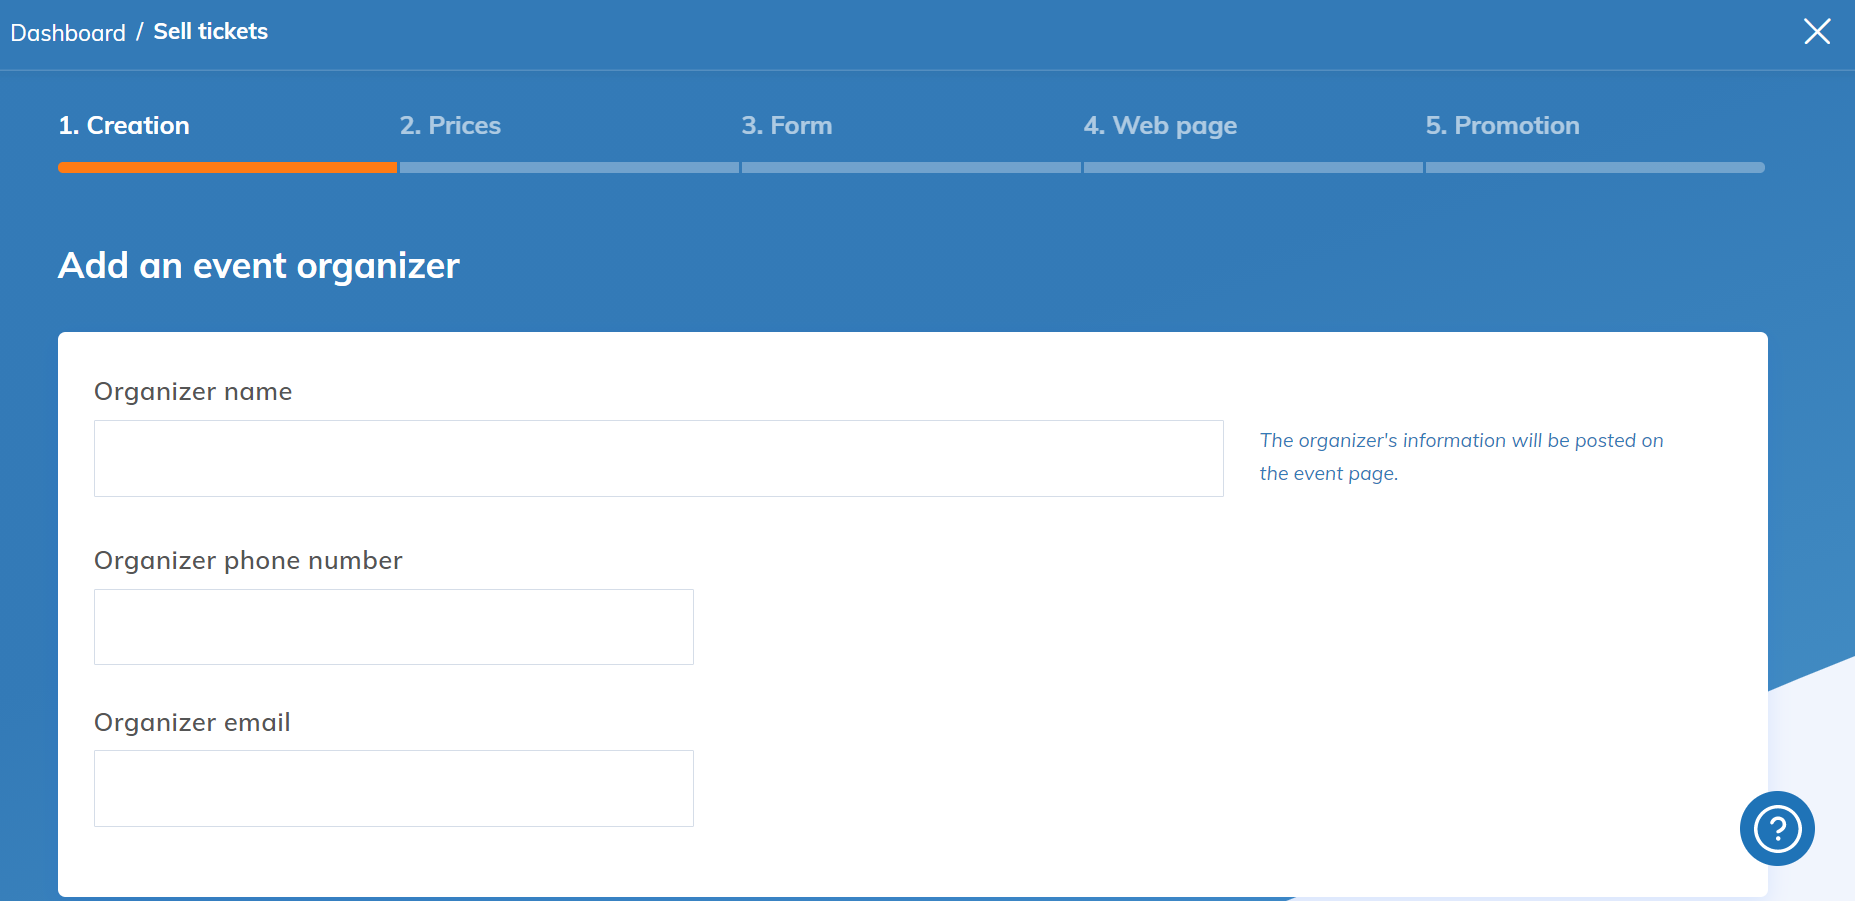
Click Next.
Set your prices
By default, the event is free. However, you can add one or several prices for registrations by clicking Add a price. To learn how to configure prices in Yapla, check our help article on this topic.
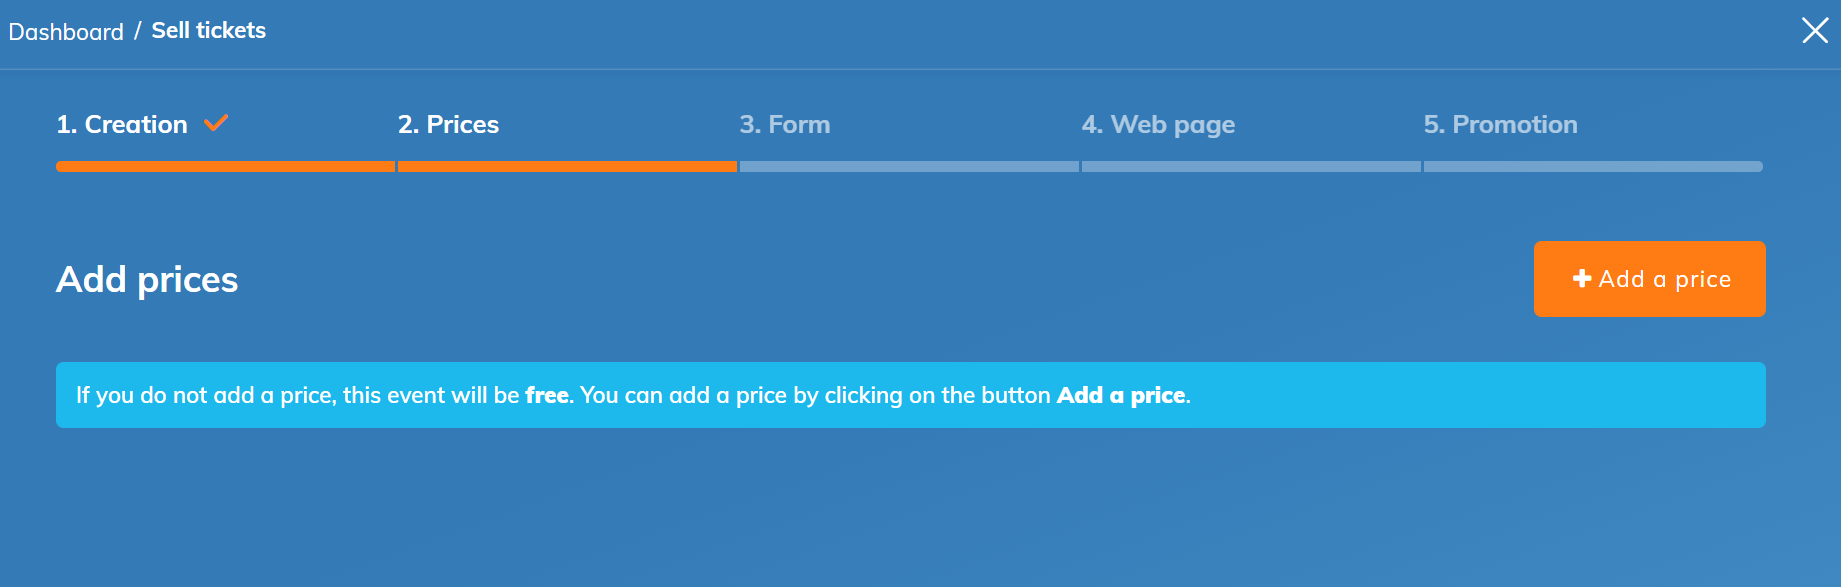
Click Next.
Create a registration form
You can customize the registration form for your event. Change its name, add and move fields, and add sections as needed.
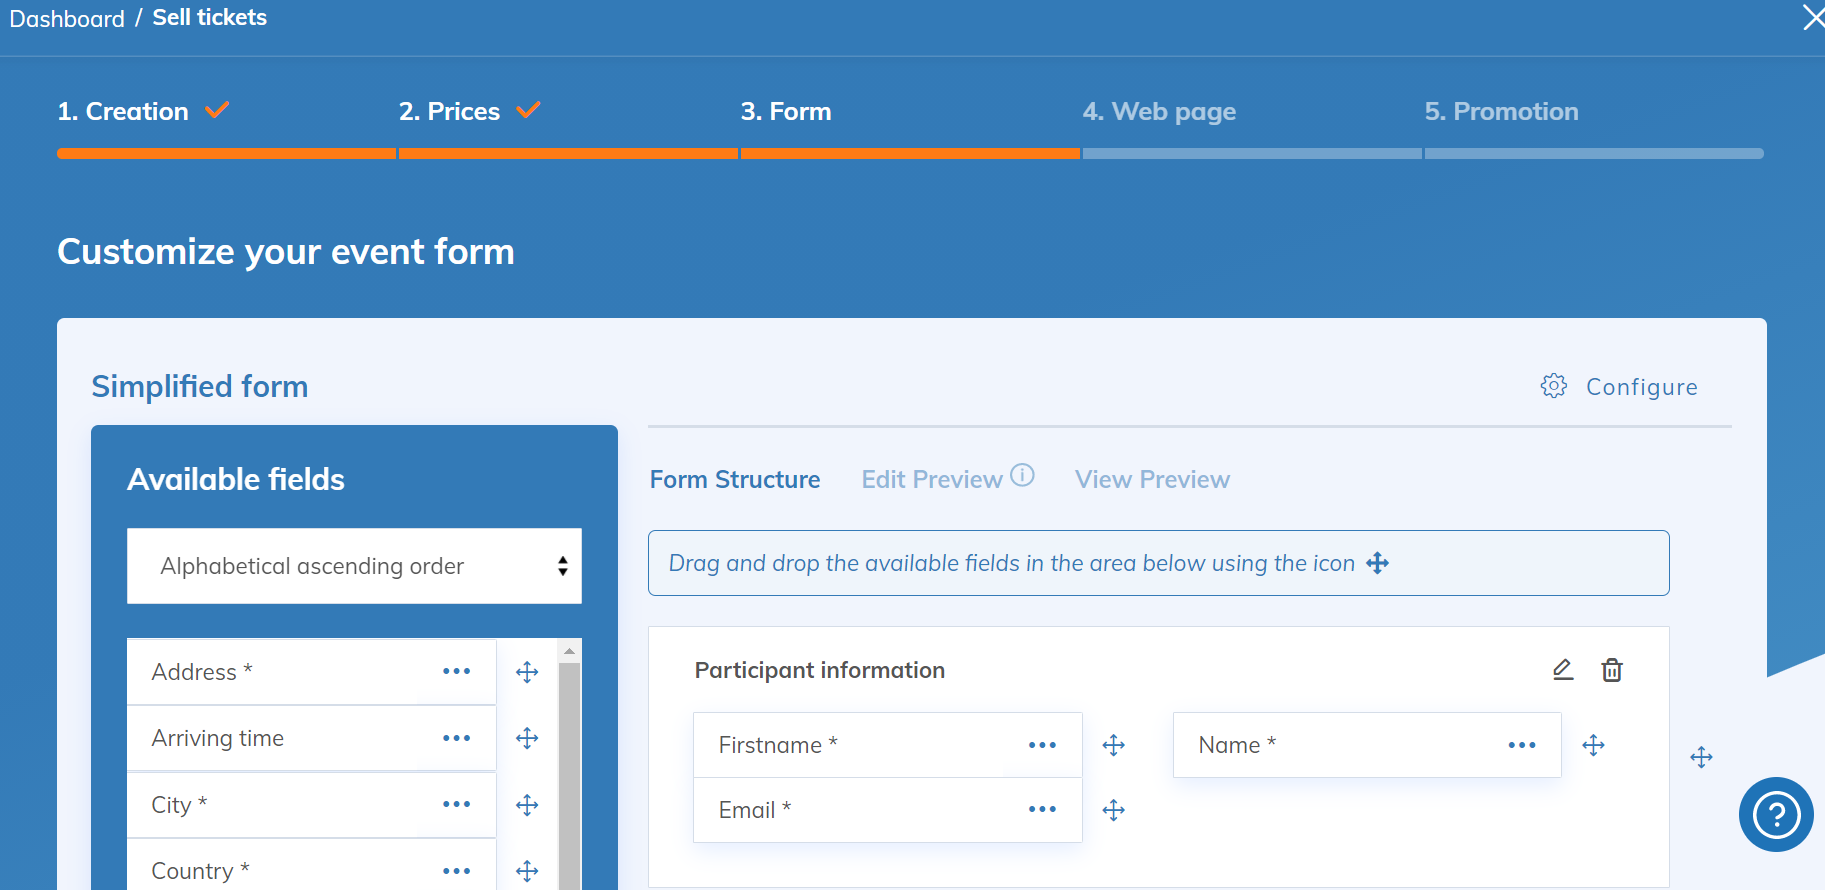
Click Next.
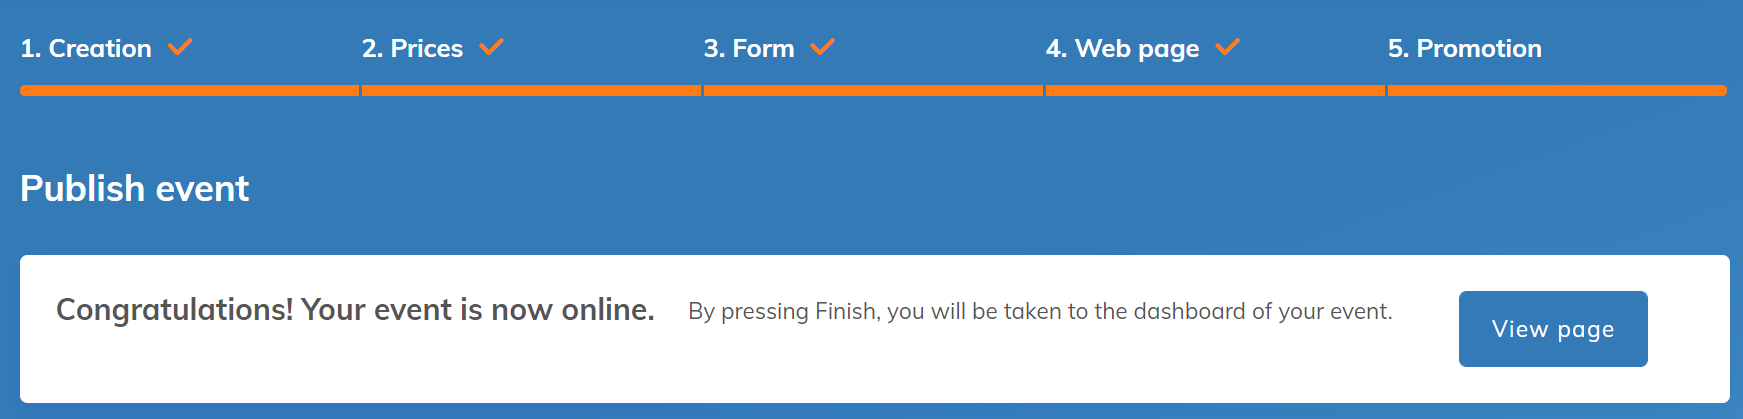
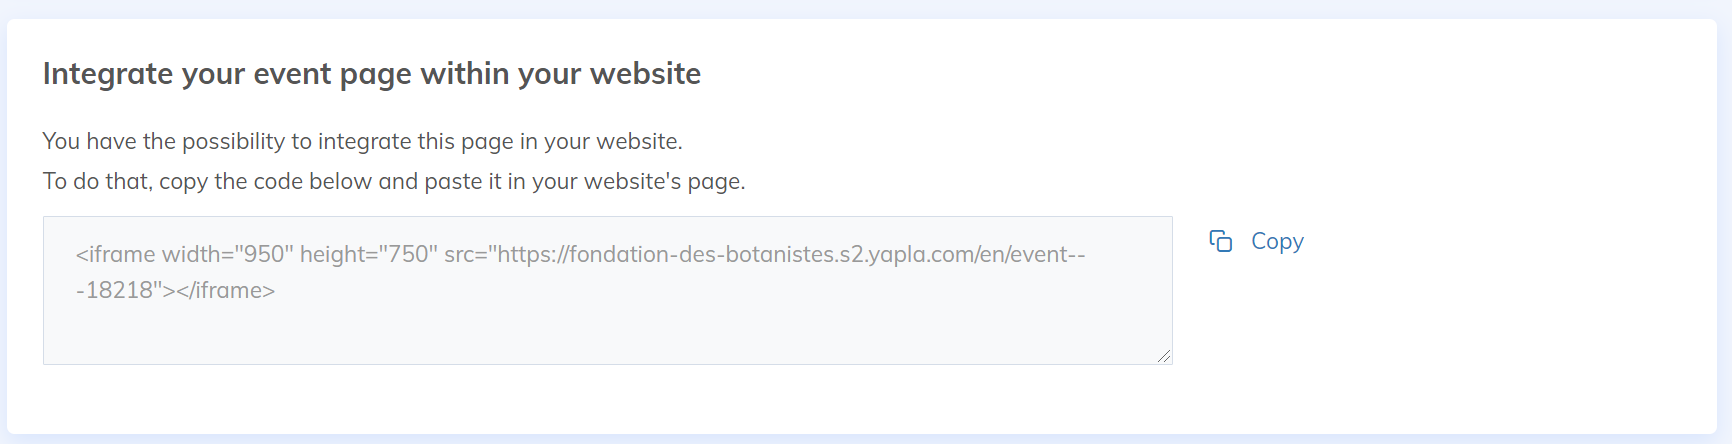
Create a web page for your event
You can generate a unique page for your event and display it on your website. This feature is available to all users whether or not they created their website with Yapla.
Choose the logo for your event, the colors and the page’s font. Once these basic fields are completed, your event creation will be done. You can now view the web page of your event.
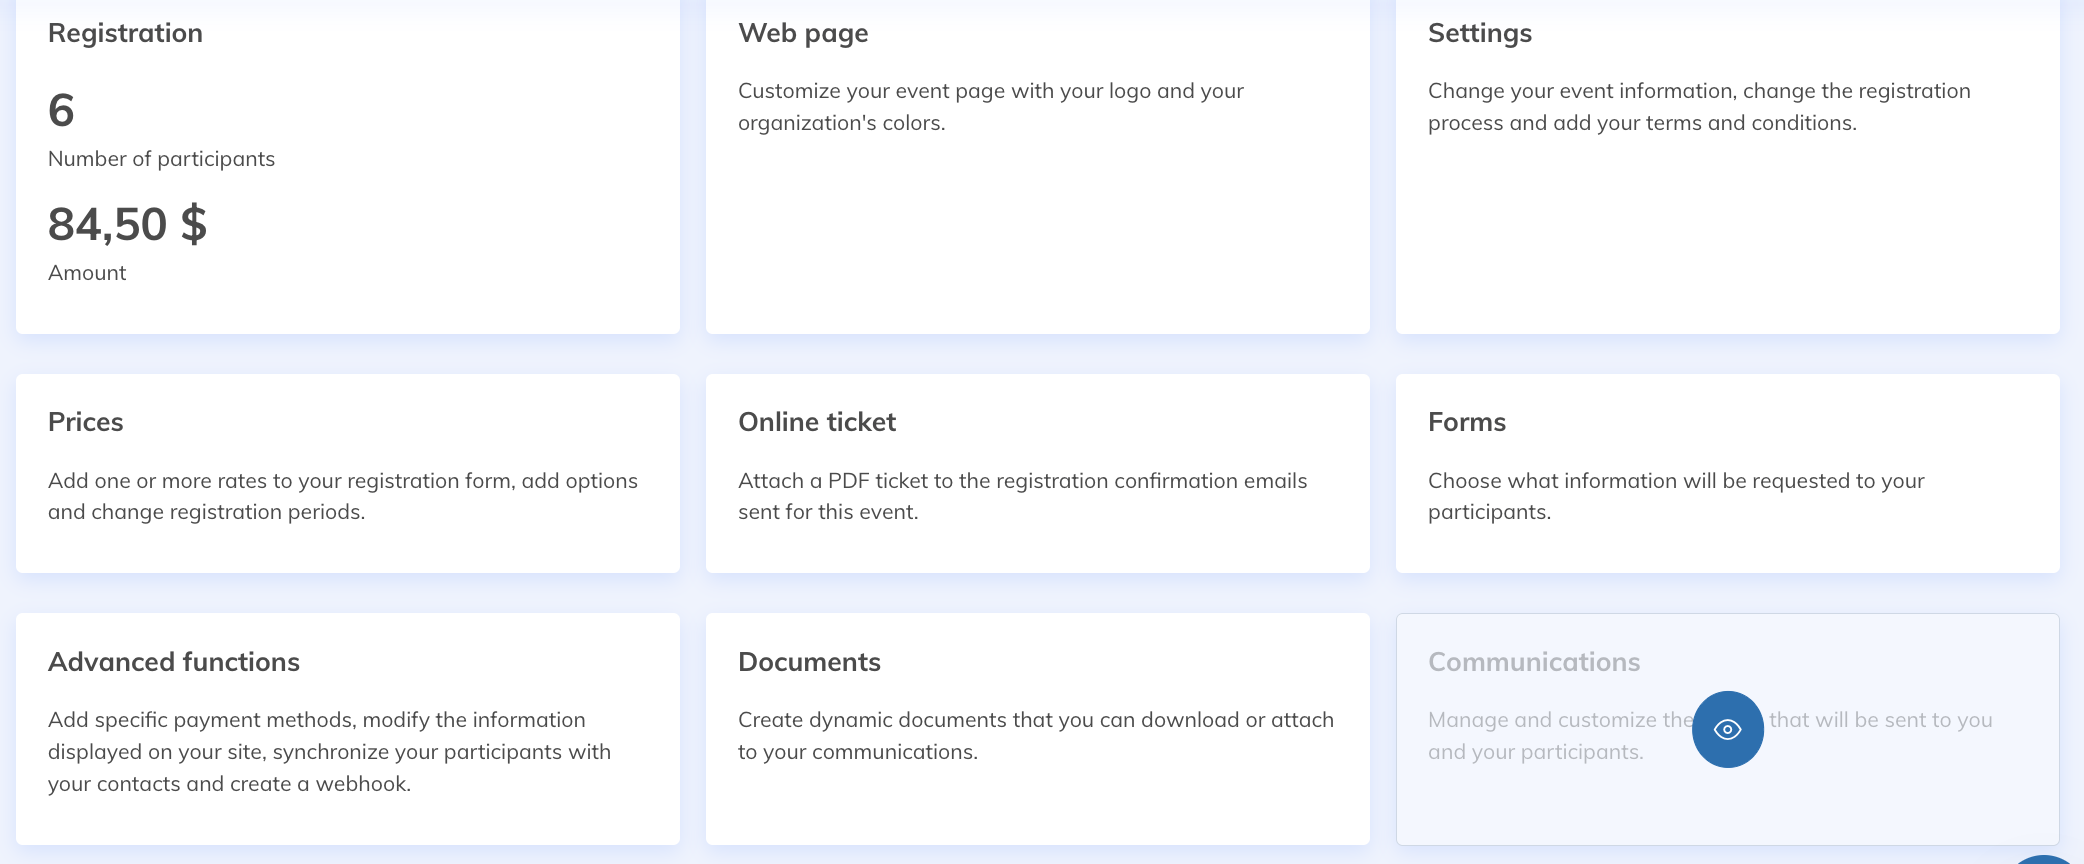
Configure Communications
Go to your event and select the Communications tile. You will find the list of available communications and their triggers. Customize and configure communications according to your needs. To learn more about how communications work, check this article.
Promote the event


Save.
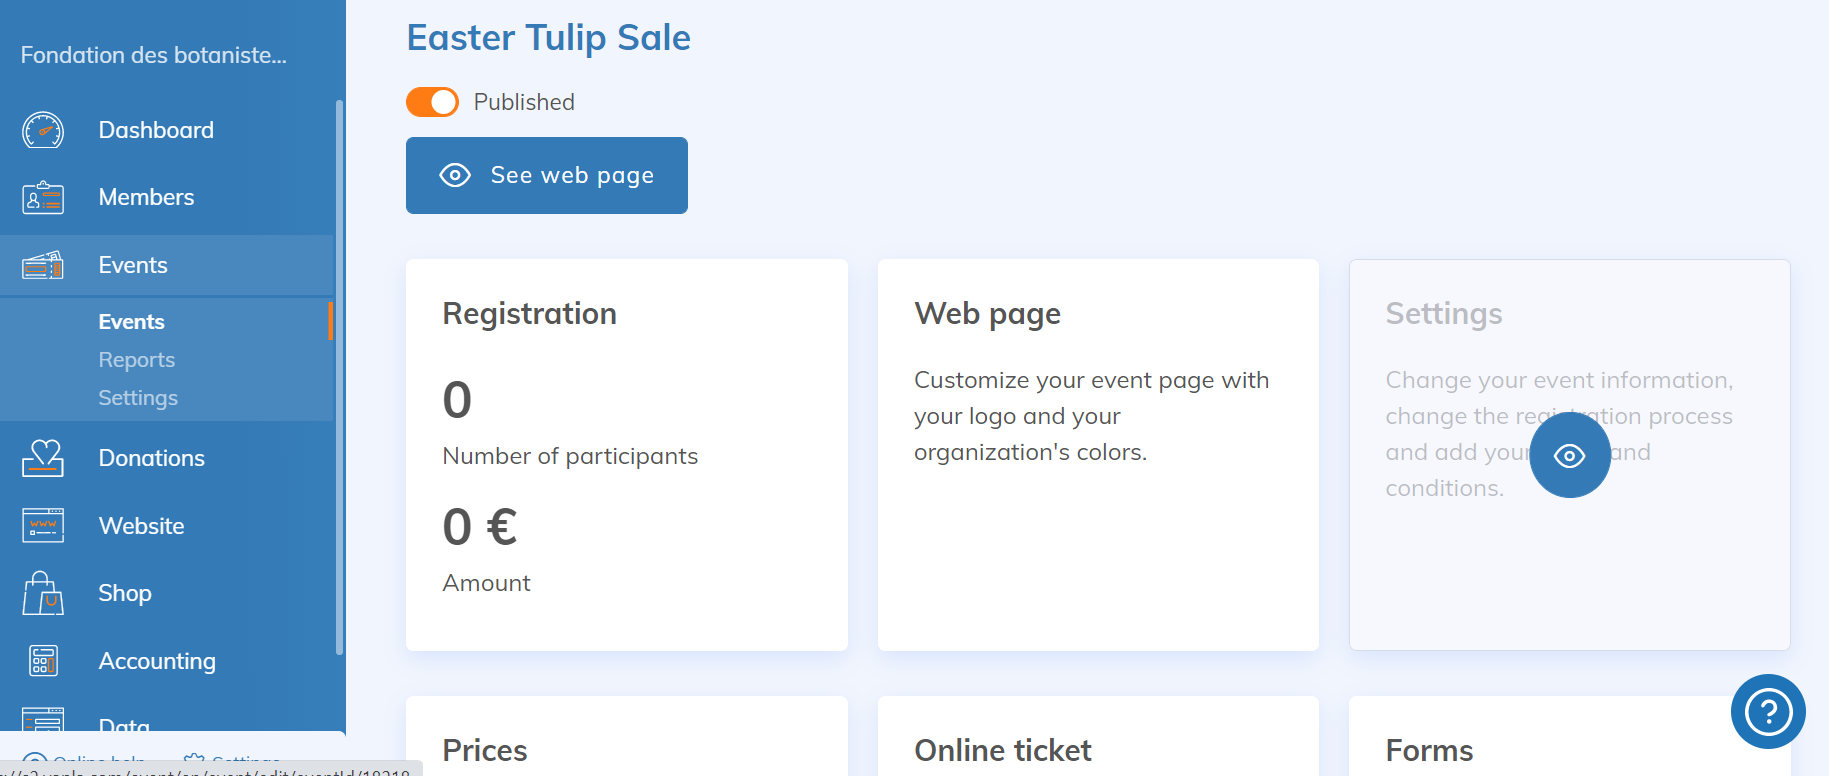
Event configurations
To customize your event, or modify previously saved information, go to the Events option of the Events feature. Then, choose the Configuration tile.
Advanced Descriptions
- The thumbnail (miniature for the page with a mosaic of your events). The thumbnail is different from the image that illustrates the event details.
- A short description (visible on the page with a mosaic of your events).
- A video, by adding an iframe code.
- Additional descriptions (which can be used for partners, for example).
- Some duration (which replaces the date of your event). This can be used when your event is postponed to a date you don’t yet know. For example, you can enter: Date to be determined. It is also an interesting option for events taking place over a long period, as it allows you to customize the duration.
- The duration in hours of your event, if needed.
Indicate a location
In this tab, you can add or modify:
- The physical address of your event, with Google Maps
- The URL of the event if it is held online
Organizer
- Indicate the contact person for participants’ questions
- Add speakers (for example, presenters).
Registration process
The Registration process tab allows you to define if the number of spots is limited, or if membership is required to access the event.
It is also possible to disable the registration process by unchecking the Allow online registration box. Your event will remain online, but visitors won’t need to register to attend.
To learn more about registration options for an event, check our help article on this topic.
Conditions
In the Conditions tab, you can indicate the procedures to follow for refunds, cancellations, and other situations related to the event. This information is then displayed in the registration form and participants must confirm their agreement. To learn more about conditions, you can check our help article on this topic.
FAQ
Is it possible to delete or cancel an event if registrations have already been made?
In Yapla, it is not possible to delete or cancel an event whether or not registrations have been made. However, you can archive an event by clicking on the gear icon to the right of it in the list of your events, then selecting the Archive.
To Go Further: Advanced Event Configurations
Now that your event is created and configured, you can also determine several specifics. For example, you can set different prices to access the event; you can define a registration deadline.