
Peer-to-peer campaigns let participants collect donations on behalf of your organization. This article explains how to view the list of participants, add participants manually, export the list and share a participant's page.
View the list of participants
The list of participants appears once the Peer-to-peer campaign (P2P) option is activated in your campaign's Advanced Functions menu.
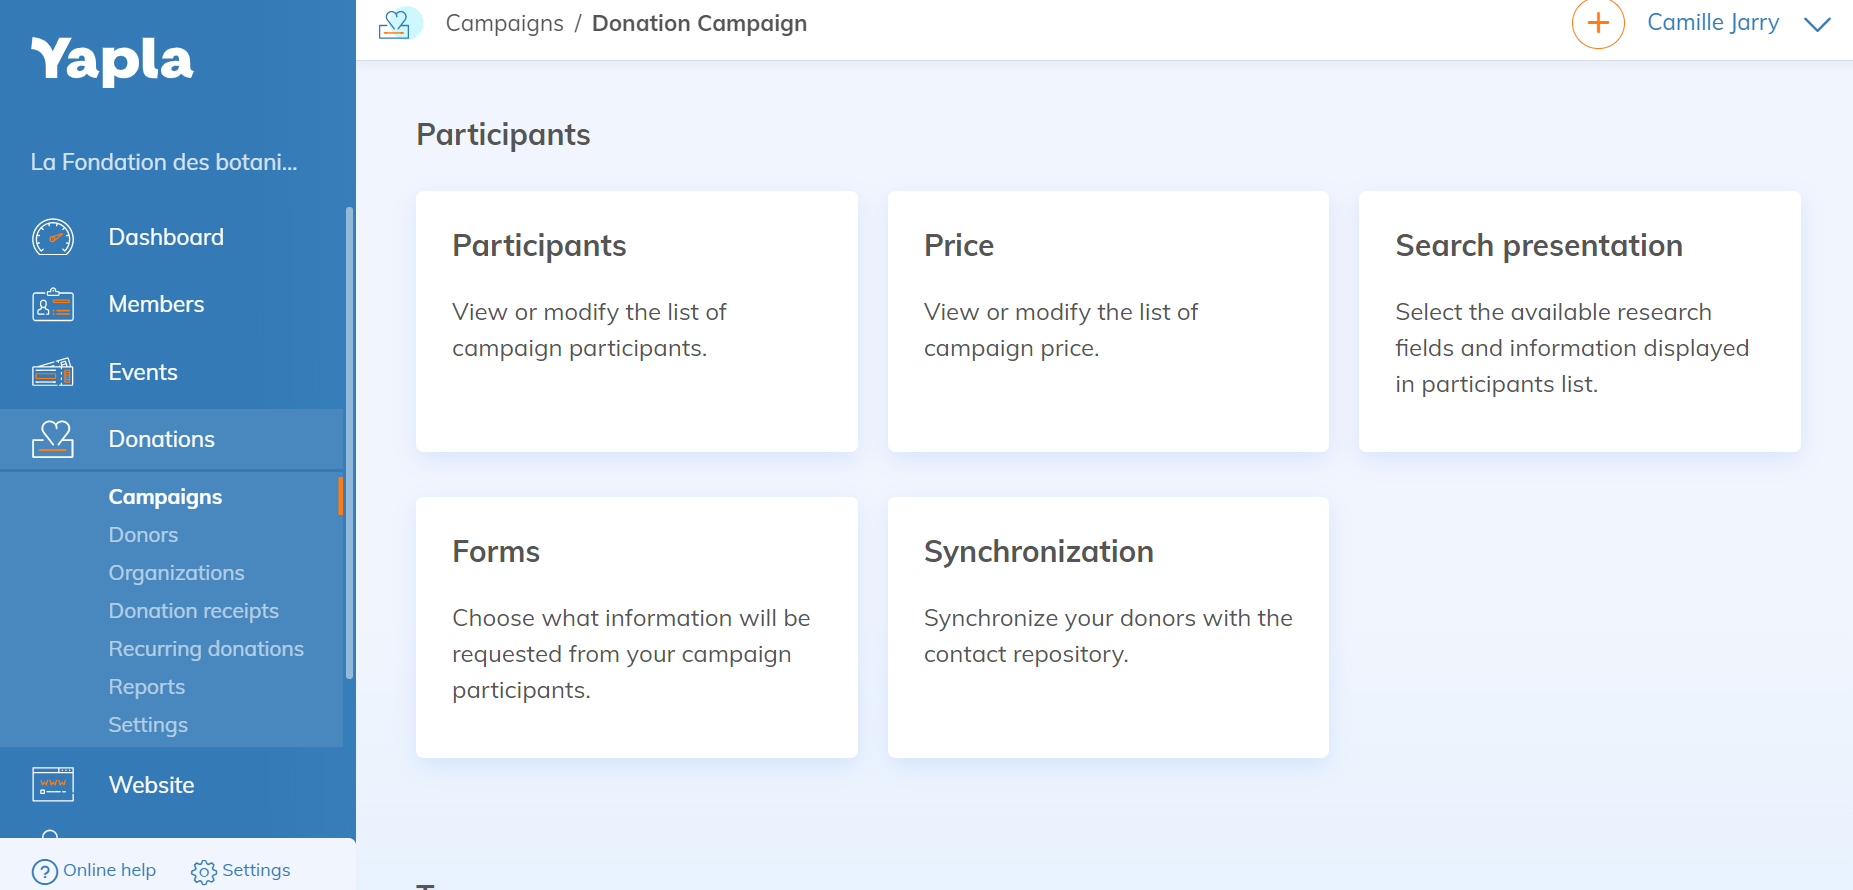
A Participants section is then added to your donation campaign. Under Donations > Campaigns, open the campaign: the Participants tile, at the bottom of the page, displays the list of participants.
Add participants manually
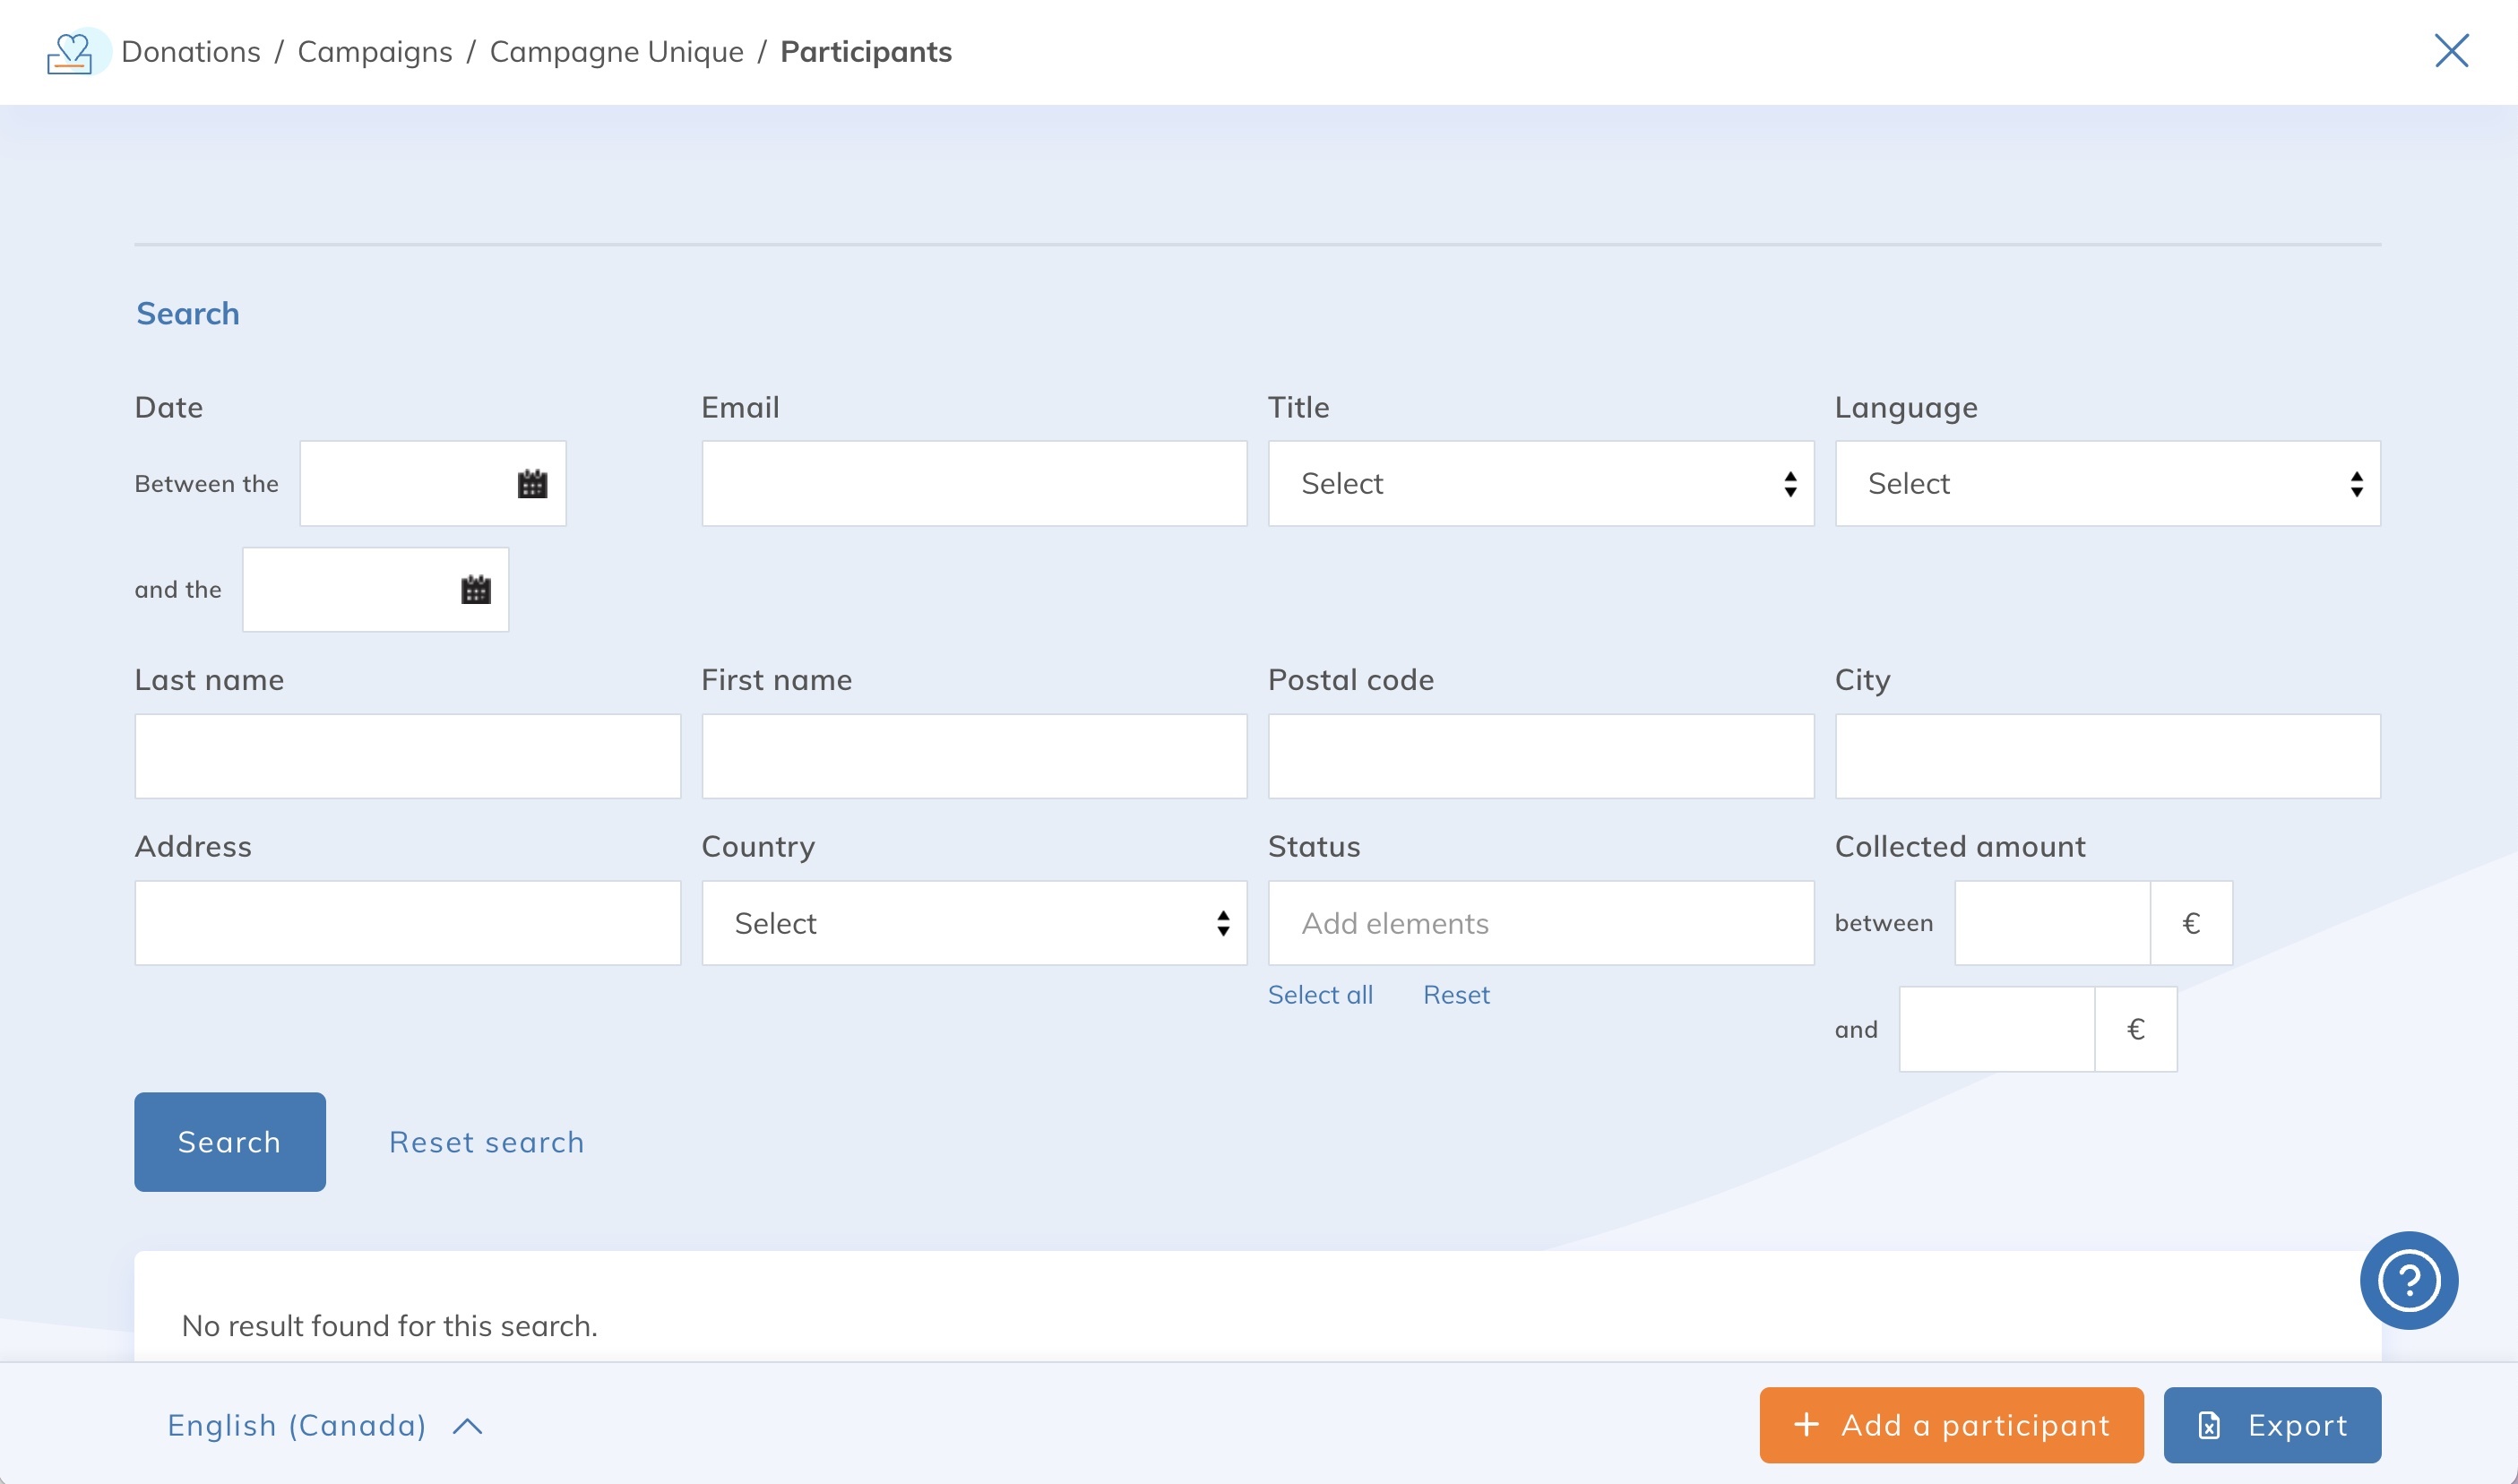
In the Participants tile, click Add a participant, then enter the participant's information.
Once the participant is created, their name appears on your site. They can then start receiving donations for your peer-to-peer campaign.
Export the list of participants
To export the participants of a single campaign, open the campaign under Donations > Campaigns. In the Participants tile, click Export, at the bottom right of the screen.
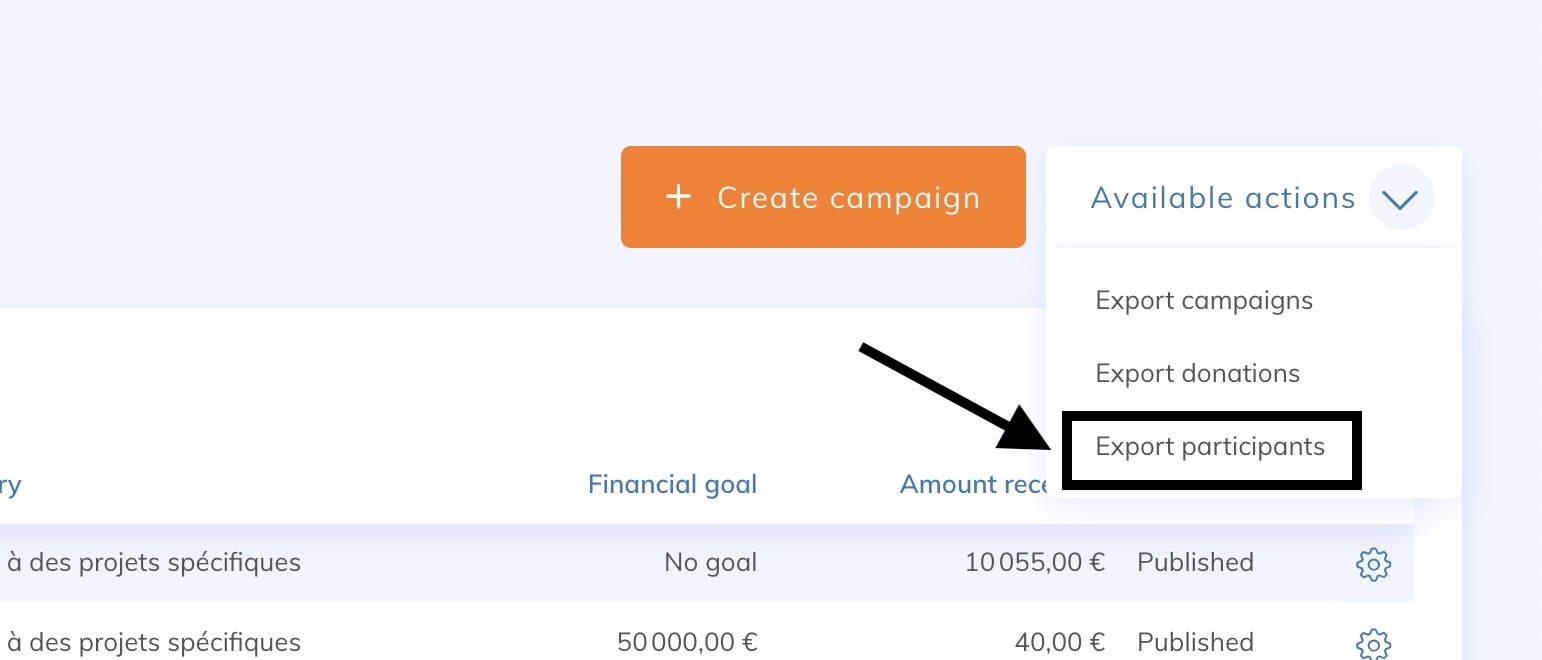
To export all your participants, across all campaigns, go to Donations > Campaigns. At the top right of the campaign list, click Actions available, then select Export participants.
Share a participant's page
Each participant has their own page on your website. To invite their friends and family to donate, the participant copies the page address from their browser's address bar, then shares it themselves on social media, by email or by message.
A participant's page does not display social media share buttons, and no setting allows you to add them.
Going further: manage teams of participants
Your participants can also work together to raise donations. Offer them to form teams made up of several members and a captain: a stimulating, and often fun, way to raise funds. See How to manage teams of participants.