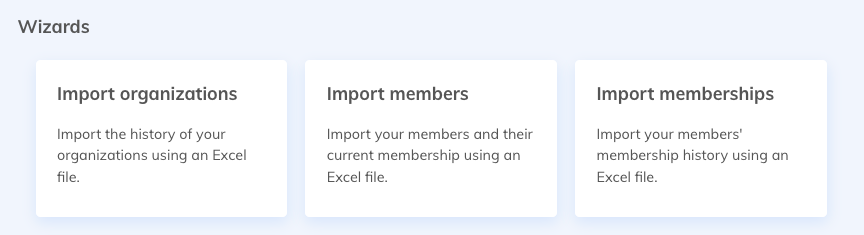
The import wizard in the Members application allows you to import your organizations in one step or to quickly update several existing organizations. Once the organizations have been imported, you can add members to them via the import of members.
In order to limit the back and forth, it is recommended to import the organizations first, so that you can add members immediately when importing them.
Preparing the file
To import your organizations or make a massive update, you will need an Excel file (.xls or .xlsx) containing all the information you need, as well as a unique identifier to distinguish the organizations. The identifier could be, for example, the organization's number or its main email.
It is also important to respect the following rules:
- Only the first tab of the file will be imported
- The file must be simple, without any formatting (colors, borders, etc)
- The cell lines must not be highlighted
- The cells must not be merged together
- The file must not contain any macro
- Avoid empty lines at the end of the file, which could create unwanted members.
If in doubt about any of these points, feel free to select the data you wish to import and copy it into a new file, using the Paste Values function, in order to clean up your data. You will then obtain a file containing only the information from your import.
Warning: If the field to be updated contains a choice of answers, such as the country, you must enter either the value or the exact wording. To find out this information, go to the Member Import Wizard (Members > Settings > Organization Import) and click on Access codes associated with fields. Select the field you need. A table will appear with a list of available options.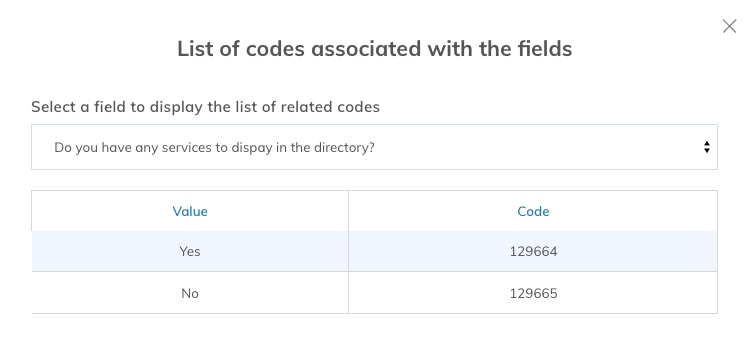
Import or Update Organizations
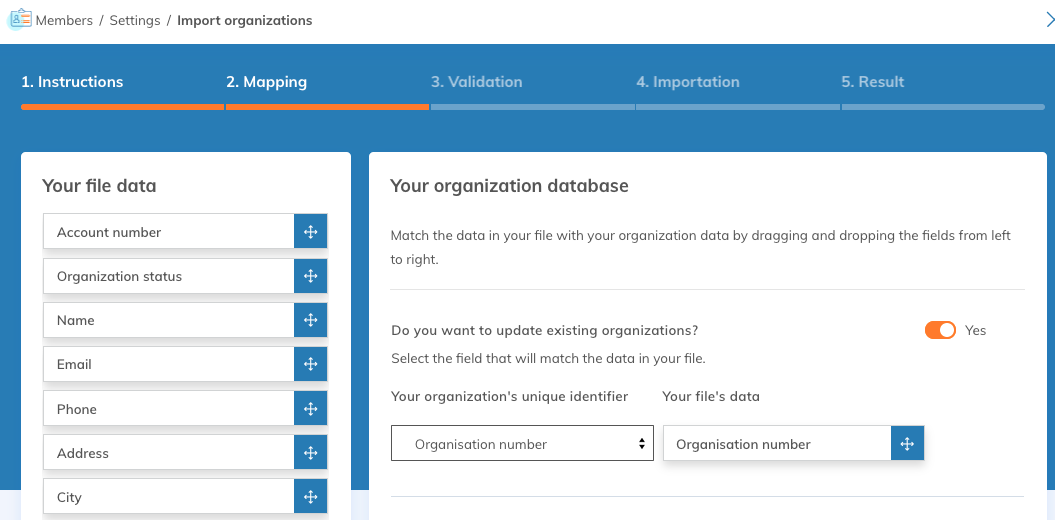
The import wizard is located in the "Settings" menu of the "Members" application, in the "Wizards" category. (Members > Settings > Import organizations).
In the first step, select the file containing your list to import.
In the next step, you will need to associate (click and drag) the columns in your Excel file on the left side of the screen with your account's custom fields on the right side.
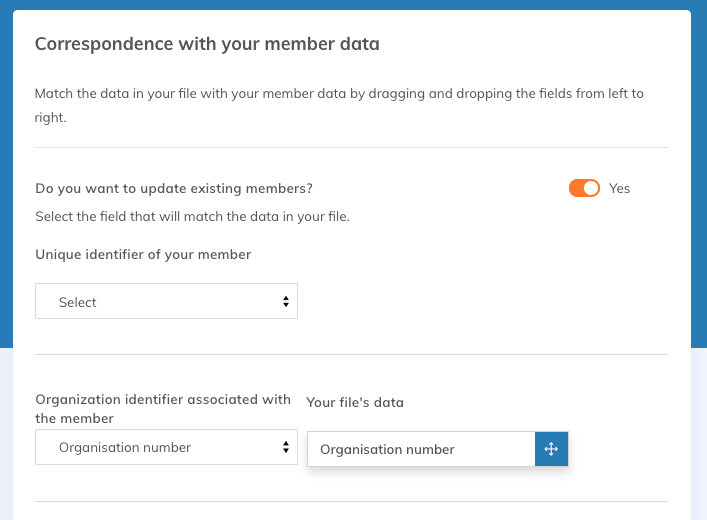
The first section, your organization's unique identifier, will be used to differentiate your members. It is this information that will determine whether to update the information of an existing organization or create a new one. It is therefore essential to avoid duplicates when updating.
If you want to force the update of a field, check the box next to it. If this box is not checked and the organization already has information in this field, it will be kept.
Validate the data to be imported
Click on "Next step". If the validation tool does not find any problem, you can click on "Next step" again and start the import. Note that you can click on the "Refresh" button to see the status of the validation tool.
If any messages come up at this stage, check their content. If necessary, correct your import file and start again. If the errors are minimal, you can also choose to ignore them and continue, but some information may be imported incorrectly.

The import may take several minutes if your file is large. We advise you to let the page run in the background and work in another tab during this time. An email will be sent to you when the import is complete.
Associate members to an organization
Once you have imported the organizations, you can use the Member Import Wizard to add members to them. You will need to have a column in the file containing the list of your members with a unique identifier for your organization. This can be a unique number or the name of the organization.
At the data association step, select the field you want to use and associate the column in your Excel file with it. If the organization exists, the member will be added automatically.