Yapla allows you to restrict access to certain web pages or sections of web pages exclusively to logged-in users or custom groups. This enables filtering access to specific pages and offering reserved content, for example, to active members or event participants.
Check out our online help article to learn how to enable members to log in to your website.
In this article:
- Restrict access to an entire web page
- Restrict access to a section of a web page
- Restrict access to a page or section for a custom group (Plus plan)
Restrict access to an entire web page
- Go to Website > [your website] > Pages.
- Select the page you want to modify access for.
- Go to the Configuration submenu, under Access.


- Check the box "Restrict access to this page to logged-in users" to activate the feature.
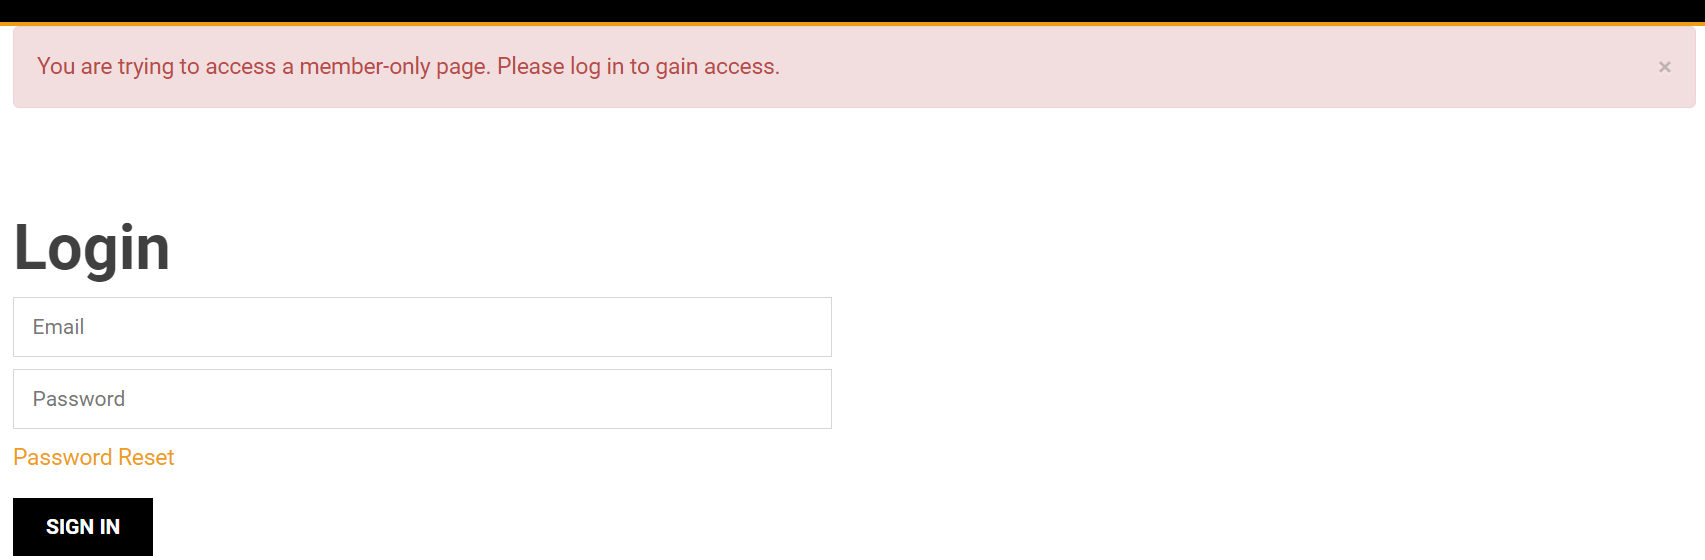
If a user attempts to access a page with restricted access, they will be automatically redirected to the login page displaying an error message. If they have an account, they can log in and then access the page.
Restrict access to a section of a web page
- Go to Website > [your website] > Pages.
- Select the page you want to modify access for.
- Go to the Structure sub-tab, where you will find all the sections present on the selected page.
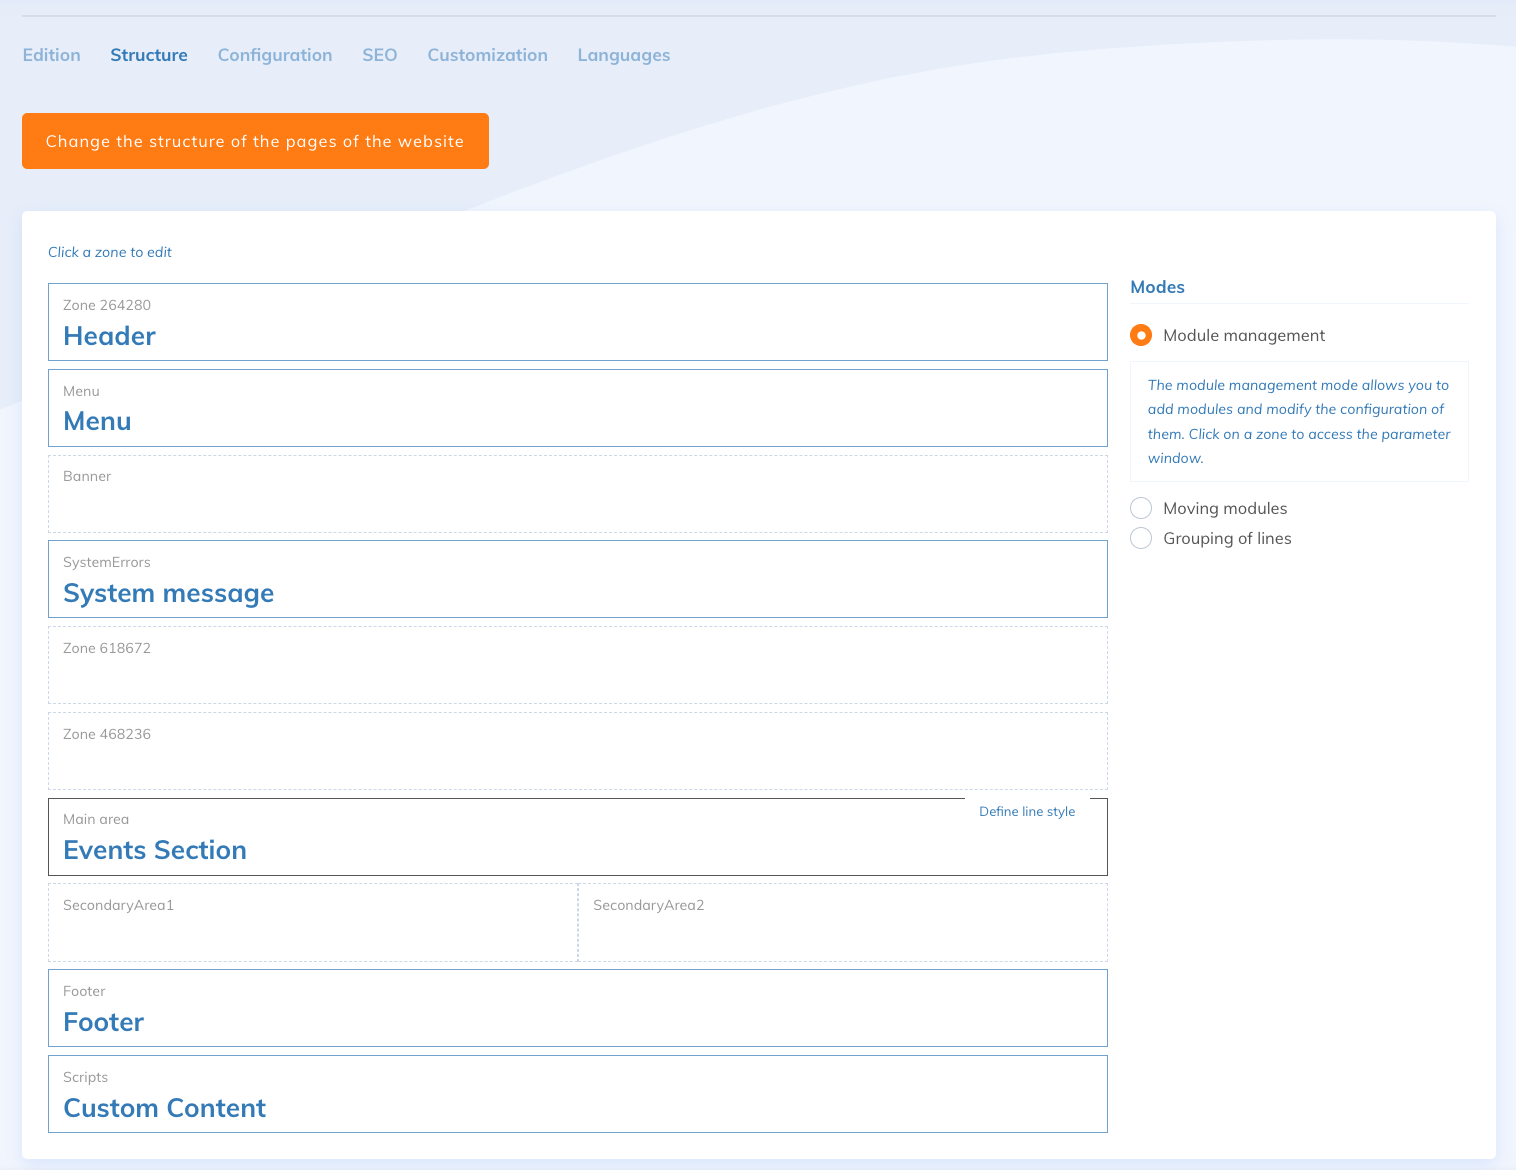
- Click on the section you want to restrict access to.
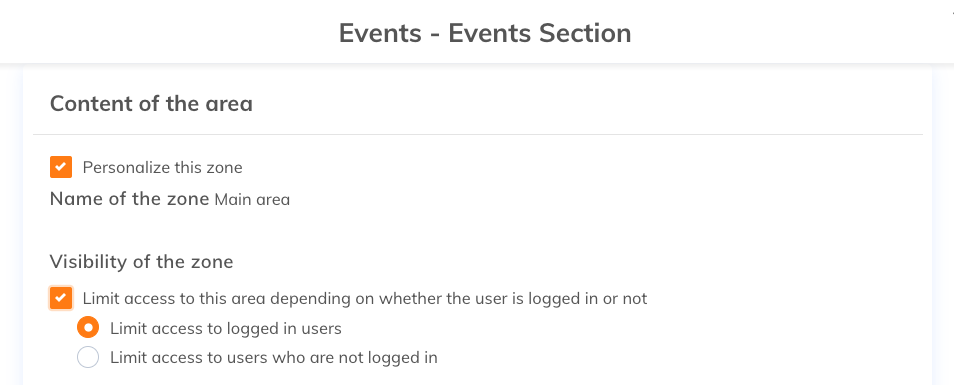
- In the first section under Visibility, check "Restrict access to this section based on whether the user is logged in or not," then decide on the display options for the page.
- Once the configurations are complete, save them.
The page containing the section will be accessible to everyone. However, the section will only be visible to the people you choose (whether logged in or not).
Restrict access to a page or section for a custom group

Custom groups also allow you to restrict access to certain pages or page sections only to contacts belonging to specific groups of your choice.
To understand and configure custom groups, check out this article.
- In the Website application, go to the page you want to restrict access to.
- Then choose the Configuration tab of the page or select the desired section of the page.
- On this page, go to the "Access" section.
- After defining that your page is only accessible to logged-in contact, you will have the option to select "Restrict access to this page based on groups associated with the logged-in user" and specify the groups that will have access to this page.
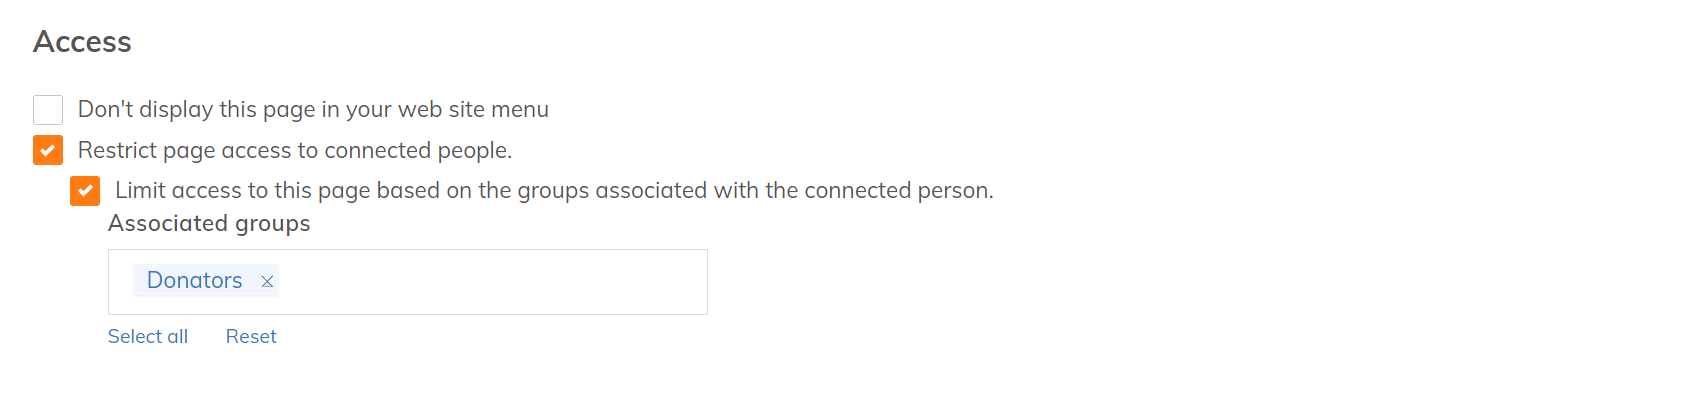
To allow access to a specific area of a page for a custom group, follow these steps and then check the box "Restrict access based on the user's groups."
In our example, only logged-in contact associated with the group "Board of Directors" will have access to this page.
Other contacts will be redirected to the homepage and shown an error message indicating they are not authorized to view this page.
For more information