Yapla allows you to create an online campaign to collect donations. Find out how:
- present and personalize your fundraising campaign,
- define possible donation amounts,
- and promote your project to your community.
Prerequisites for creating a Yapla online donation campaign
The donation feature is available with all packages, even the free version.
⚠️ Important: carefully write down your organization's name and check that it contains no errors. This is the name that will be displayed on the user screen, as part of your fundraising campaign.
Step 1: Create a donation campaign
Now that you have a Yapla account, start by logging in.
On your Dashboard page, a box entitled Quick Actions allows you to Create a donation campaign.
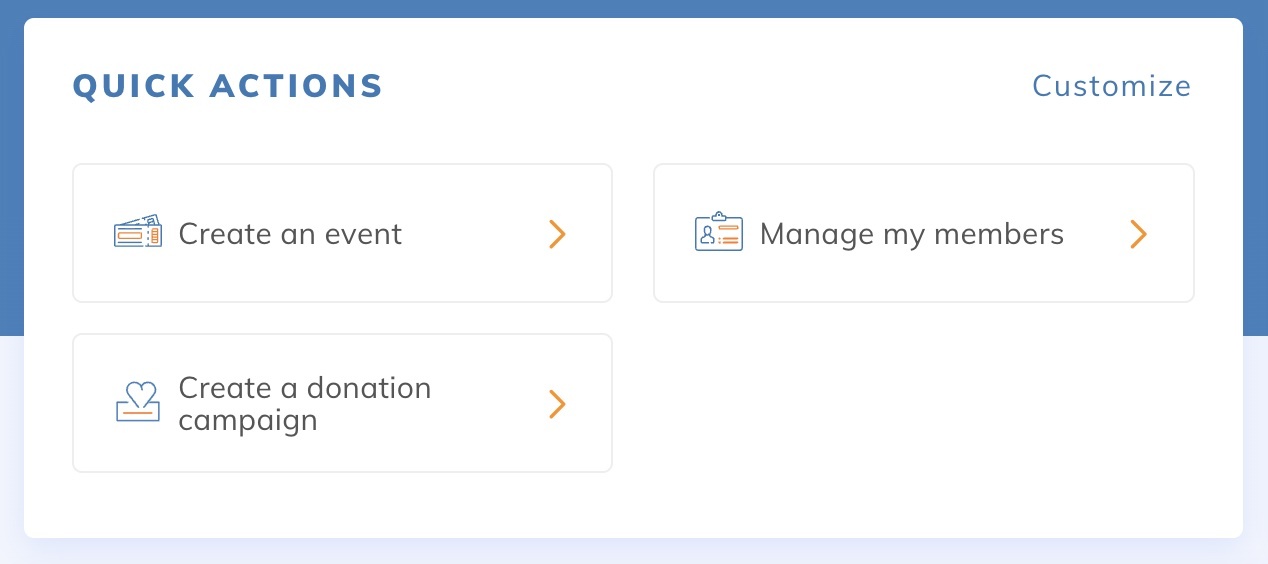
Click on the Create a donation campaign button.
You're now ready to start your campaign creation process.
Our tip: although the process is fast, take the time you need to fine-tune it.
On the first page of the campaign creation process, you'll be asked to enter a name for your campaign. This will be displayed publicly on your website. Choose an evocative name, so that your visitors are well informed.
Then set your goal: how much money do you want to raise? To measure the progress of donations, you can even decide to display a gauge on your page.
Include an image, so that your community can easily identify your campaign.
Finally, personalize the description. You can, for example, explain why you're launching this campaign, why this cause is important to you, and what the donations will accomplish.
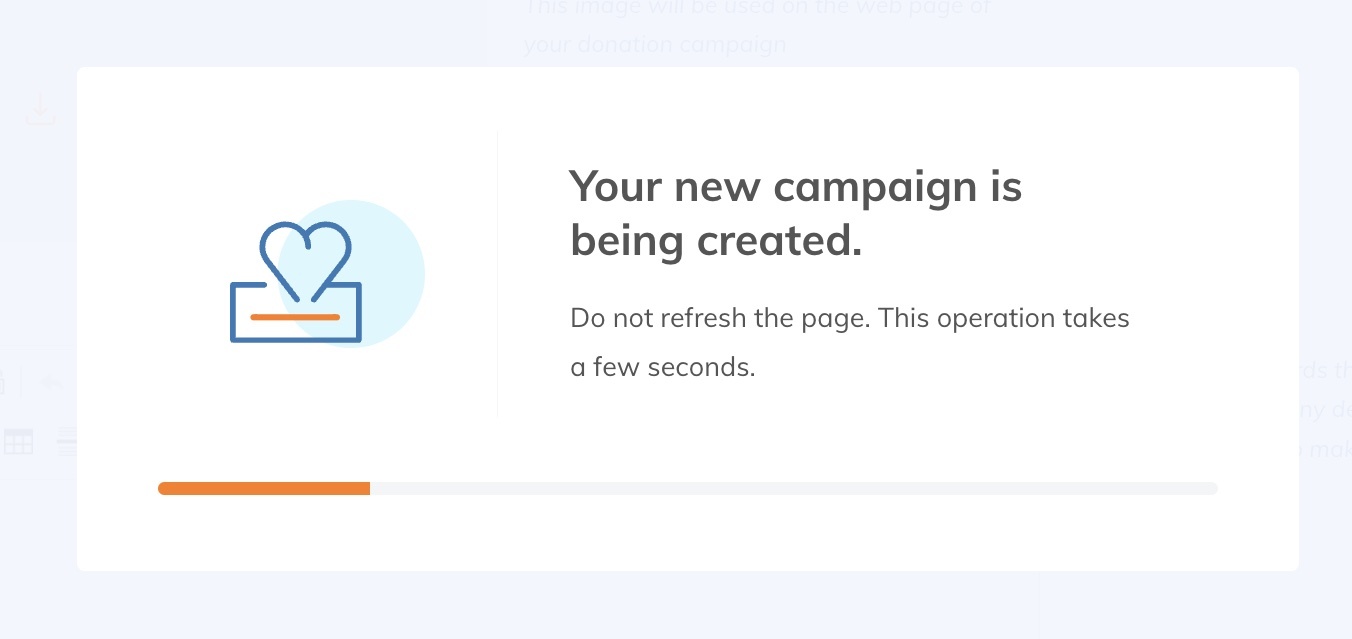
Once you've completed this first step, a window appears, telling you that your campaign is being created.
Step 2: Setting up the campaign with donation selection
The new page invites you to select the types of donations your community will be able to make.
This includes :
- the amounts that can be donated: fixed increments, or free amounts,
- the frequency of donations: a unique donation, recurring donations, and direct debit dates.
By default, the form allows both unique and recurring donations. You can choose to keep this option or select the one that suits you best.
Click Next once you've set your payment amounts and recurrence schedule.
Step 3: Customize your campaign donation form
At this stage, your campaign is created, but you still need to decide what information your donors need to enter to finalize their donation.
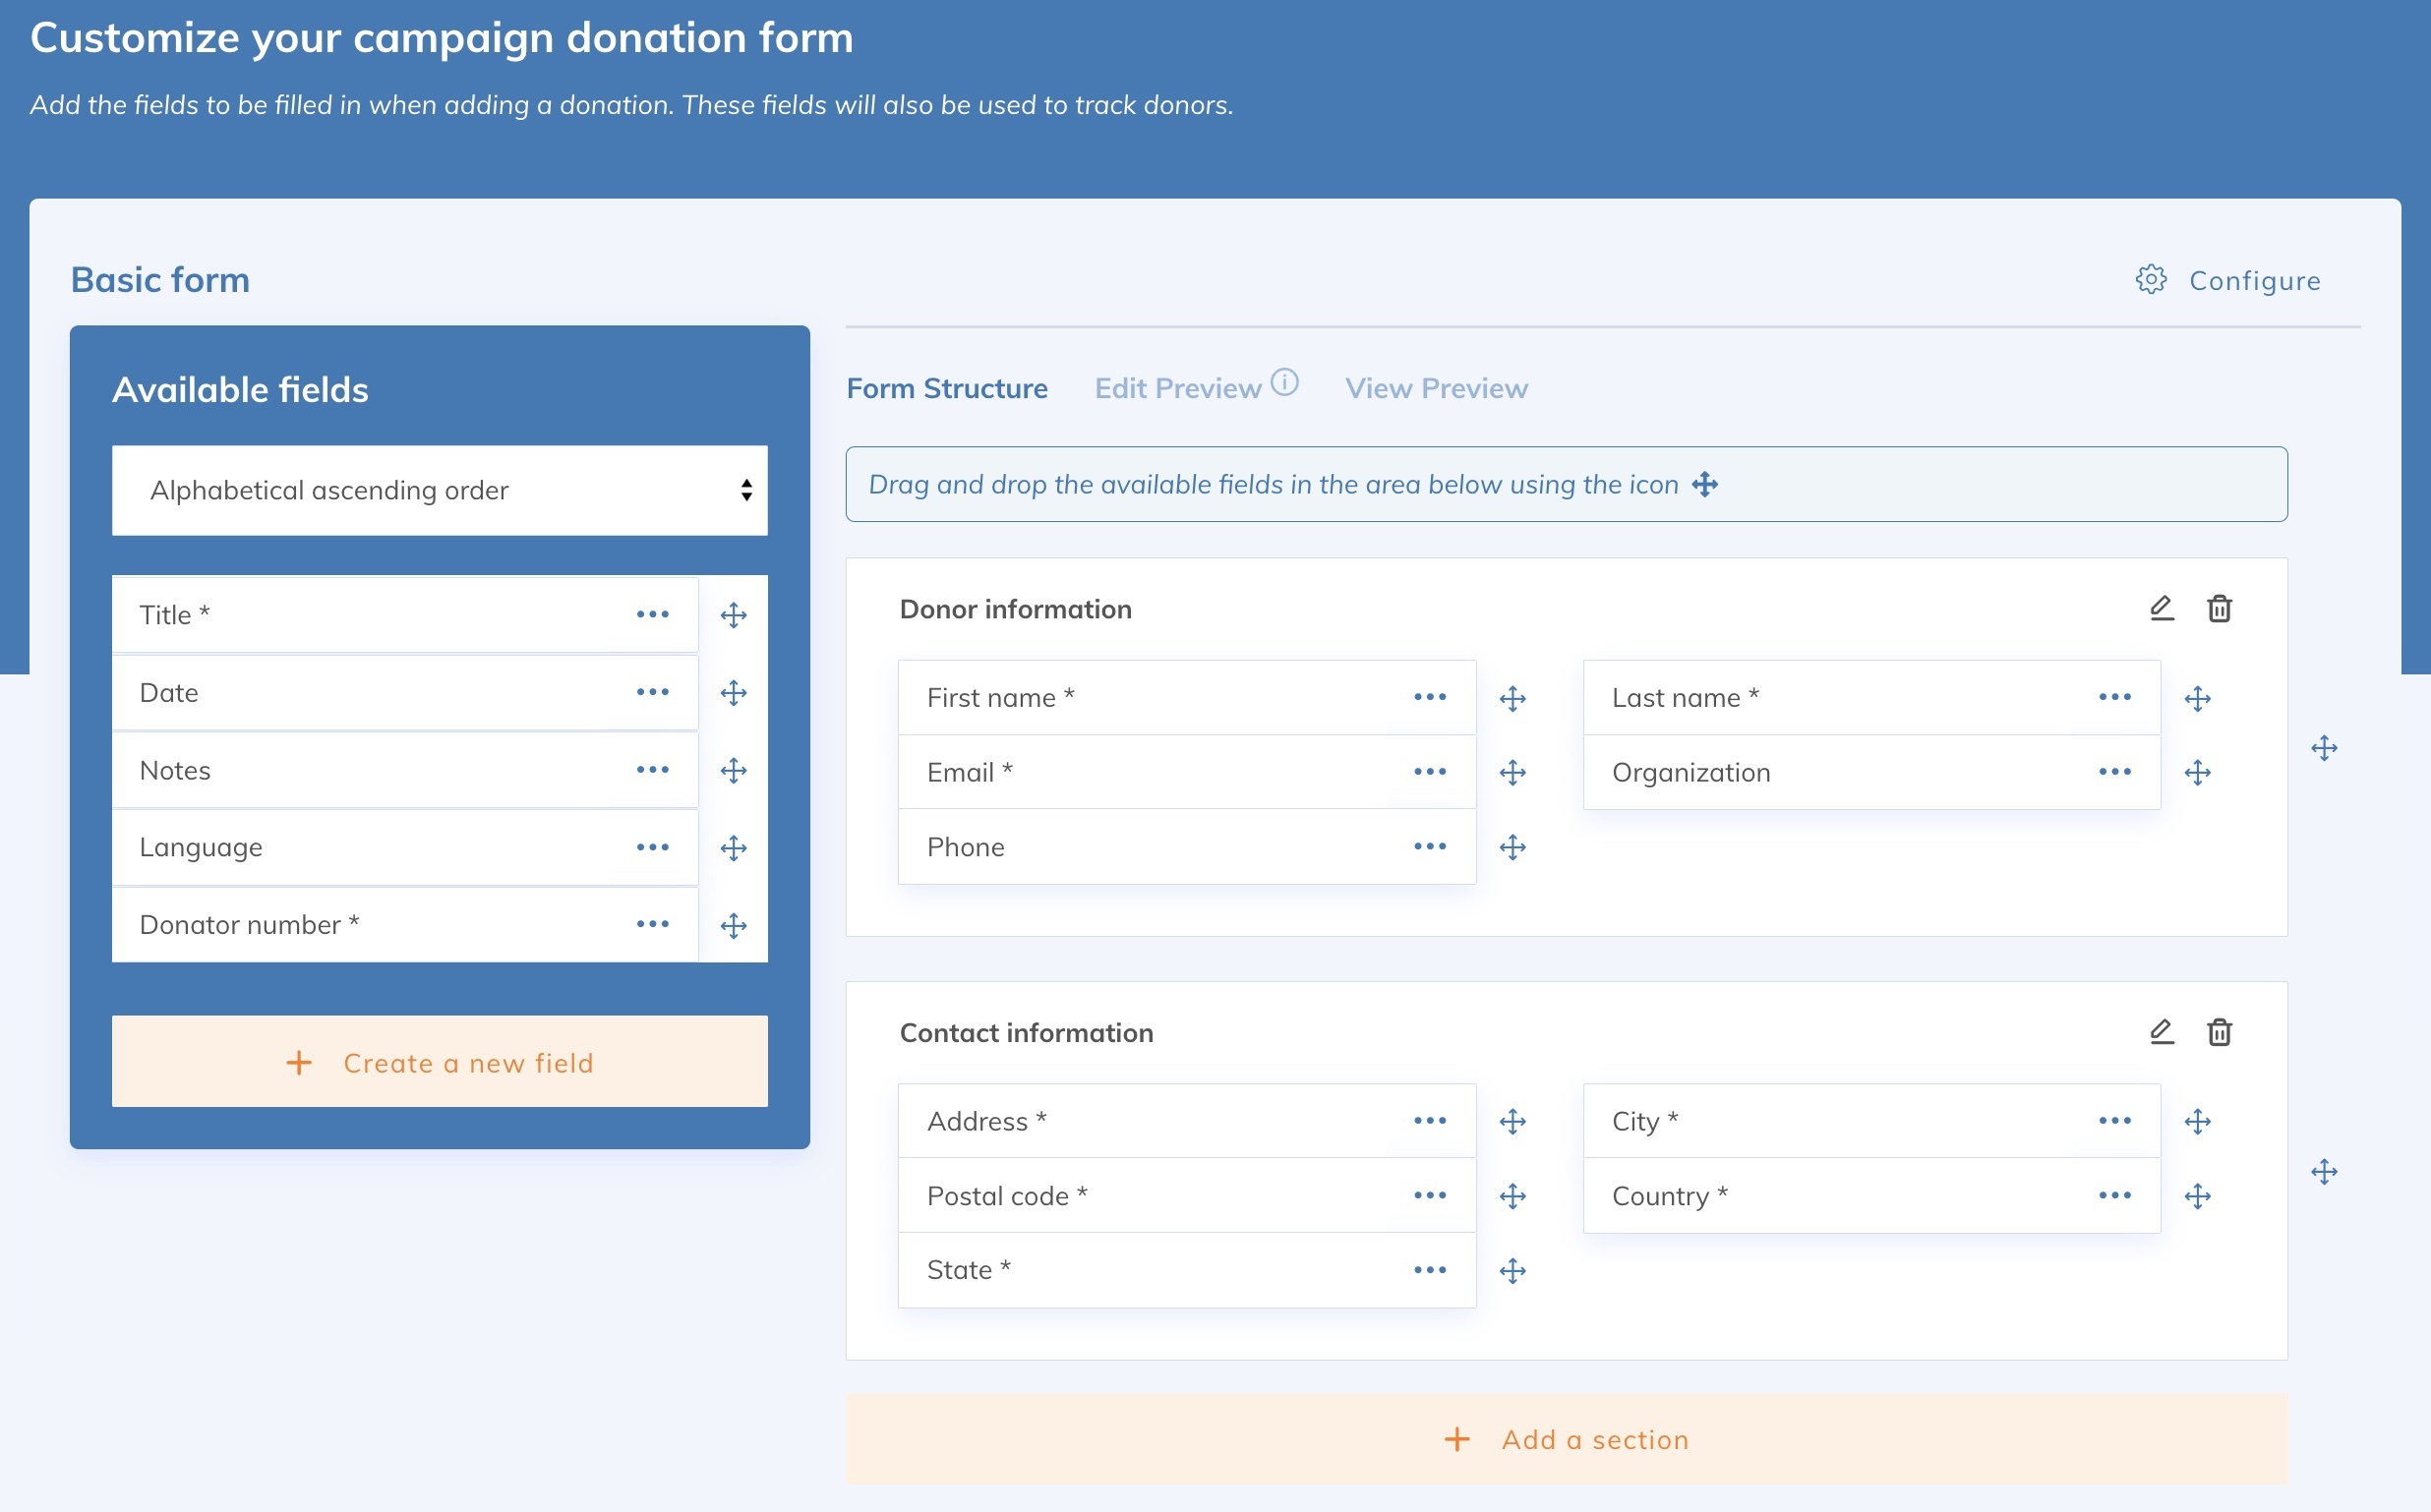
Determine the contact details the donor will need to enter in order to finalize their donation. This information is useful for communication purposes, but can also be used for marketing purposes.
Information fields are available in the default form. You can see them in the Donor Information window. If you wish to add one, simply click and drag one of the available fields from the left-hand column to the right-hand window.
You can also add a custom information field. To do so, in the Available fields column, click on the Create a new field button.
A new page appears, where you can decide which field to add to your information form. Here you can find out more about your donors' profiles. For example, you can ask them why they want to participate in your fundraising campaign. Create your field by giving it a name, and adding a description that helps visitors understand the purpose of your question.
Once you've made your changes, click Save at the bottom of the page.
Back on the form structure page, you can add your new field to the Donor information section, or click on the yellow banner at the bottom of the form, Add a section.
Click on Next.
Step 4: Customize your fundraising page
Your fundraising web page is a page generated by Yapla, which can then be integrated into your website. Its purpose is to increase the visibility of your campaign since you'll be able to share it with your contacts once it's finalized.
Please note that if you have already created your site with Yapla, this step is not necessary. The donation collection page you create is automatically adjusted to match the aesthetics of your site.
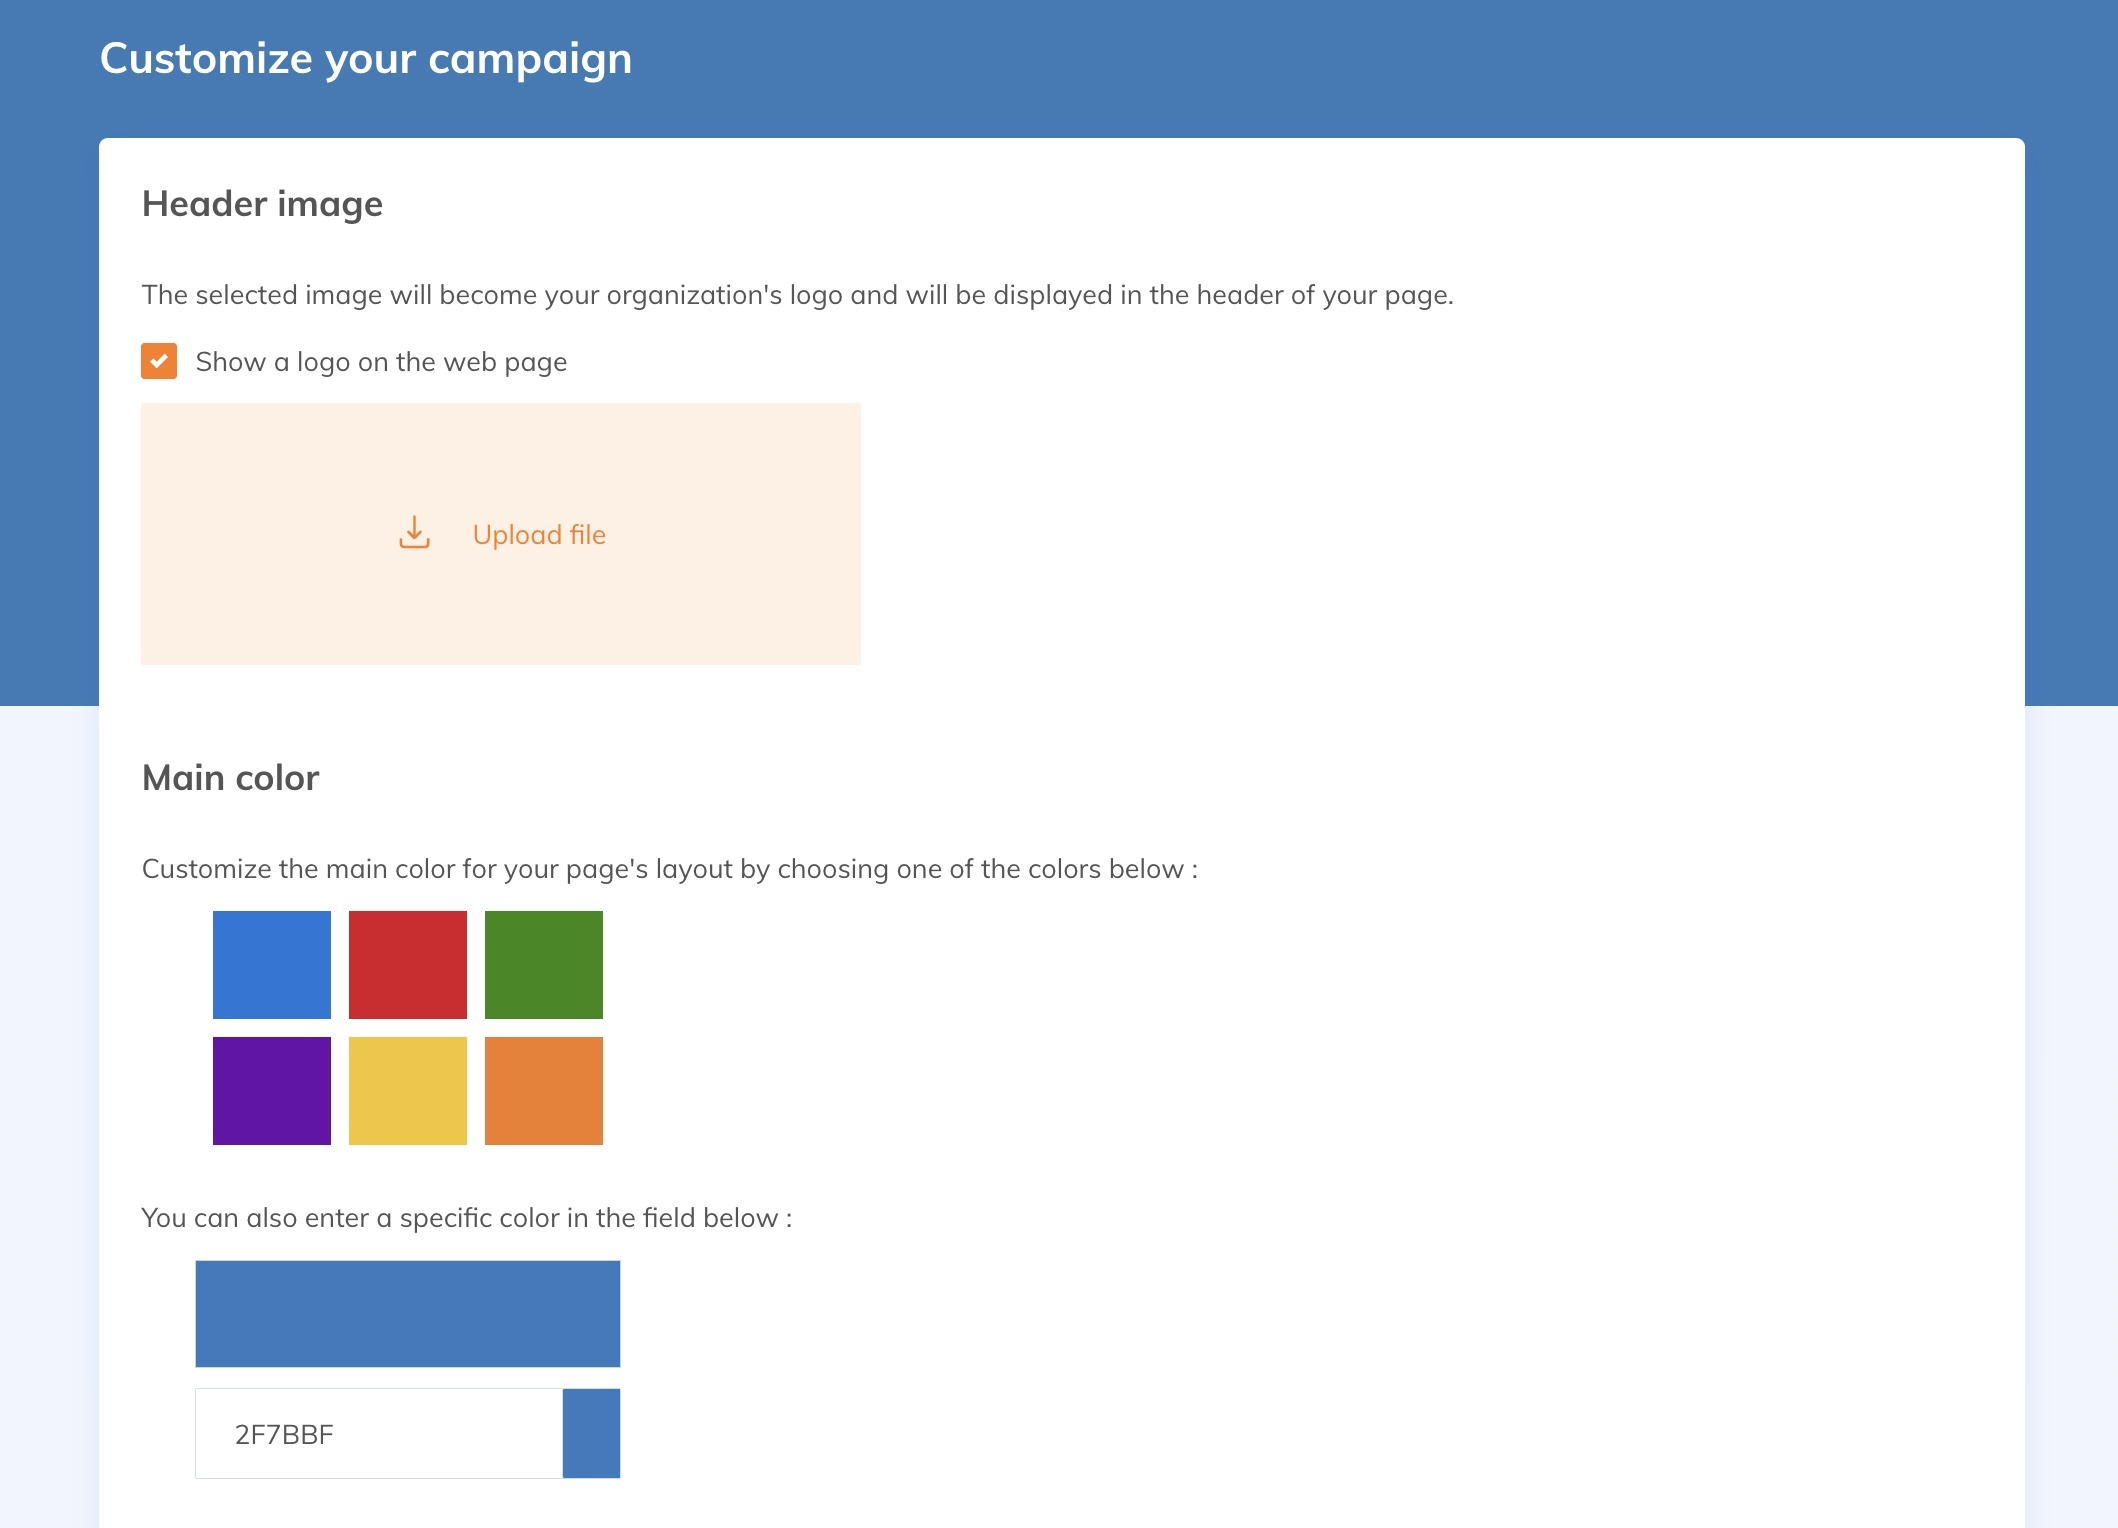
This step allows you to personalize this page, by :
- choosing colors: use the colors of your brand image, for example
- integrating your logo
- choosing the text font, so that it's consistent with the rest of your site.
Click Next after entering all your changes.
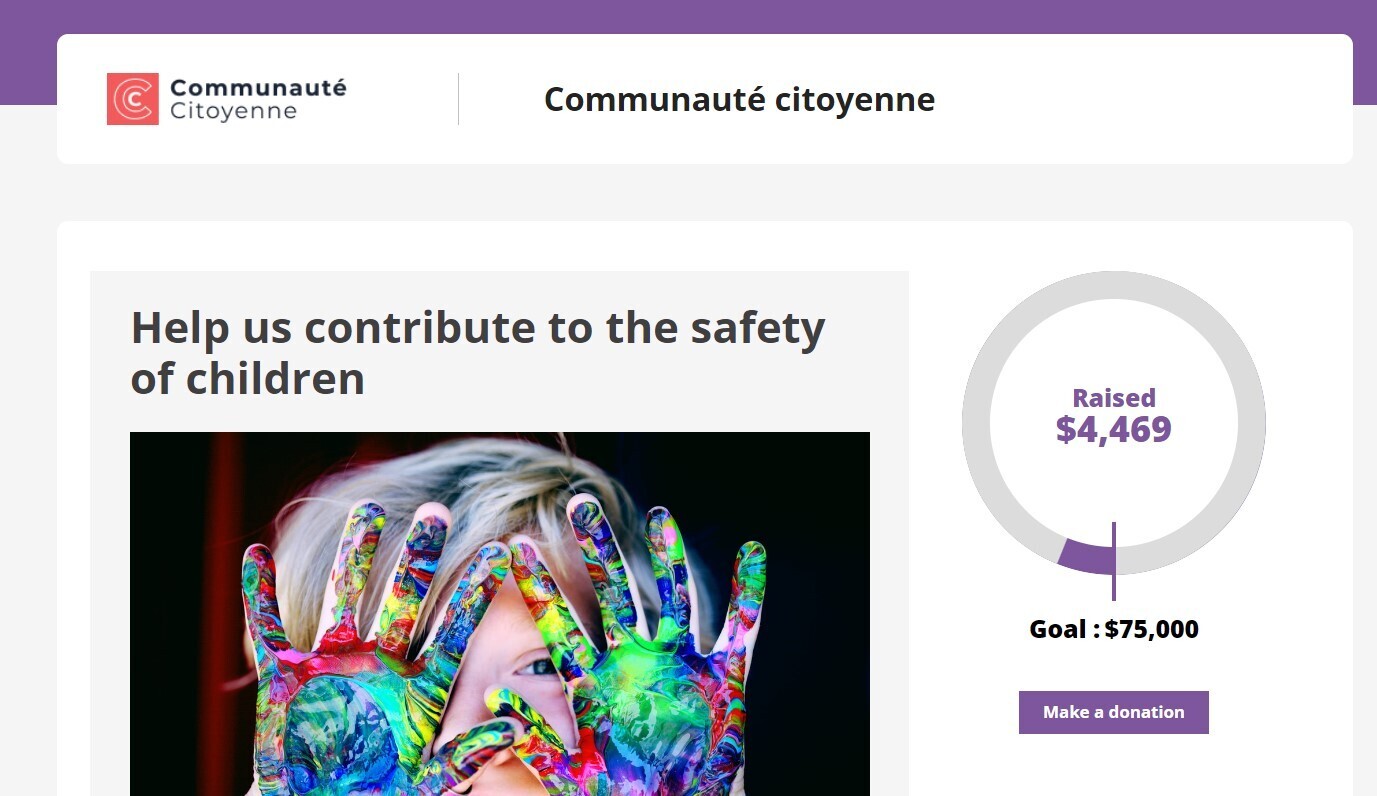
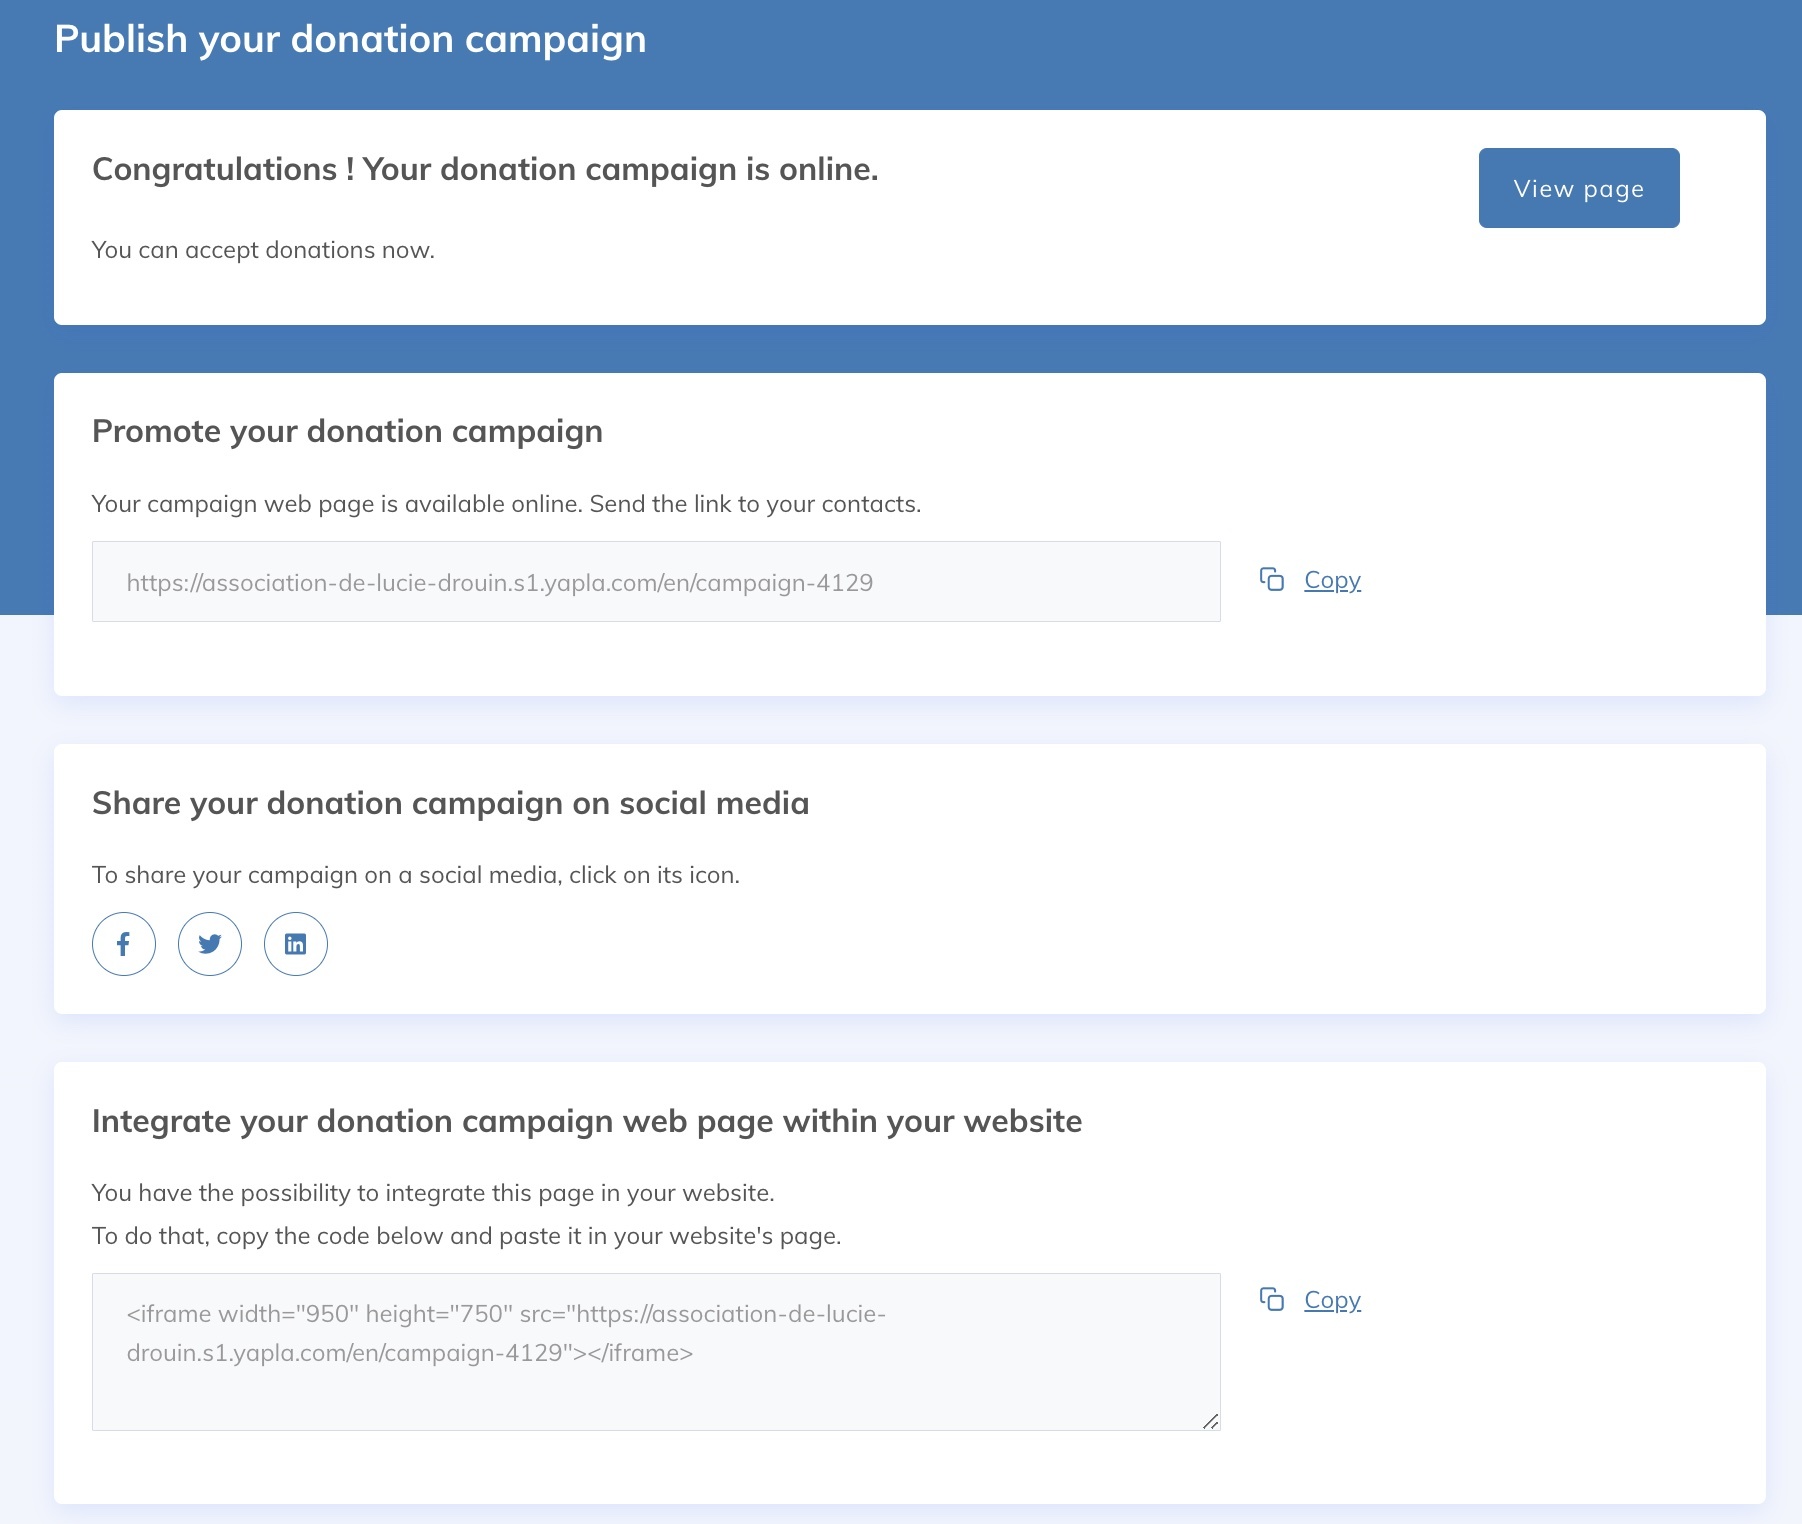
Step 5: Publish the campaign to promote itYour campaign is ready - all that's left is to make it known!
The collection page just created includes :
- the name of your campaign,
- the logo and name of your association,
- as well as a gauge to visualize your objective, and how far you still have to go to reach it.
At this stage, you need to get the word out about your campaign. You have the option to :
- share the link to your fundraising page; you could, for example, create a newsletter and send it to all your contacts, then schedule reminders as your fund grows
- share your donation campaign on your social media: you're more likely to reach your goal by planning an editorial calendar, revealing how much you've raised and what it will help your association to achieve. Maintain your community's sense of satisfaction and encourage them to keep on giving!
- integrate the page generated by Yapla into your website. This way, visitors who hear about your association and want to find out more will also be informed about your fundraising campaign when they visit your site.
Other parameters of your donation campaign
Your donation campaign is now up and running, but your Yapla account Dashboard offers you even more possibilities.
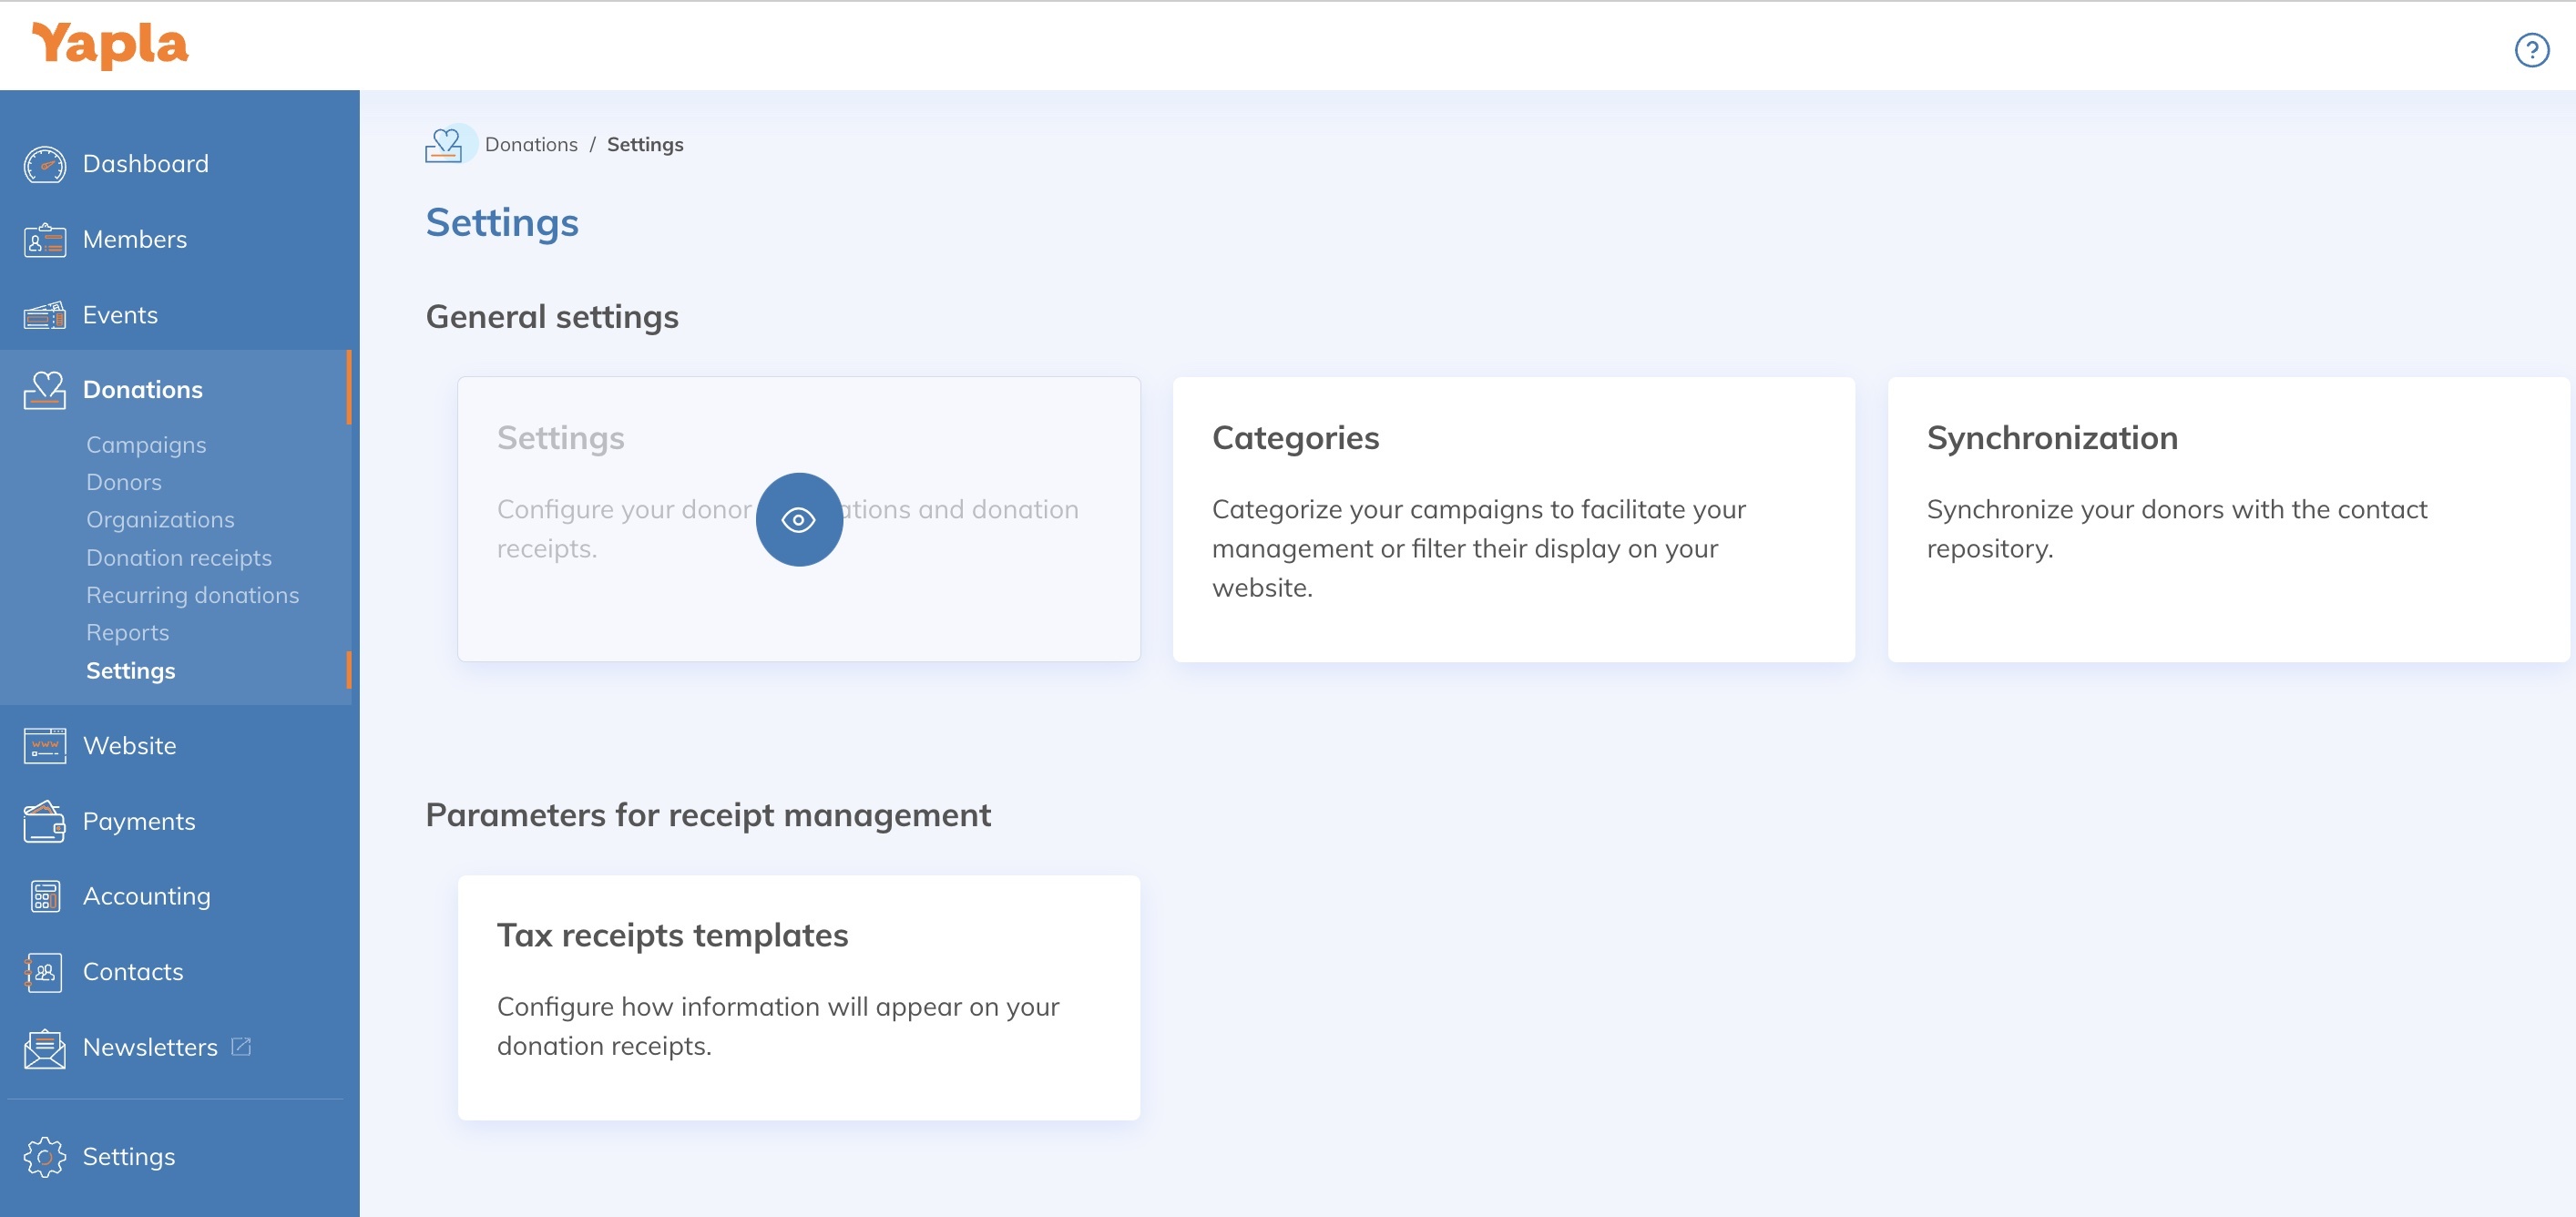
To access it, log in to your account, then go to the Donations menu, in the bar on the left of your screen.
Here you can review your campaign and donor information. Here you can view accumulated donations, modify your campaign web page or donation form information.
Your campaign settings also allow you to create tax receipts, so that donors are exempt from paying tax on their donations. This feature even allows you to create consolidated receipts for your regular donors. See our guide to creating tax receipts for more information.
Finally, you can integrate your Terms & Conditions, to provide donors with a legal framework. Find out how in our help section on activating your terms and conditions.
Customize your automatic communications
Once you have completed the setup process in the Members, Donations, or Events features, it is important to review and customize the automatic communications associated with each trigger.
Each feature has its own set of triggers — membership confirmation, donation receipt, event registration confirmation, reminders, and more. The messages sent automatically to your contacts should reflect the tone and identity of your organization.
To learn more: