The Member Space module of the Website feature in Yapla allows you to create a secure area where an organization's members can log in to access exclusive content, manage their personal information, and interact with the organization.
In this article:
- Add and configure the Member Space module on your website
- List of available items in the Member Space menu
- Add a custom menu item to the Member Space
- Edit menu items
Add and configure the Member Space module on your website
To add and configure the module, go to the Websites > Websites tab and select your website. Then select the Pages tile, followed by the page where your Member Space will be located.
In the Structure sub-tab, you can insert the Member Space into the Main Area.
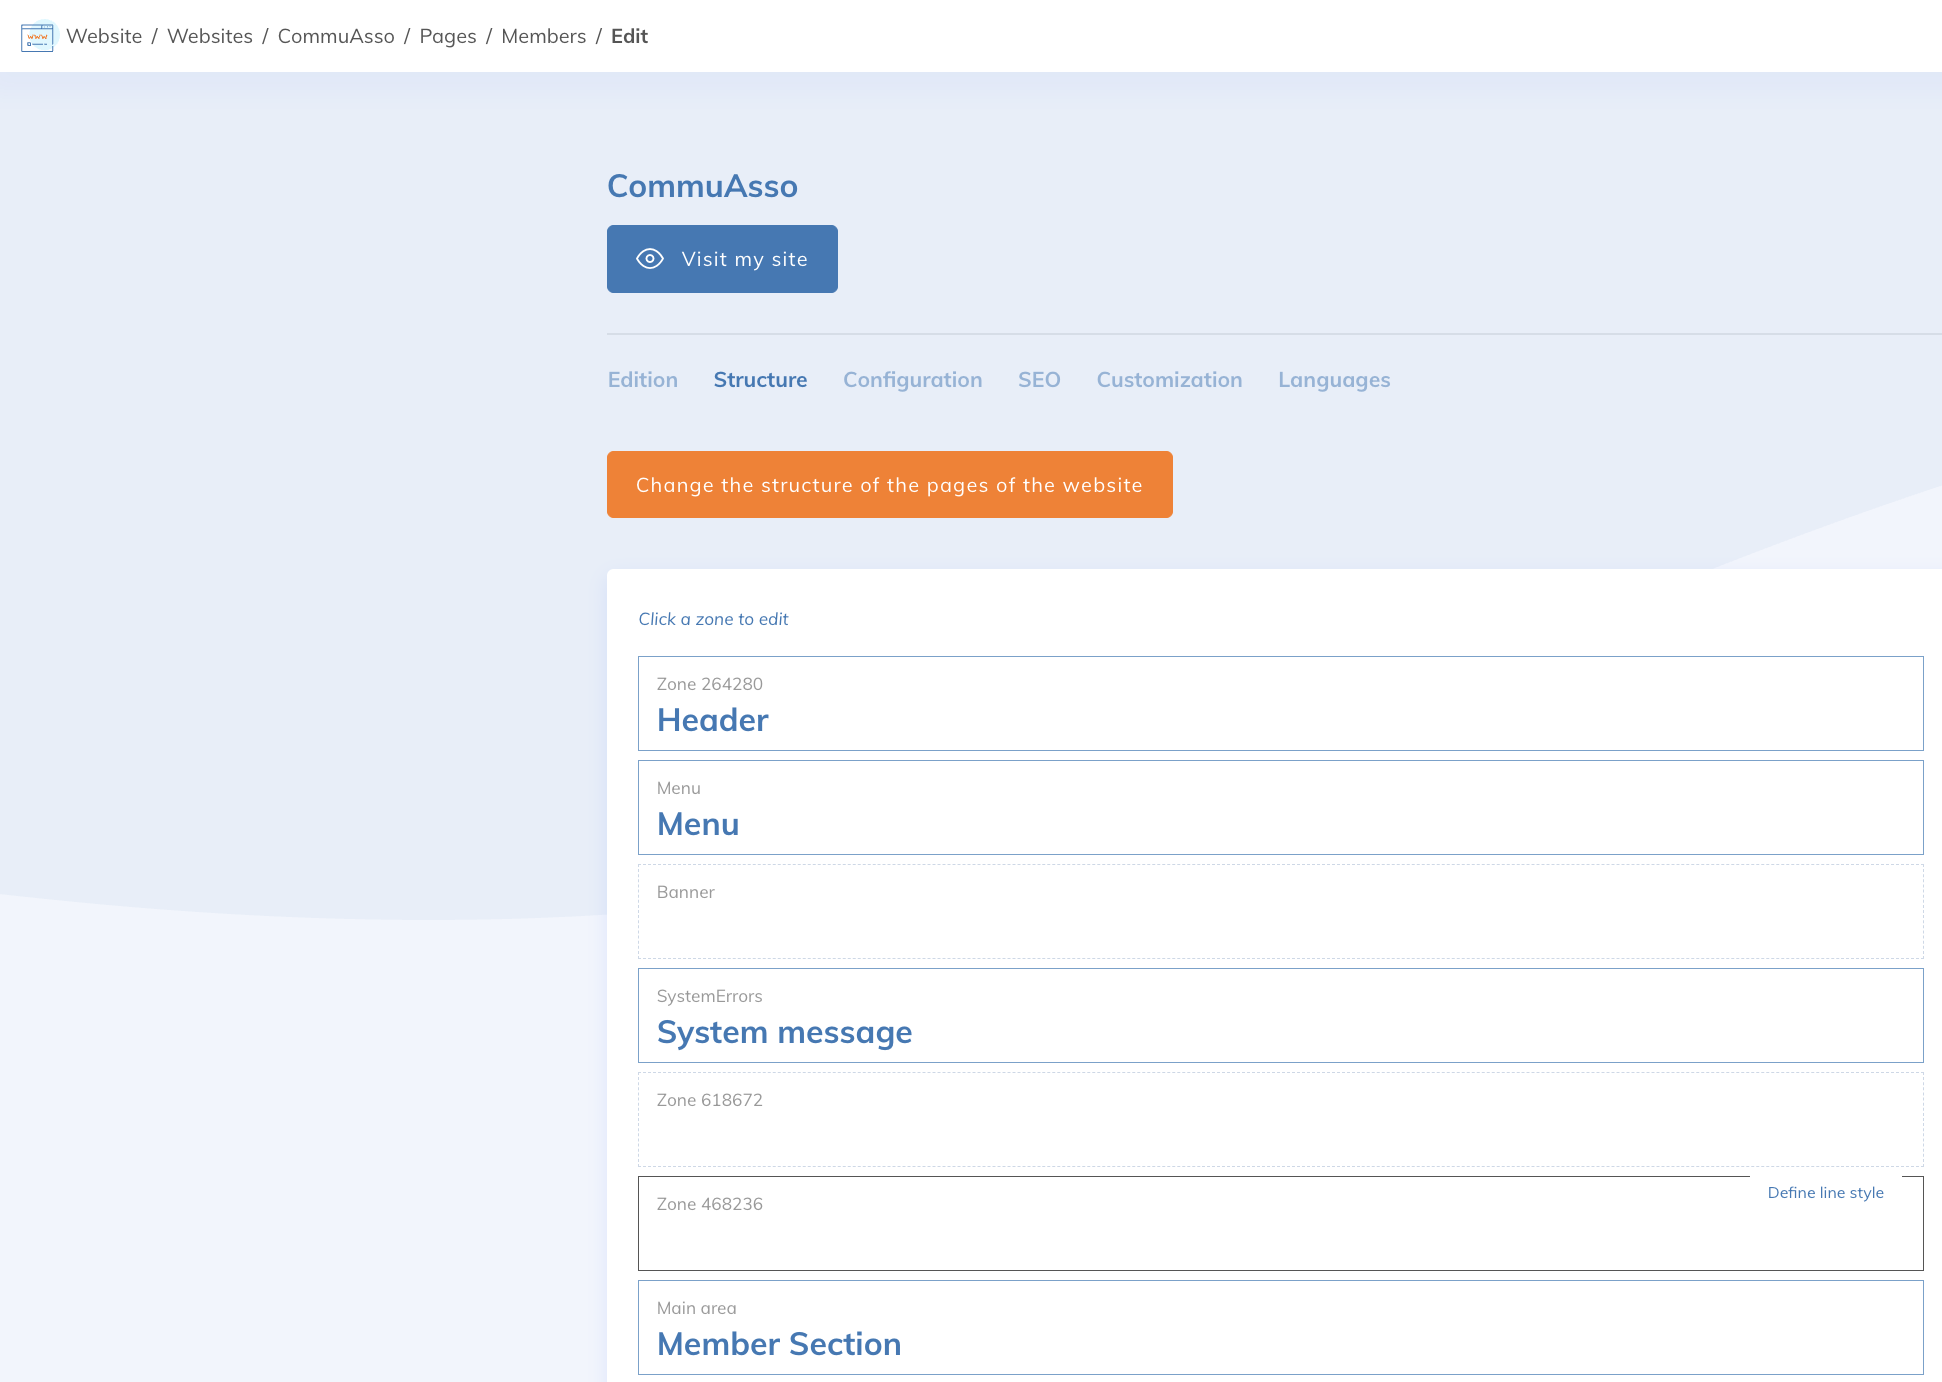
By clicking on the desired area, select Members from the Application list and Member Space under Zone module.
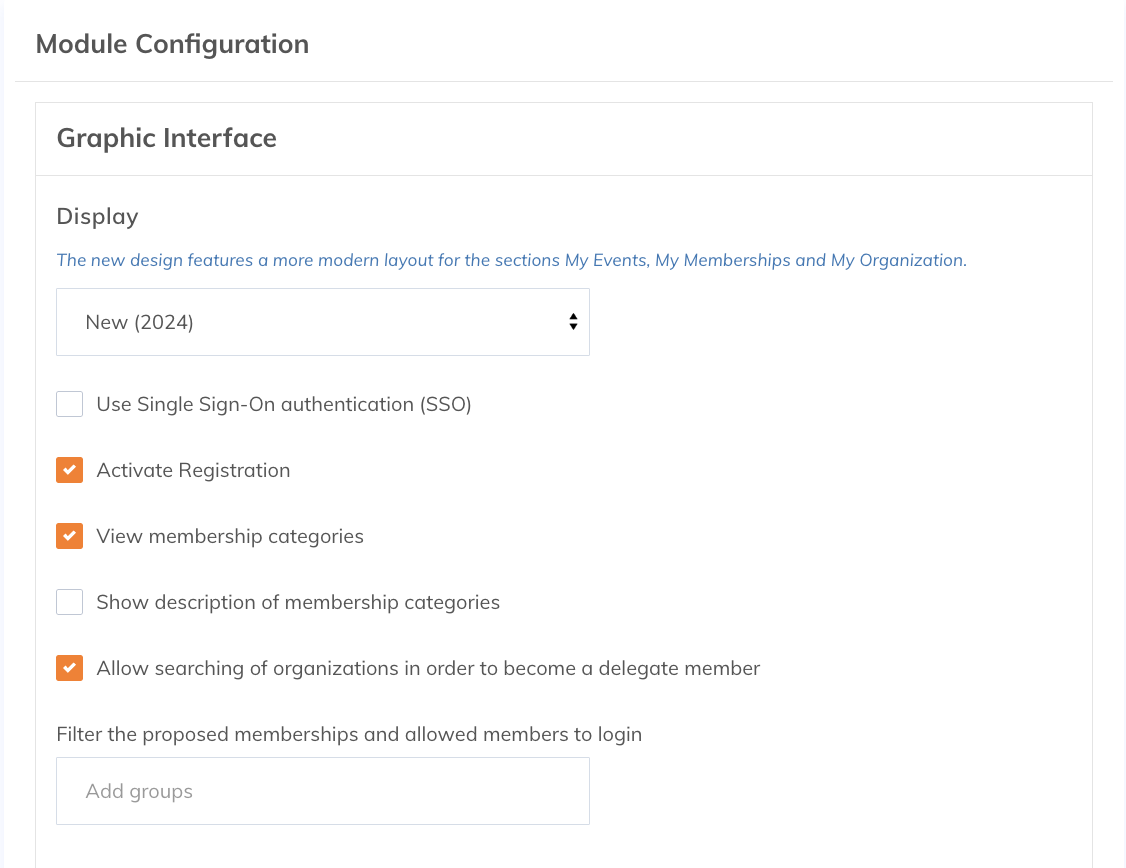
Module Configuration
In the module configuration section, the following options are available:
- Display: allows you to choose the display mode for the Member Space.
- Use Single Sign-On (SSO) : allows you to choose the login method for your members.
- Enable Become a Member function: allows new users to become members directly on your site
- Display memberships by category: allows you to group different membership types under configured categories.
- Show category descriptions: allows you to display the description linked to the category.
- Allow organization search for delegated membership (Premium) : if your association manages organizations, you can allow logged-in members to search for an organization to become a delegated member.
- Filter offered memberships and authorized members : allows control over which memberships are shown and restricts access to Member Space to specific groups.
Introductory Article
The introductory article allows you to add guidance or details on how your Member Space works.
- Category: allows you to select the category where your introductory article is placed.
- Article: allows you to choose your introductory article from those in the selected category.
Authorized Users
By default, only members can log in. You can allow non-member visitors such as donors to log in to view their interaction history. They must have a password.
List of available items in the Member Space menu
Here are the available functions:
| Option | Description |
|---|---|
| Enable My Profile | Allows the member to view and edit their profile |
| Change My Password | Allows the logged-in member to change their password |
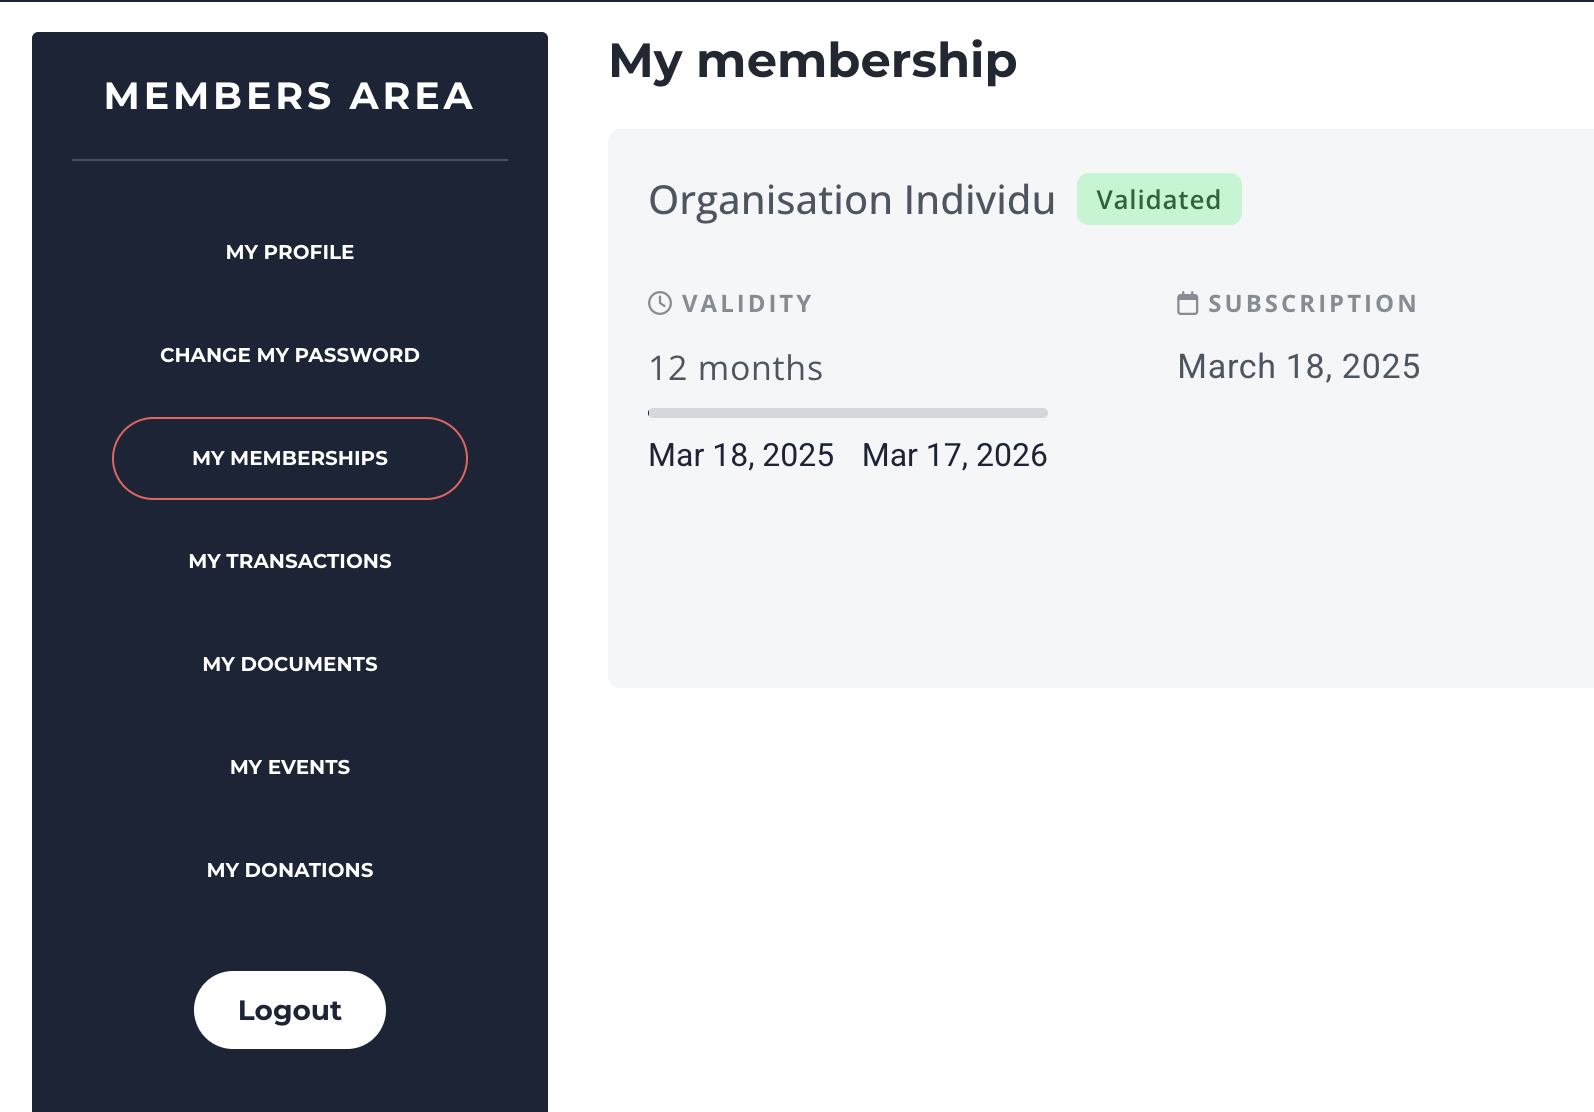
| Enable My Memberships | Allows the member to view their membership history and renew their membership |
| Enable My Events | Allows the member to view events they are registered for, registration date, ticket name, and event price |
| Enable My Donations | Allows viewing of donations and downloading of tax receipts |
| Enable My Documents | Allows members to access various documents related to their account and communications |
| Enable My Organization | Allows members to access the section related to their organization if your association manages organizations |
| Enable My Transactions | Allows the member to view their transaction history, if any |
| Enable My Preferences | Allows the member to manage preferences such as privacy settings |
| Enable Training | Allows training completed by members to be displayed in their Member Space |
| Enable Member Directory | Adds a Member Directory tab to the logged-in member's account menu |
Add a custom menu item to the Member Space
In addition to the menu items listed above, it is possible to add custom menu items and choose their label and redirect location.
Below the list of menu items, select + Add a menu item and enter a label. Then choose between the available options:
- Internal page: select a page from your existing website pages. Commonly used to redirect members to reserved or exclusive pages.
- External page: insert a custom link redirecting to an external page. The page will open in a new tab.
- Object page: select from your object fields. An object page creates a new tab within the Member Space linked to the relevant feature. This type of page allows members to edit an object themselves.
Edit menu items
Here are the customization options for menu items:
- Order of appearance: drag the item in the list using the arrows to the left of the label
- Uncheck the box: keeps the item configured but hidden from members
- Delete: completely removes the item and its configuration
- Edit: update the destination link and label name
Good to know
From the Plus package, you can add a universal password in the administration section to log in to your members' accounts on the website. The password will be valid for 6 hours. After this period, you will need to set a new one, different from the previous one. Go to Website > select your website > Settings, then enter it in the Advanced Settings section.