You can integrate a membership page into your Yapla website to allow new members to register for your NPO. It is also used to renew memberships. This page is like an access portal for members; here, they can update their information. Here is how to create this page step by step.
Step 1 - Create a membership campaign
Start by creating the possible types of membership from your Dashboard.
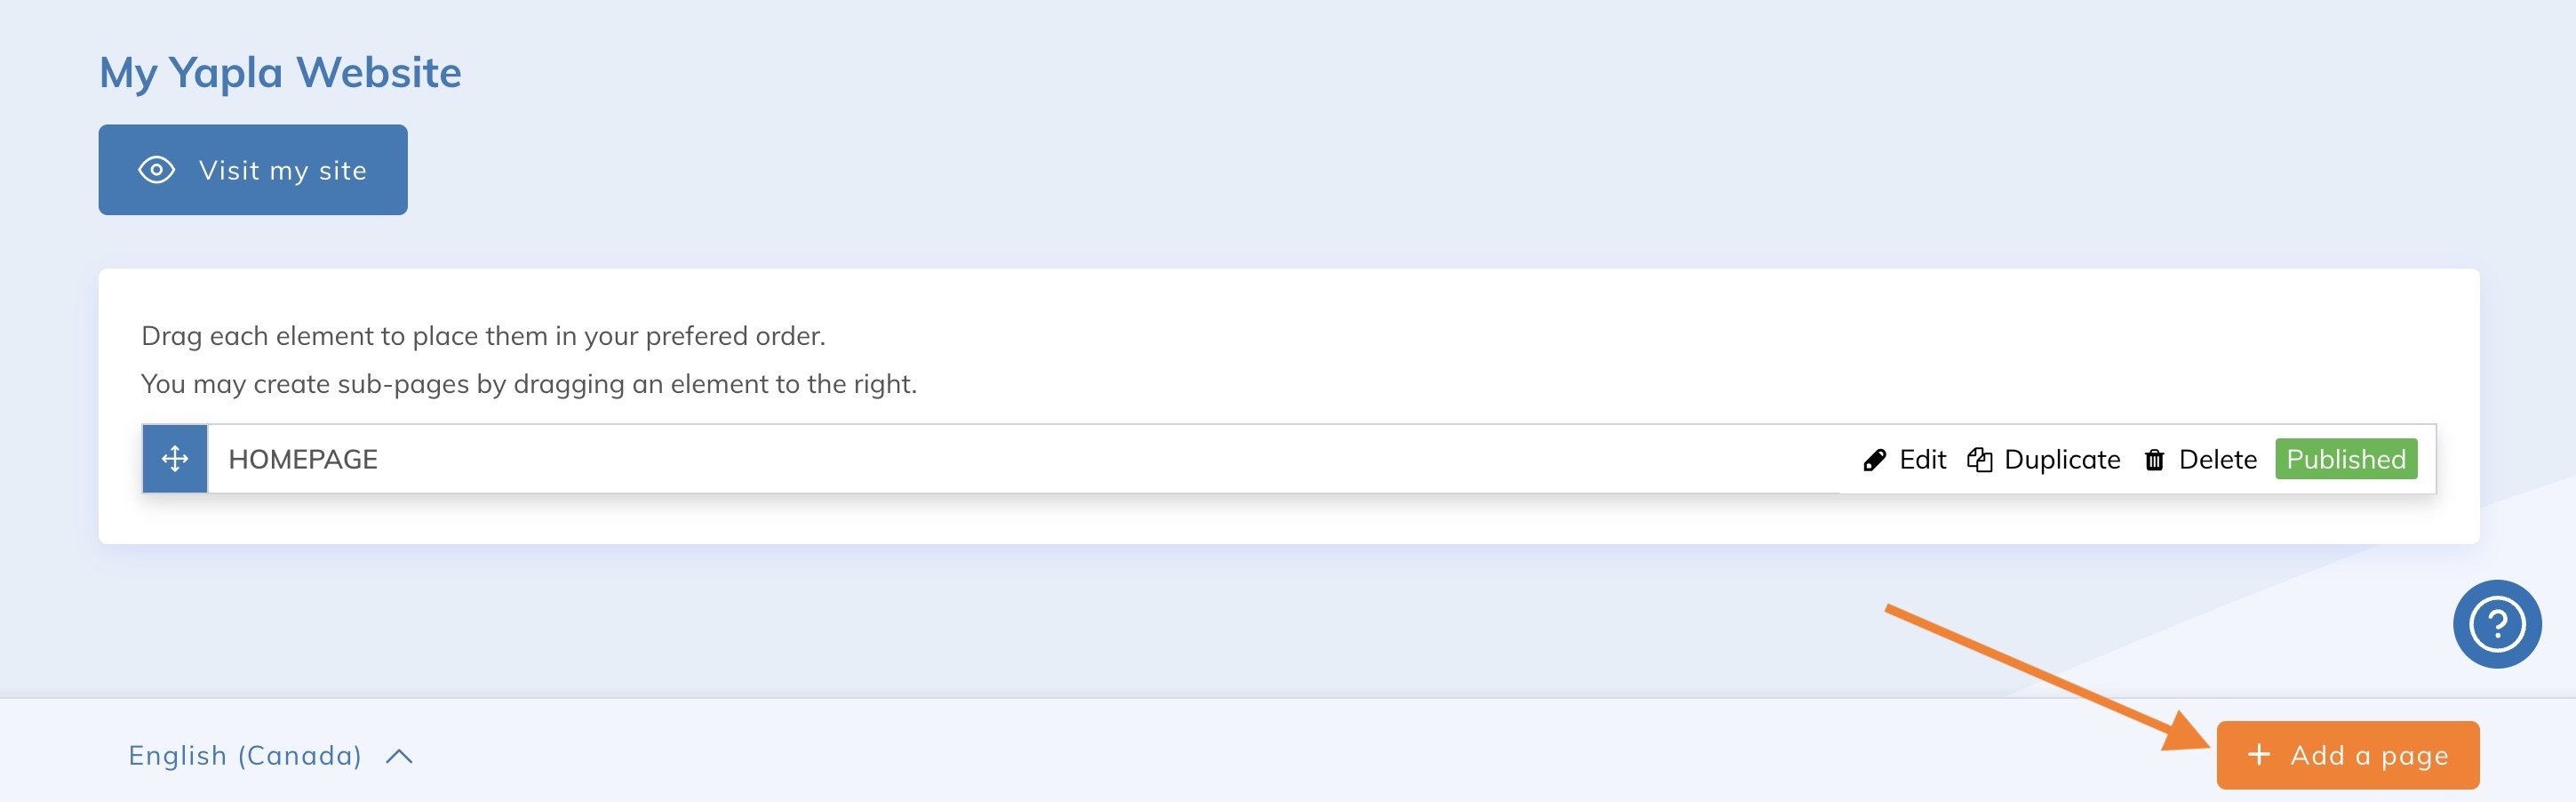
Go to the Website feature, then click on the Pages tile.
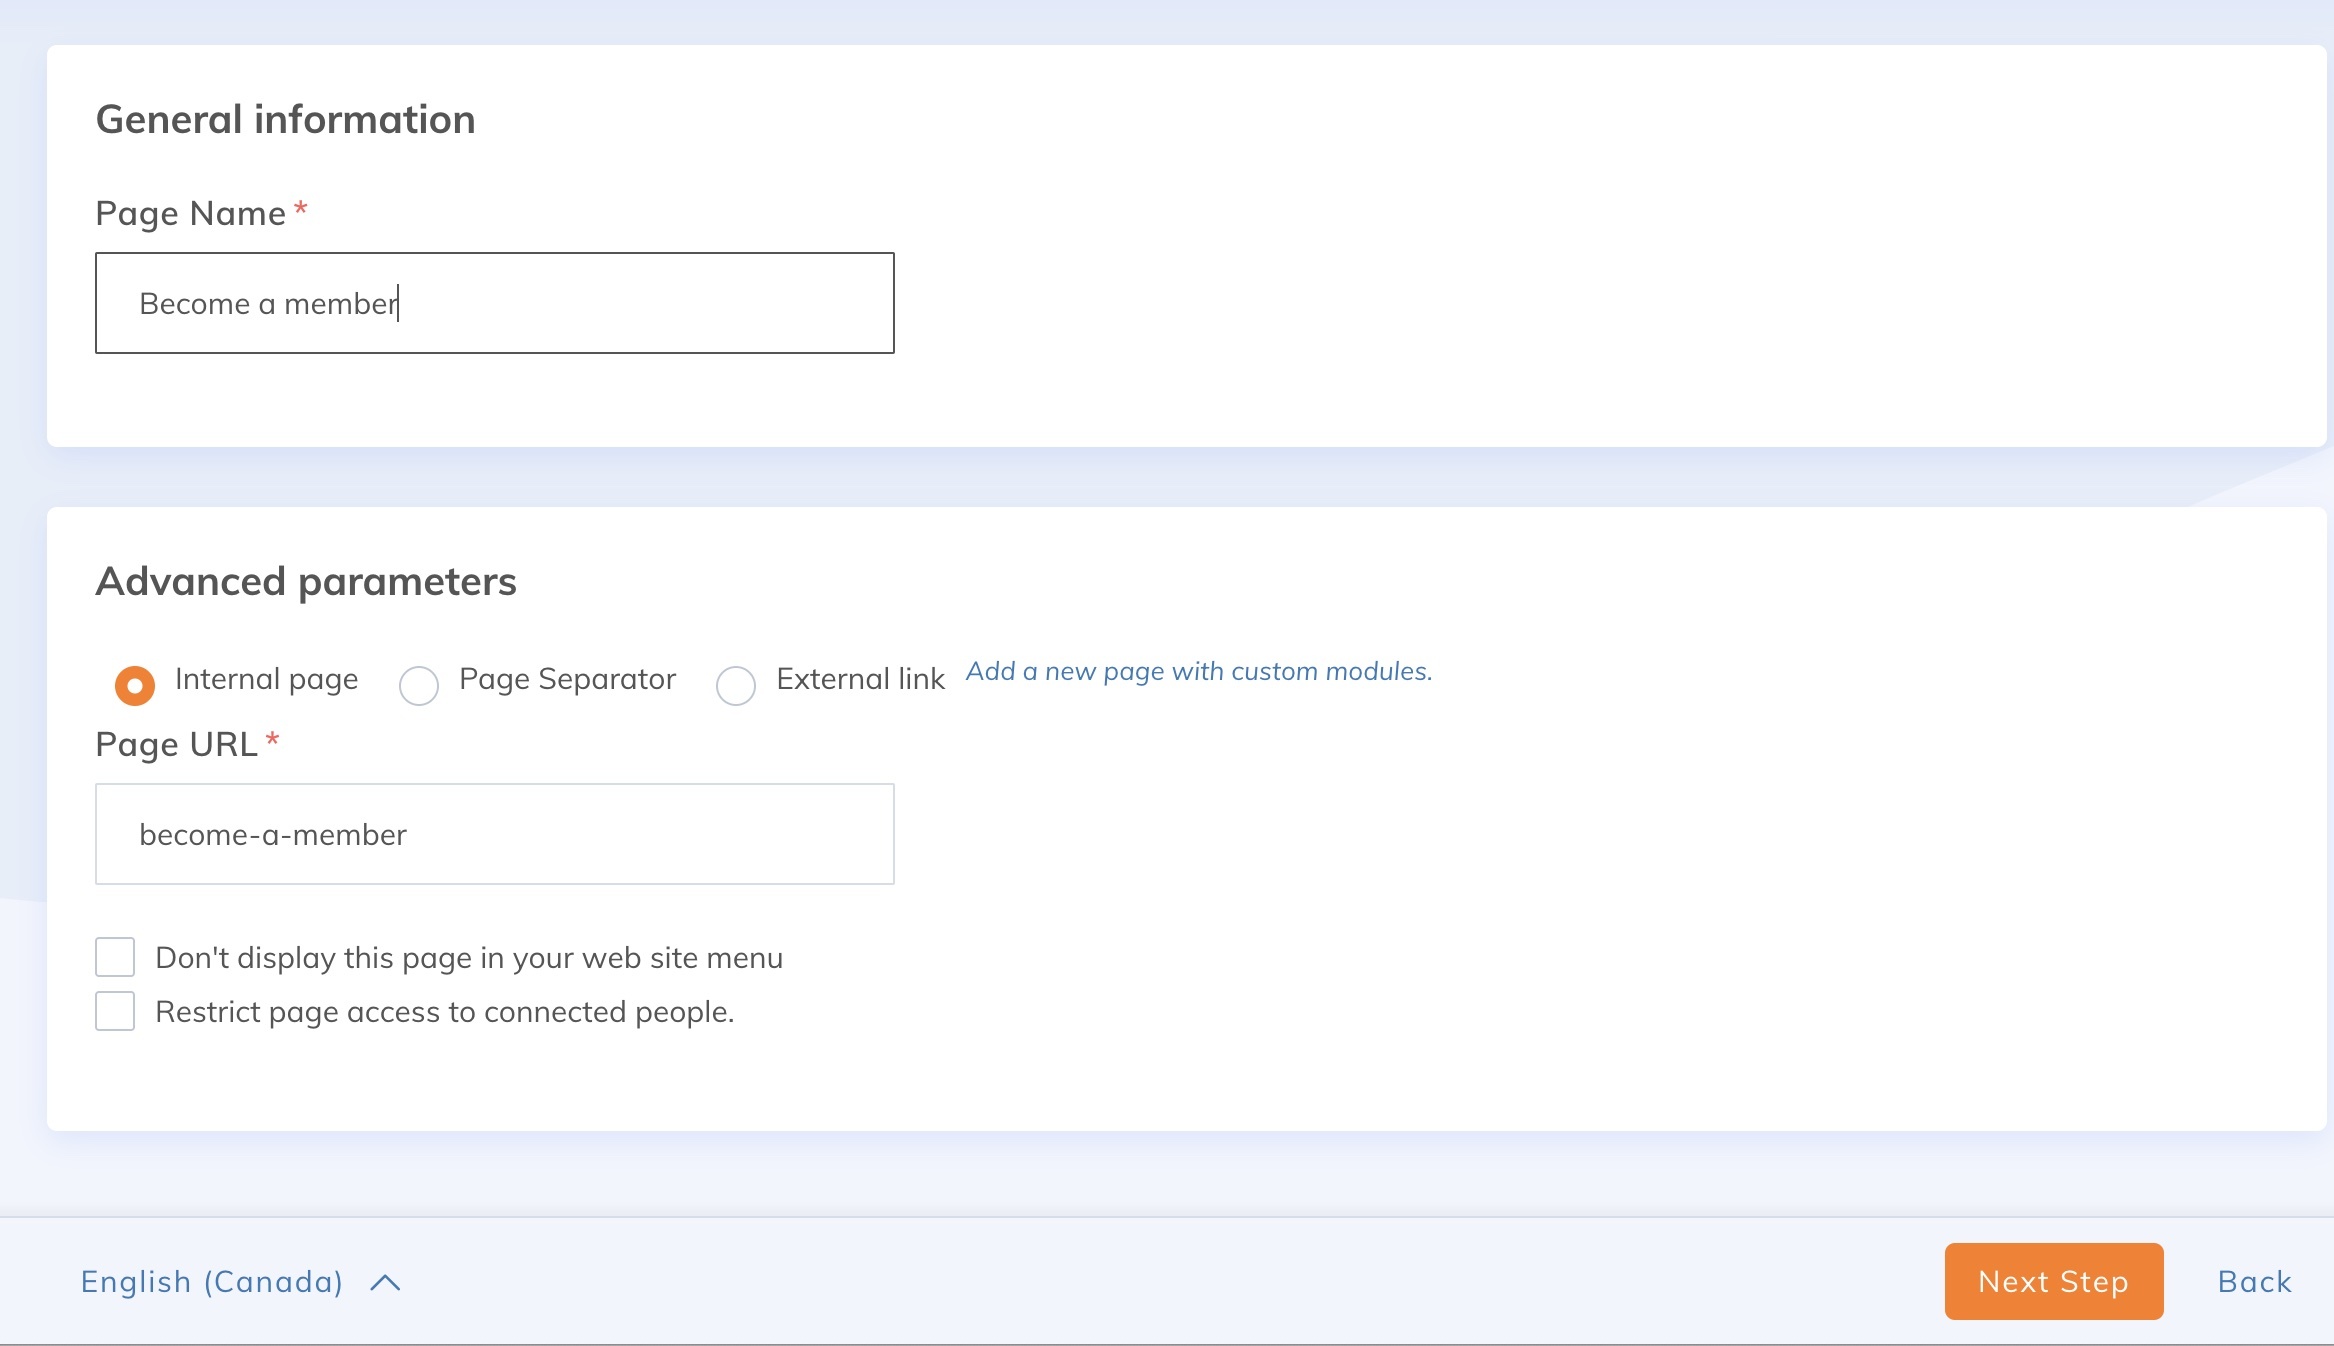
In the bottom right-hand corner, click on Add a page. Here you can enter the URL of the page and give it a name, e.g. "Members' Area" or "Members".
This will enable you to customize your membership form, add your different types of membership and set a price for them. For more information on creating your membership campaign, please refer to this article: creating a membership campaign.
Once the page has been set up, click on Next Step.
The page is now visible on your site, but when clicked on, it appears empty. The reason is simple: you now need to include a membership campaign.
Step 2 - Add a membership campaign to your membership page
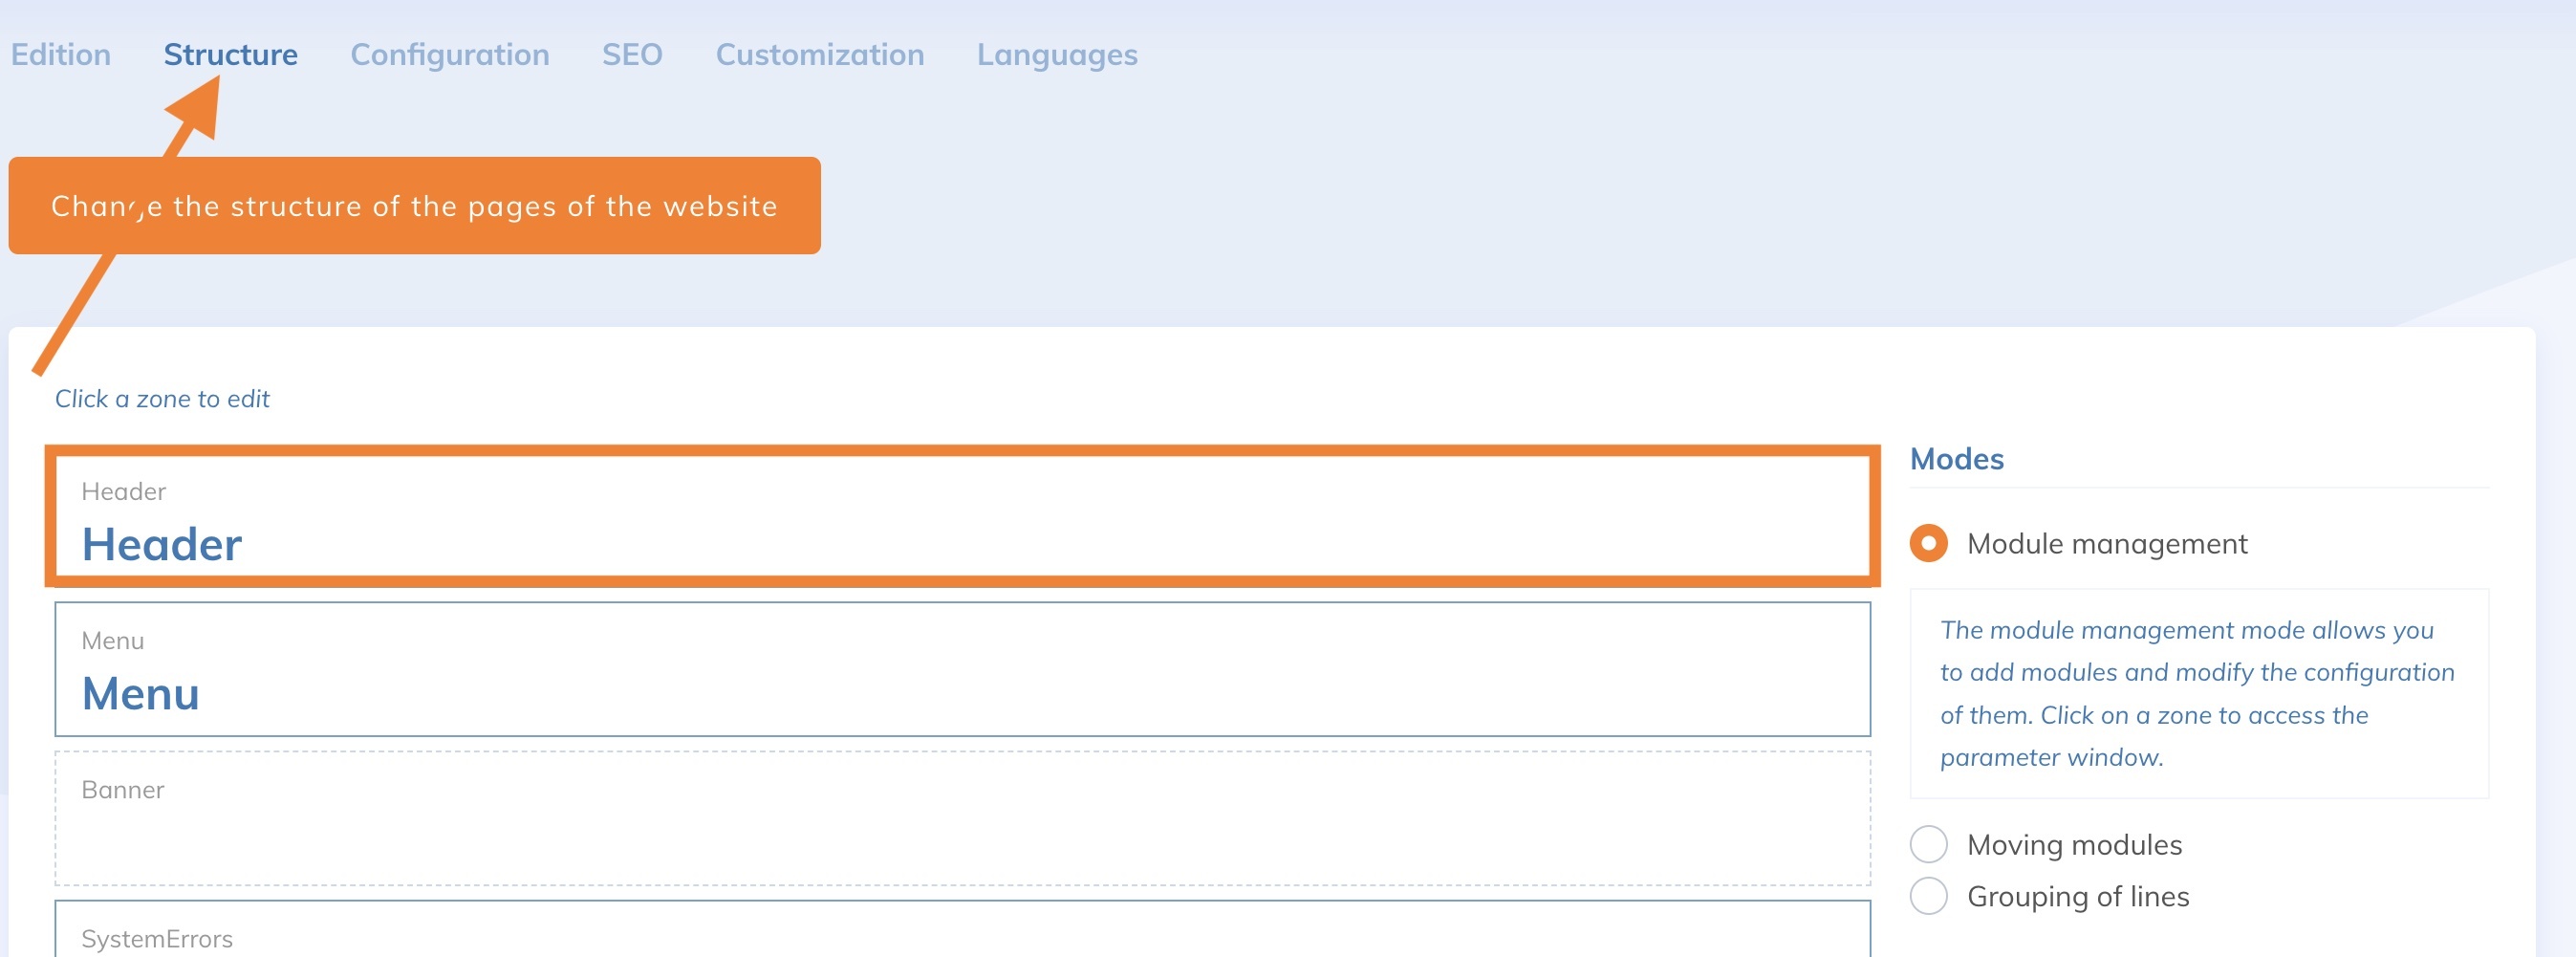
To add your membership campaign to this page, click on the page you've just created and select Structure. Then select the area of the page where you wish to add your membership campaign (we recommend you use the MainArea, i.e. the center, to add your membership campaign).
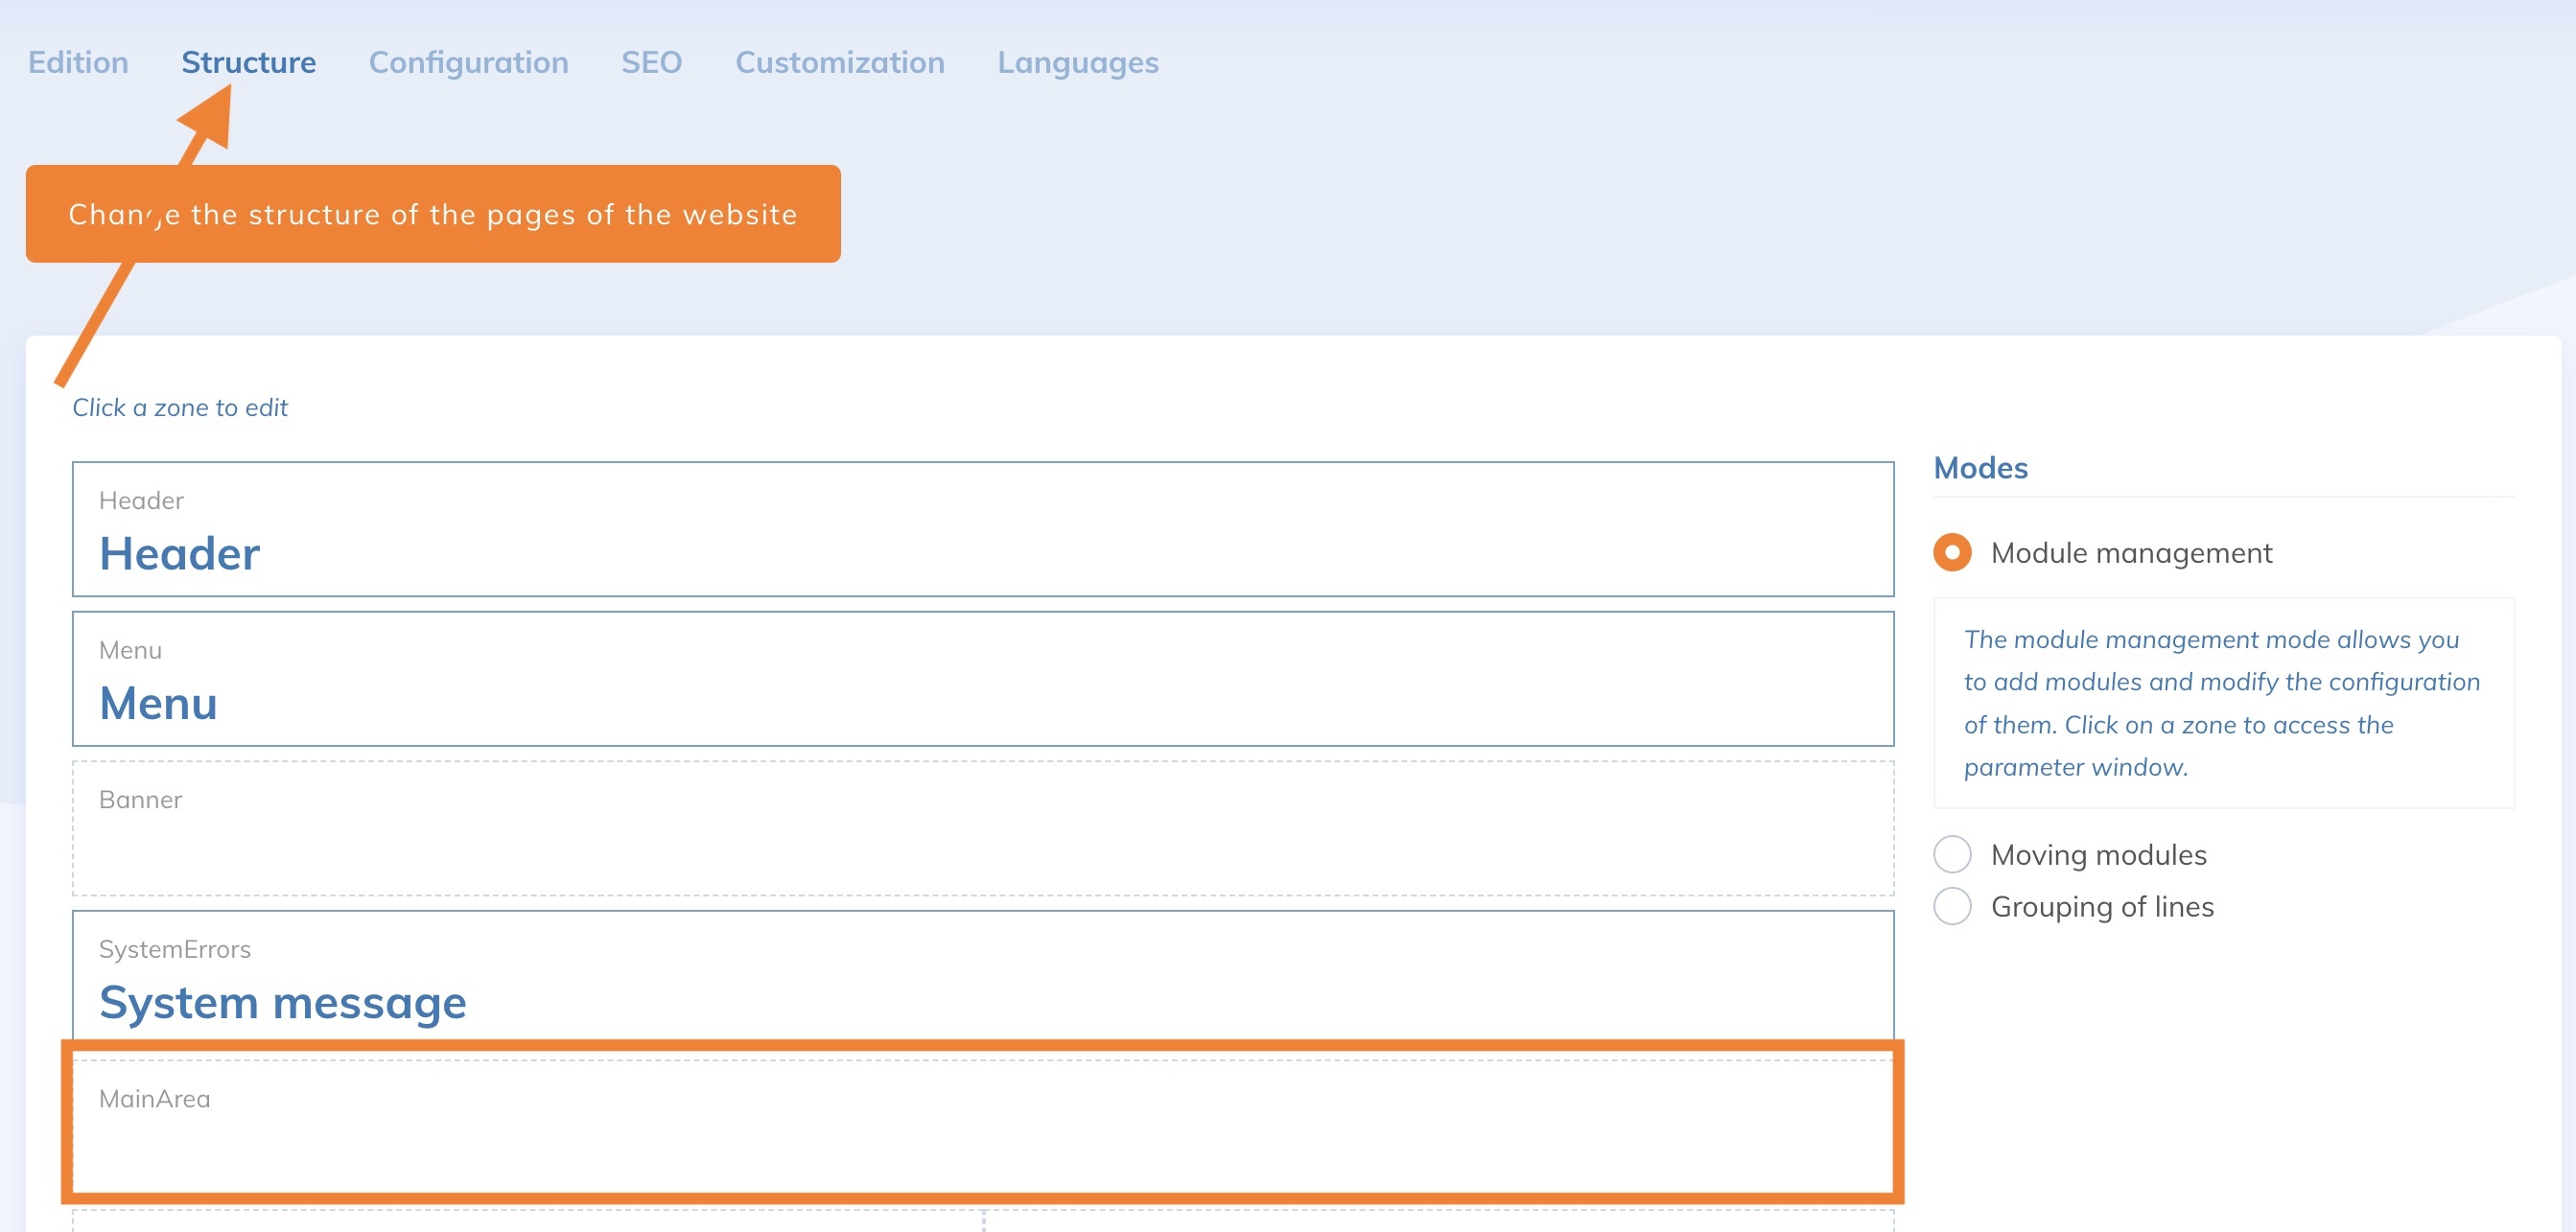
Once you've chosen a zone, a page appears, where you can type your content.
In the Feature field, select Members. Then, in the Zone module field, select Member Section.
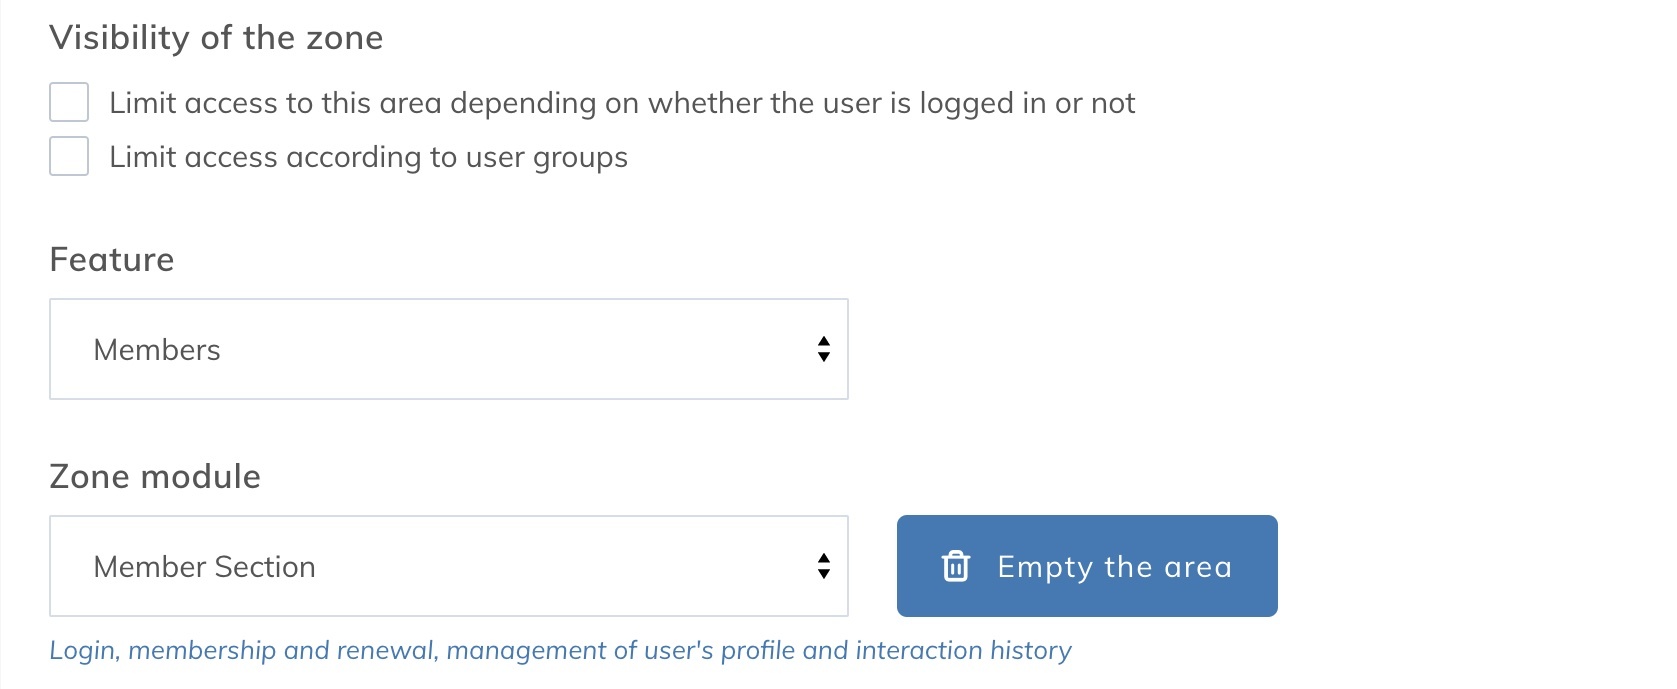
Then click on Save and close. Your membership campaign will now appear on your website.
Warning: Don't put 2 members area modules on the same page, and don't set a condition that this one is reserved for members (Yapla takes care of access).
Step 3 - Add call-to-action buttons to your site header
In your site's header, we strongly advise you to create call-to-action buttons with, for example, a Login button, or a Renew my membership button. This makes it easier for your visitors to find what they're looking for, and puts the actions they can take at their fingertips.
To set up the login, go to the Website feature and select the Pages tile. Then click on your Website's home page. In the Structure tab, click on Header.
A page appears, where you can set the action buttons. Check the Connection section, for example, then tick the items you want to appear in your header.
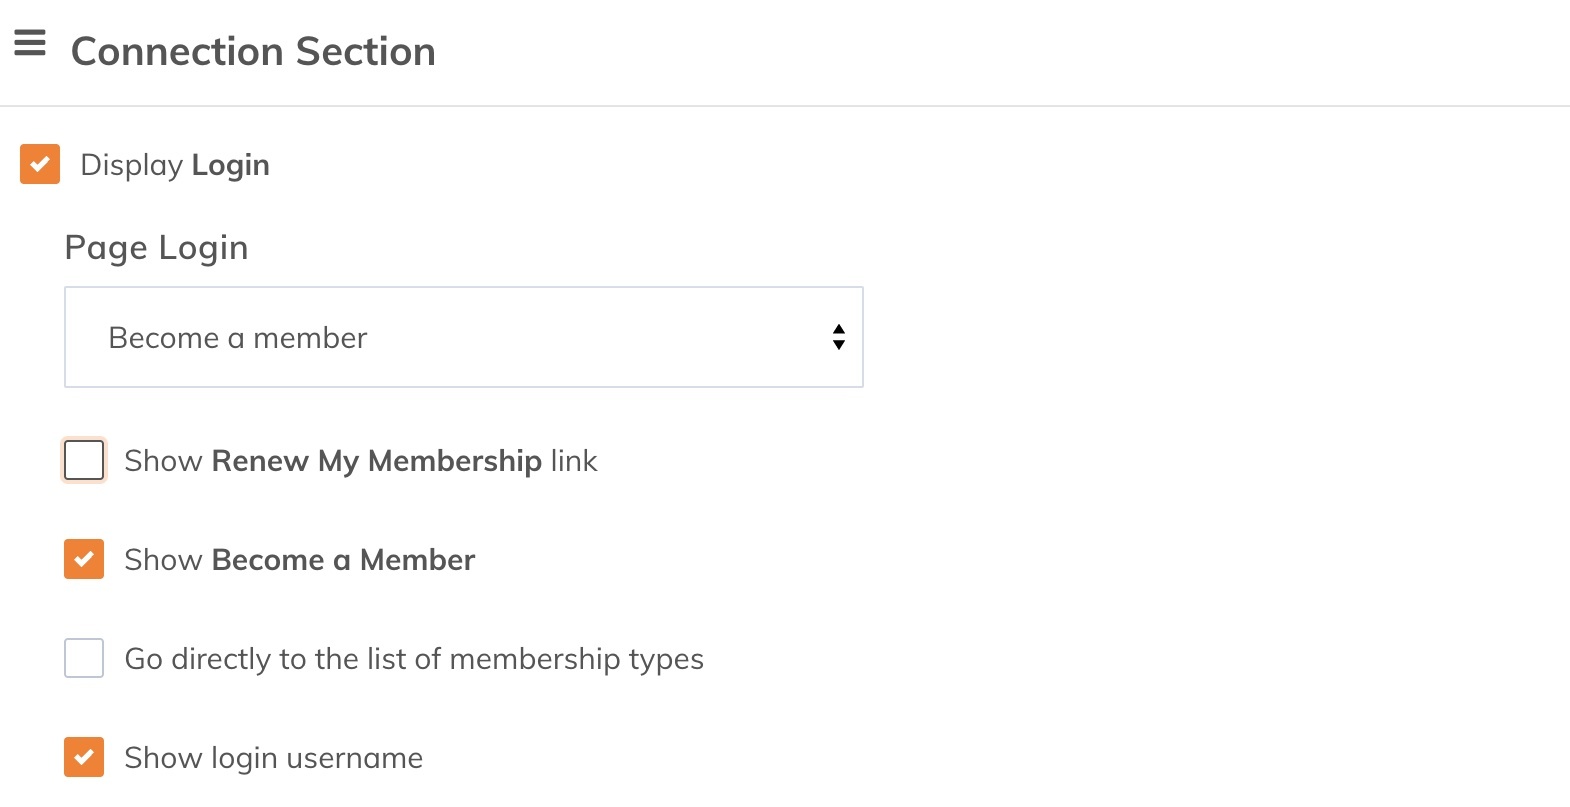
In the Page Login field, select Become a member.
Configured in this way, call-to-action buttons will appear in the header of your site.
Conclusion - Contact our team for technical support!
Our team is here to help. If you need help setting up your membership page, please contact us.