
A web page (single page) is created automatically for each event. Participants register and pay online on this page. Its address is your event's registration link: the link to share, sometimes called the payment link. This article explains where to find it, how to check that your event is ready to accept online payments, and how to share it.
In this article
- Find the registration link
- Check that your event is ready to accept online payments
- Share your event
- Frequently asked questions
Find the registration link
Under Events > Events, open your event, click the Web page tile, then the Sharing tab.


In the Promote your event section, click Copy to copy the link. Click View page to open the page as your participants will see it.
The registration link is different from the Send a payment link feature, which is used to collect payment for an invoice already issued with the Balance due status. To let new participants register and pay, share your event's registration link.
Check that your event is ready to accept online payments
Before sharing the link, check the following:
- The event is published: under the event name, the switch shows Published.
- Online registration is open: in the Settings tile, Process tab, the Open online registration to participants box is checked.
- A registration period is active: in the Prices tile, Registration period tab, at least one period covers today's date and shows Yes in the Active column. See Create and manage registration periods for an event.
- A paid price is offered: by default, an event is free. In the Prices tile, add at least one active price with an amount.
- Credit card is offered on the website: under Payments > Settings > Payment methods, the Website column is checked for the credit card. See Configure online payment methods.
- The event's payment methods include credit card: if the Specify the payment methods accepted for this event box is checked (Advanced functions tile, Payment methods tab), the credit card is one of the checked methods. See Customize Payment Methods by Application.
- Your electronic wallet is authenticated: if authentication is not completed within the required time, online payments fail. See Guide | Authenticate your Yapla Wallet.
Then open the link in a private browsing window and go through the registration process up to the payment step.
Share your event
The Sharing tab offers three ways to share the page:
- Promote your event: copy the link to add it to an email, a newsletter, a button on your website or any other communication.
- Share your event on social media: click the icon of the network you want to create a post that includes your event, then write your message.
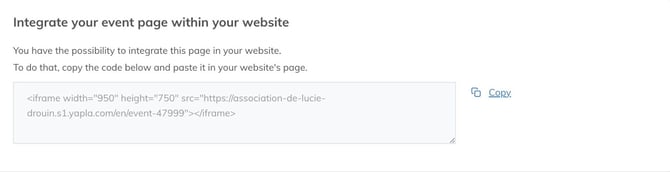
- Integrate your event page within your website: copy the code provided and paste it into an HTML area of your external website.

Share the event from your organization's social media accounts, not from your personal accounts.
To customize the page and learn more about sharing options, see Using Yapla single pages (monopages). To display your events on a Yapla website, see Events Section: display your events and registrations.
Frequently asked questions
Why doesn't the registration button appear on my event page?
The registration button appears when online registration is open and at least one price has an active registration period. Check:
- the Open online registration to participants box (Settings tile, Process tab). Unchecked, it lets you promote an event before registration opens;
- the dates of the registration periods (Prices tile, Registration period tab). A future or ended period does not show the button.
Why can't a participant register anymore?
If the Limit the number of available spots option is checked (Process tab), registration closes once that number is reached. If the Registration limited to holders of an invitation only option is checked, the participant must enter the invitation's access code. See Set up a Registration Process and Multi-Registrations.
Online payment shows the "Code 1" error. What should I do?
Complete the authentication of your electronic wallet. See Clarification regarding error Code 1 during payment.